Patchwork in the interior (80 photos): how to assemble a puzzle from multi-colored patches? How to sew an equilateral triangle. Patchwork master class How to sew a patchwork quilt
TOTAL
This topic relates to patchwork for beginners who are mastering patterns and patterns for working in the patchwork technique. You can sew a lot of products from equilateral triangles - blankets, pillowcases, breakfast napkins, cosmetic bags and handbags.
First, the triangles you want to sew are lined up. It is highly recommended to align the triangles. If you line up all the tops straight, and also sew the triangles together in rows, you will be much less likely to have your stripes warp after washing.

Patchwork for beginners patterns patterns of equilateral triangles
Take two triangles that touch at the bases and sew them together.

Unfold the stitched pieces and place them back into the template. Then sew the adjacent triangle with the ones already sewn next to it.

Continue sewing your triangle pieces together until you have two strips. Check that the corners are square and there is seam allowance.

Once you have sewn all the prepared pieces together, your work should look like this.

Now it's time to carefully press the seams on the wrong side. The best way is to steam them with an iron.

You will enjoy ironing with a hot iron with lots of steam. To prevent the edges from warping during this process, you can press the open seams with your finger, and then simply hover the iron over the seam, this is very convenient. The seams usually fold flat and don't require much effort.

Now it's time to sew your rows together. It is very important to align the two strips seam into seam. Secure them with sewing pins and sew them together. Important: seam allowances must always be the same. This is a guarantee that your triangles will fit together perfectly.

They turned the work over and steamed it.

And bam – smooth and beautiful equilateral triangles. Beauty!

We hope that this master class will be an assistant in the patchwork technique for beginners when drawing up a pattern diagram. Have a creative mood!
Helped you today Adrianne
Patchwork is the art of sewing patches, the secrets of which are not so complicated, but the result is always impressive. If you look at photo catalogs of Western decorators and designers, you will see how patchwork products and crafts have found their place in the most modern interiors. And this is not news - in recent years, patchwork has been in the top of the most popular types of needlework. Patchwork is a pleasure and beauty that is accessible to everyone, and the crafts in this needlework are not inferior to many designer items.
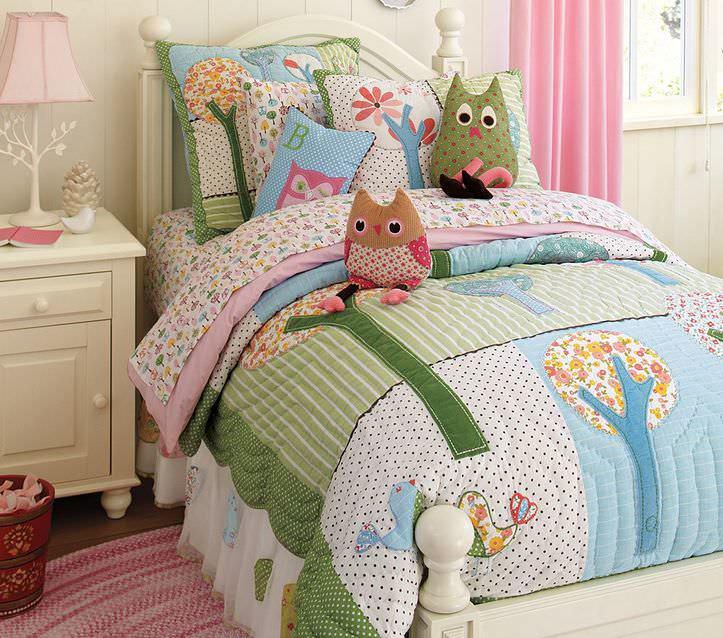
The collection of products in the patchwork style includes both very simple works (for example, potholders) and quite complex ones (such as patchwork bedspreads). There is a place for both in the house. In the pictures you can see how a bedroom is transformed if the bed in it is decorated with an elegant and cozy patchwork blanket. And for children, patchwork style decor can perfectly match their room.
What else modern can be done in patchwork style:
- Chair upholstery. One such chair will become a bright interior accent, and if you need to diversify a modest decor, consider not throwing away the old chair, but giving it a new patchwork upholstery. It can be a pattern of triangles, stripes, even a traditional checkerboard pattern. Or maybe a chaotic drawing, or a fantasy picture.
- Pillows. Interior pillows made of triangles especially emphasize home comfort. In the photo you can see a variety of design ideas for such pillows, and, inspired by the photo, make the same product.
- patchwork wall– special interior chic. The most fashionable interior design magazines are now decorated with such patchwork corners. An entire wall in the house is allocated for pasting with patchwork, but usually a separate patchwork fabric is sewn together - patchwork in this case becomes a bright, original wall decor.
- Patchwork rug. Well, what would we do without this classic! Such products are most suitable for a children's room. A patchwork rug would also be appropriate in the kitchen and hallway.
- Stylish potholders As a gift for creating a Russian-style kitchen interior, they will become your favorite helpers.

Well, you can start your handicraft journey using this technique with patchwork sewing from strips. Patchwork and patchwork sewing are mastered from this type, thanks to its simplicity.
Patchwork from strips
Patchwork, patchwork sewing from stripes is the most popular type of this technique. The essence of the work is to first sew the strips and then cut them in a certain way to obtain blocks for making various patchwork products. The patches will not be sewn in order, in lines, but along the edges. The trimmed parts at the edges are easy to sew.
Strip sewing has come back into fashion thanks to interest in ancient handcrafts. This type of handicraft is called quilting. Usually sewing starts from the center, where the first rectangle or square is fixed.
Well, other pieces of fabric are placed around it.

One of the most popular patterns in quilting is the log cabin. Otherwise it is called a well or an American square.
Features of working in the well pattern:
- Colored stripes gather around the hearth (well) in a spiral;
- This hearth is traditionally made of yellow or red fabric, symbolizing the fire in the hearth;
- The color of the stripes that play the role of logs is also symbolic, the light stripes are the illuminated parts of the hut, and the dark ones are the shadow ones;
- Typically, a block is divided diagonally into dark and light sides.
The pictures show that the well pattern is not complicated, but requires an accurate diagram.
The well is one of the basic patterns of traditional quilting.
Well technique: master class (video)
Patchwork mug program
It’s no news that patchwork has become such a popular type of needlework that you can learn it in childhood, moreover, in your own school or out-of-school educational institution. Many teachers strive to open such a circle at school and pass on the secrets of mastery to children. Teaching children, of course, requires a system. Its basis is the circle program, which outlines each lesson. More precisely, it determines the topics that each lesson will be devoted to.
The program might look like this:
- Lesson 1. Introductory lesson. Patchwork is pleasure and beauty. Crafts made by children.
- Lesson 2. Sewing from stripes. Photos of works. Sewing from stripes using potholders as an example.
- Lesson 3. Squares in patchwork. Quick crafts.
- Lesson 4. Circles in patchwork. Potholders and other crafts with circles.

The teacher, before starting to conduct circle work, must have some methodological reserve. These are at least examples of work, ready-made crafts (even simple potholders), photos and pictures of interesting works (or better yet, a whole collection of them), and the program itself, both on paper and in electronic form.
Russian patchwork
Russian patchwork is a separate type of patchwork that barely dates back a couple of centuries. People became interested in patchwork sewing with the import of chintz to Russia. Examples of photos with samples of works in the Russian style are replete with the Internet - the pictures indicate that our people have reached enormous heights in this art.
Traditionally, there are three types of Russian patchwork:
- Patchwork applique;
- Patchwork mosaic;
- Mixed technique.
The well-known term “Russian square” is a block in Russian patchwork sewing, the products based on which turn out incredibly beautiful and deep.


An ancient Russian patchwork technique known as lyapochika is also known.
Lyapochika are rugs and bedspreads that can still be seen among grandmothers in villages. Lyapochika, or rather, its essence lies in the fact that the shreds are attached in one place so that the shred flies away. Many shreds receive a kind of pile.
Lyapochika in a modern version is made on a sewing machine. You can make a rug from leftover cotton fabric or knitwear. Not to say that the results will be quick, but the work is worth it. Look at the photos of the craftsmen - the resulting products are original, incredibly cozy.
Patchwork exhibition “Seasons”
Patchwork for children
If the children themselves, even learning patchwork only at home, can find pictures, diagrams on the Internet and sew simple potholders, for example, parents can sew more complex things for their children.
Yes, you may have to watch more than one lesson, read the news (which is in fashion today in patchwork style). Inspiration can also be found on paper, that is, not from Internet sources, but from paper publications. An example of this is “Ashet Collection”.
“Ashet Collection” is a magazine with a huge variety of focus.
You will be interested in a magazine specifically on patchwork sewing. This is a real country of craftsmen, a colorful publication where everything is - instructions, master classes, patchwork news. If a lesson on the Internet is not for you, then you will definitely like the “Ashet Collection” for patchwork more. There you will learn what sewing is using squares, sewing from triangles, how to sew vests from knitwear in patchwork, what a checkerboard pattern is, etc.

“Ashet Collection” offers the most interesting options for products for children, and “Ashet” is also generous with gifts. Lost the habit of reading something on paper? This is the case when information on paper is more necessary and useful.
Regarding what to sew for children in patchwork:
- Bedspread made of colored triangles;
- Plaid in bright squares;
- Square plaid in Provencal style;
- Rug made of triangles;
- Sofa cushions in squares;
- Round rug made of triangles for a computer desk;
- Triangle vest.
Most often, mothers are interested in how to sew a patchwork quilt from squares or triangles. Here you need to be patient and not deviate from the instructions. But start with something easy - with the same potholder. And then it will be easier to master something voluminous.
Secrets of Russian patchwork masters (video master class)
Patchwork is an interesting technique that not only allows you to make unique things of great value, but with your own hands. These are also lessons of attentiveness, diligence, perseverance and self-control. So don't miss the opportunity to learn how to make beauty with your own hands, while acquiring enviable character traits.
Great work!
Patchwork (photo)


I came across some absolutely wonderful corner rugs made by Alla Snegovskaya. How bright and warm they are, they perfectly decorate the house: you can make rugs, bedspreads and even use them as elements in clothing. And most importantly, now I know where to put all these small scraps that remain in large quantities after sewing.
A woman with a beautiful surname Snegovskaya lives in the center of Moscow. Her small apartment, not far from the Kievsky railway station, has a special atmosphere. The many books, things and gizmos that create the comfort and style of this apartment convey the special atmosphere of an entire generation of the Soviet era, when nothing was thrown away and was carefully preserved. This is a reflection of the life of the Soviet intelligentsia. Most things quietly become antiques. 
Harmonious, as a single whole, in this apartment is its owner, Alla Yakovlevna Snegovskaya. Her name can be found in catalogs of Russian patchwork festivals. Her rugs have captivated craftsmen from all over the world. We will probably not be mistaken if we say that no one in the world does similar work. 
Do you know the northern ones? round rugs? Many grandmothers enthusiastically made and are making them. Alla Yakovlevna, having once seen a picture of such a rug in a magazine, understanding the technology and principle, sat down and created her miracle. And he continues to create and create round miracles. Her children and grandchildren did not immediately admit that their closest relative could go down in the history of Russian patchwork as a unique master. She doesn't draw or sketch. “I sew as I sing,” she says, “I can never predict in advance what will happen. I’ve wanted to draw all my life, but I don’t have time.” Her sense of color is so harmonious that you can say that instead of paints she uses scraps of rags. Everything is done by hand, stitch by stitch, painstakingly and slowly... sometimes it takes more than a month to make one round piece. The word “round” somehow simplifies the meaning of the final result of her work, but no other word has been chosen, and there is absolutely no way to translate it into English. 
And here I found a video on how to make such fabulous rugs:
Making a rug "Round"
Among patchwork techniques, traditional patchwork rugs are of great interest. Sewn from small dense corners, they are distinguished by their richness of color and texture. Rugs are varied in color, pattern, shape, and size. The unique handwriting of the author is visible in each product. Various types of round corner rugs are common in the Leningrad, Vologda, Novgorod, and Arkhangelsk regions. Arkhangelsk round rugs are considered a unique phenomenon in folk art.  From the “corners” you can lay out all kinds of colored ornaments in the shape of a circle, square and make decorative pillows, napkins, rugs, panels or paintings from them - and all these products turn out to be voluminous thanks to ingenious techniques for working with fabric corners.
The peculiarity of this technique is that the shreds are not sewn together, but, having made a separate corner from each, they are sewn in rows onto the base.
You can use any material for the corners, but it is especially easy to work with cotton fabric (chintz, satin), as it irons well.
1. Cut the base from thick fabric in the form of a square, find the center.


6. Lay out the corners of the first row with the tops facing the center (counterclockwise), pin them with pins and stitch on a sewing machine, perform the remaining rows in the same way.
First build option. Fold the fabric in half for the base. Iron it.
Fold across the ironed line. You have formed a central point with center lines. Mark them with a pencil. For a complex geometric pattern, there may be more centerlines. Place a small piece of padding polyester in the center of the base and cover it with a beautiful piece of 6-10 cm in diameter. Pin it with a pin. Begin sequentially, one after the other, sewing the teeth around the center. The teeth are attached in a circle in rows. The teeth of each subsequent row should be slightly offset from the previous ones. The seam of the second row covers the tails of the triangles of the first row and runs through the middle of the triangles of the second row, etc. The number of triangles in each row increases. Having filled the entire surface of the future rug, draw a regular circle along the edge, cut the base and tails of the teeth along this line and cover the cut with a wide bias tape. 
Second assembly option. The teeth of the mat can be directed from the center to the edge. This rug is sewn differently. Iron the center lines, they will help to lay out the triangles in some kind of pattern. The first row of teeth is sewn along the entire perimeter of the circle of base fabric. In this case, the cloves are positioned with their tips towards the center of the circle. Fold this first row over to the other side of the warp and iron the fold of the fabric. At the same time, the cloves will unfold in the direction from the center. Sew the next row on top of the cuts from the previous one. Each row moves relative to the previous one and becomes smaller as it approaches the center. In each subsequent row the number of triangles decreases. 
When it becomes impossible to sew on parts, fill the center with a piece of padding polyester and stitch a suitable size circle of beautiful fabric on top of it. 
7. Subsequent rows are sewn row by row with threads matched to the tone of the patches. Iron each stitched row well with an iron.
8. Having finished the last row, straighten the edge of the circle with scissors.
9. Fold the patchwork top with the lining - the back with the wrong side inward, pin it with pins and sweep through all the layers along the very edge of the product.
10. Cut a bias strip 3.5 cm wide at an angle of 45 degrees to the grain thread. The length is equal to the circumference of the circle + 2 cm per seam.
11. Baste a bias strip along the entire circumference of the rug, aligning the cuts and stitch simultaneously with the lining on the machine 0.7 cm from the edge. 
12. Fold the open edge of the strip by 0.7 cm, baste along the fold and sew on the front side of the product into the “stitching seam groove”, that is, placing the stitch in the line of the first connecting seam. 
13. You can hem the bias strip from the wrong side manually with blind stitches, using threads that match the bias strip.
And this is what we should strive for: 


Here are the masterpieces you can create using seemingly the most ordinary things. But I don’t say goodbye to you at this point, come back again, and I sincerely wish you creative success!
Another simple block, and not even a block, but the configuration of a basic element, on which, without any other tricks, an infinite number of very different patchwork products, unlike each other, are built.
By the way, why else did I want to tell you about it - our official Olympic symbol is also a “thousand pyramids”.
By the way, on this occasion, the blog “Quiltspirations” authoritatively states that one of the first patchwork quilts in Russia was sewn by Tsarina Catherine for her husband Peter the Great. The logic, as I understand it, is this: Catherine was of German-Estonian blood, that is, the Russians did not have any patchwork sewing before the Germans... They are funny, after all!
Here are some wonderful products that can be made by simply cutting several pieces of fabric into isosceles triangles and sewing them together:


1. Select fabrics for the quilt. Mary decided to sew a product in which variegated triangles would alternate with plain ones. If you have in mind only monochromatic or only variegated details, divide them into two “piles” by contrast: for example, in one pile there are red, yellow and orange tones, in the other there are blue, cyan, and green.

2. Cutting fabrics…. no, not yet into triangles, but into stripes. The width of the strip should be equal to the height of the base part - the triangle.


3. The next stage is to fold the strips in pairs and sew along the entire length. We make two seams, it looks like a “pipe”, but quite narrow.


4. Here's an interesting point. We take a ruler-triangle at 60 degrees, apply it to the “pipe” (note that the tip of the ruler extends beyond the “pipe” and cut triangles, either with the base up or with the base down.

5. We get paired parts, unpick the seam at the top -

And we have blocks ready for two rows at once!

6. For the edge rows, we cut out single triangles - to do this, leave a strip of each flap, or, alternatively, make all the edge parts the same color, for example like this:

7.Sewing blocks together is very simple:

We take two parts, put them face to face and sew them together - we get the beginning of the row.

Gradually we make rows of parts
And we put them together

Make sure that the seams on your base pieces face the same direction; when assembling, lay out the seams as shown in the illustration, one to the left, the other to the right.
Patchwork- a type of handicraft that was formed due to the need to use something shreds remaining after cutting and sewing. And if in the old days these were primitive crafts for household use, today the technique of patchwork or patchwork has become a real art that even people can practice unfamiliar with sewing- creating a patchwork quilt or craft is very simple.
Patchwork equipment
Patchwork has become so widespread that many handicraft stores can be seen and purchased special set for patchwork sewing, including all necessary tools. But for those who are not going to do such handicrafts all the time and do not want to spend money on purchasing such a set, tools that can find houses absolutely free.
 Tools
Tools To create a patchwork masterpiece you will need:
- scissors or roller cutter
- needles
- threads
- pencil
- pins
- centimeter
- paper
- sewing machine (if there is a lot of sewing to do)
 Textile
 Besides, materials needed, which can also be purchased in a store or searched for at home. To create a beautiful multi-colored craft you will need motley pieces fabrics and lining - all this can be cut from unusable old clothes, bed linen, scarves, curtains and others unused in everyday life of things.
Quilt sewing techniques for beginners. Easy ways to sew a DIY quilt
There is a large number various styles and techniques creating a patchwork quilt. They differ from each other not only specifics of creation, but also the superiority of a certain textures and colors. Let's look at the simplest patchwork techniques for beginner craftswomen.
 Patchwork
 Traditional technique
English or traditional patchwork is considered the simplest and most suitable for beginners. His peculiarity is that scraps are used for sewing various sizes and shapes, which are simply stitched together in any order or forming a specific ornament.
 Blanket in traditional technique
  Product made from scraps of various sizes
  Pillows in English technology
  Traditional technique with ornament
 Using this technique you can sew various household appliances, such as potholders, napkins, blankets and blankets. The simplicity of English patchwork also lies in the fact that, as a rule, only the front side is sewn from the scraps, and backside is a single piece of fabric.
 Blanket with a pattern
 Square or checkerboard technique
 Square technique
 This technique involves sewing a blanket from scraps sewn together squares of the same size. Making such a blanket will not be difficult, but hand sewing the parts will require a lot of time, so to save effort it is better to use sewing machine.
 Blanket in chess technique
  Small squares
  Chess technique using squares of arbitrary sizes
 Watercolor technique
Blanket sewn from squares, as in the previous case, but a feature of the technique is a special approach to the selection color range and the combination of shades with each other. As a rule, fabric scraps are selected from light shades to darker ones, from cold colors to hot ones, etc. Attention is also paid to the texture of the fabric - the flaps should be in harmony with each other.
 "Watercolor"
 “Strip to stripe” technique
To create a product using this technique, fabrics of various colors and textures cut into strips various lengths and widths. Combining them with each other in various patterns, they sew intricate pillowcases and blankets, tablecloths and interior items. Products may also contain any geometric figures(most often it is a square in the center), but stripes dominate, which are the basis of the composition.
 Stripes
  Strip technique with creating a square pattern
 Technique "Triangles"
A blanket made from various triangular flaps, looks colorful and decorative due to the fact that with the help of these geometric shapes you can create various drawings and patterns. The technique is quite simple and suitable for beginners, and the principle of creating a blanket is to sew the sides together isosceles triangles.
 Small triangles
  Large hand stitches
  Intricate pattern
 Crazy patchwork
The technique for making such a blanket is chaotic connection scraps of various sizes, textures and colors. Connecting with each other, they do not form any pattern or design, but are placed in in any order. The highlight of such a blanket will be its diversity and unusualness.
 Crazy patchwork
  Similarity of drawing in this technique
  Blanket made from scraps using the crazy technique
 Knitted patchwork
Unlike previous techniques, this patchwork is created without stitching flaps. Firstly, not pieces of fabric are used, but knitted scraps different colors, but made from the same type of thread. Secondly, these scraps contact, rather than stitched, which allows you to create an original knitted blanket in the patchwork style.
 Colorful squares
  Crochet patchwork
  Blanket in knitted patchwork style
 Knitted patchwork is not suitable for all needlewomen, since to create such a blanket you need to be familiar with knitting firsthand both knitting and crocheting.
Japanese patchwork
The technique involves sewing a product from scraps of various geometric shapes. They can be connected to each other chaotically or in a specific application, and the colors must certainly be natural shades.
 Japanese technology
 How to sew a patchwork quilt?
Whatever blanket sewing technique you choose, you need to prepare for what lies ahead painstaking work, but its result will more than repay all the efforts spent. Before starting work, you need to think about what tools will be necessary and what fabrics, if necessary, purchase the missing material.
 Tools and materials
 If you don’t want to sew by hand, you can use sewing machine- the stitches will be more accurate and the seam line will be straighter. Also used in many techniques iron for ironing seams, and instead of scissors they use roller knife, which will make the work much easier.
 Stencils for patchwork
 Patchwork sewing of a double-sided quilt
Beautiful and unusual blanket using crazy patchwork technique can be created even by a person who is hearing about patchwork for the first time. Ease of manufacture lies in the absence of any ornament and design- nevertheless, the blanket will turn out to be very unusual and will delight the eye with its bright colors.
 Finished blanket
 First you need to prepare tools and materials that will be needed in the process of creating a blanket:
- 6 pieces of fabric (110*140 cm each), the same amount will be needed for the second side of the blanket
- padding polyester (170*220 cm)
- threads, needles, pins
- sewing machine
- roller knife or scissors
- lining
- ruler
- chalk or pencil
The fabric for the blanket must be suitable by texture and color scheme, the shreds should be in good harmony with each other. Before you start sewing the fabric is better wash and iron so that later it does not shrink in the finished product.
The work begins with patterning and cutting the fabric. To create a blanket, you need to cut out one piece from each cut. 6 squares with parameters 45x45 cm. We lay out the resulting cuts balls, alternating all available squares in the same sequence.
 Squares
 Using a roller knife and a ruler, arbitrarily cut all the squares along one line. If you use scissors, you must measure out ruler cutting line and mark it with chalk or pencil, and then cut it out.
 Pattern
 One of the cut fragments move it underneath stack in such a way that there are two fragments on top: the first and second color.
 Squares need to be cut
 After that, by squares sew the fragments using a sewing machine. Iron the resulting squares and fold in the order in which the squares were after cutting.
 Sew the fragments
  Another cut and repositioning
  Squares from fragments
  All fabric types must appear in the square
 One of the cut fragments is again placed under the bottom, after which, as the first time, it is repeated stitching and ironing.
 Repeating actions
 Cutting, rearranging and further actions are repeated 7-10 times in order to maximize the colors in the squares mixed up. To make this happen faster, you can rearrange the fragments two or three squares at once below, then these steps will have to be repeated less times.
 Trimming edges
 After from single-color squares Multi-colored patchwork cuts will be made. You are faced with the task trim them so that all their sides are equal 32 cm. Then you can proceed directly to “assembling” the blanket, or rather, its tailoring.
Using a typewriter connect the squares into one canvas, sewing them together and ironing the seams. Create in exactly the same sequence second side blankets, after which you can sew the product into a single whole. To do this sequentially stitched layer by layer the first layer, padding polyester and the second layer.
Patchwork: baby blanket for girls
In the patchwork style you can create a cute blanket for girls, choosing pieces of fabric in pink shades and padding polyester as the material. Perfect for this any technique patchwork, but the simplest technique, which even beginners can handle perfectly, will be the technique chess patchwork.
 Pink patchwork quilt
 For an interesting checkerboard pattern, fabrics are enough two shades, but by using more shades of pink, your product will be more advantageous. Cutting out the squares same size and by connecting them together, placing the colors in a checkerboard pattern, you can quickly and effortlessly sew an original blanket for a child. To ensure that the seams do not bulge, it is necessary iron them carefully.
 Large square blanket
 The manufactured part of the blanket must be attach to padding polyester, and on the reverse side it is better to use solid cut pink fabric of the required size: the wrong side will not harm the product at all, but, on the contrary, will give it a decorative effect. It will also contribute decorative finishing the front side, which can be decorated with homemade flowers or bows.
 Chess technique
 Patchwork: a blanket for a boy
To create a warm and beautiful blanket for a boy, it is preferable to choose fabrics blue and light blue shades, but they can also be multi-colored, variegated and have different patterns. For a patchwork style product you will need:
- several types of fabric that match each other in texture to create squares
- piece of fabric for the wrong side of the blanket
- padding polyester
- sewing supplies (needles, threads, sewing machine)
- ruler
- scissors
 Baby blanket
 Sequence of work:
- Before you start creating a baby blanket, you need fabric wash and iron(this way the finished blanket will not shrink after washing)
2. After this you can measure and cut squares of different sizes 27x27 cm. Total such squares need to be created 24
3. Lay out the wrong side of the fabric on a flat surface, which should be a few centimeters larger than the front side and attach padding polyester to it
5. Place on the resulting workpiece along the edge, in a line squares and pin them to the workpiece
6. Sew the squares to the workpiece along the lower and lateral lines squares, without touching their upper side, which again pin with pins
7. Along the lines, a little tucking the squares to hide their edges, sew all the squares to the workpiece
8. The protruding edges of the blanket can be trimmed and attach on the sides there are small strips of fabric that will hide errors and irregularities