Knitted hat owl knitting pattern for children. Hat with owls (schemes added)
I know that some girls from childhood begin to get involved in applied arts and discover the amazing and wonderful world of knitting. And it's just wonderful! 🙂
They will carry their love for this meditative type of creativity through their whole lives, creating beautiful and interesting things for themselves and their loved ones.
And today, I want to offer young needlewomen, and possibly their mothers, to knit a fashionable, creative and very interesting OWL hat.
She knits very simply, in one sitting, so to speak. Only purl and front loops are used.
I bring to your attention a master class with photographs, a description and a diagram of the OWL pattern using the example of one of the hats I ordered.
Hat size: for a head circumference of 51 cm and above. Width - 21 cm, height - 19 cm. It stretches VERY well.
You will need:
- 1 skein of thread (I took yarn made in Turkey ALIZE LANAGOLD, Classik, 49% wool, 51% acrylic, 100 g - 240 m),
- knitting needles 3.5 cm,
- auxiliary needle for knitting braids,
- hat hook,
- scissors,
- 2 buttons or beads for the eyes.
1. Cast on 88 sts on the needles: 86 sts + 2 selvedges.
We agree that we will always remove the edge loop at the beginning of the row, and knit it with a purl loop at the end of the row.
2. Knit stockinette stitch 8 rows.
Front surface: in the front rows - faces. loops, in purl - out.

Knitting a pattern "rice" or a tangle consists in alternating front and back loops in each row.
Pattern "RIS": diagram


The diagram below shows the average 20 loops. Of these, two extreme always in the front rows must be knitted with the wrong side, in the wrong rows - with the front ones. Those. they are knitted with the wrong side.
The report of the "OWL" pattern is 16 medium loops.
Pattern "OWL": scheme

Important additions to knitting the "OWL" pattern
- Purl rows knit in pattern, except for the rows described below.
- In the 2nd row of the report (it turns out to be purl), knit like this: 2 purl, 12 loops with a “rice” pattern, 2 purl.
- In the 14th row of the report (purl): 16 purl.
- In the 16th row of the report (purl-m): purl 16.
- In the 26th row of the report (purl-m): purl 4, facial 8, purl 4.
- In the 28th row of the report (out) knit as in the 26th row.

6. Turn the knitted fabric inside out and remove the first 22 loops on the auxiliary knitting needle. On the other needle, slip the next 44 stitches. There will be 22 stitches left on the third needle.

7. Fold the product as shown in the photo below, right side inward.

8. Connect the back and top seams in a way that suits you. Turn right side out, check seams for accuracy. Hide all the threads with a hook.

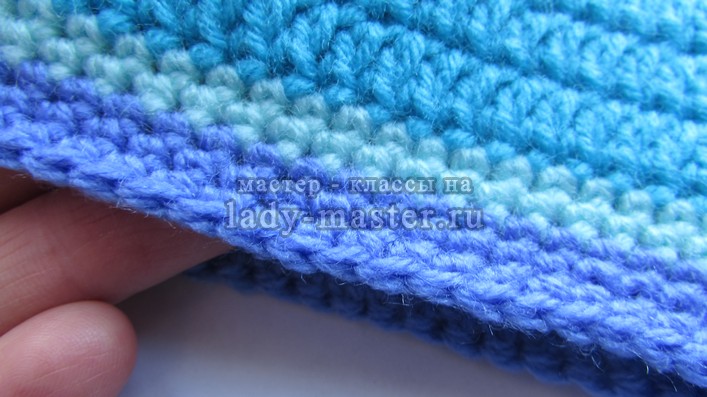
View from the inside

View from the face
9. Sew on the "eyes". Additionally, you can attach tassels of thread along the edges at the top or embroider a twig for an owl. 😉


I note that it took about 2/3 of a skein to make a hat. In the photo below - the rest of the yarn.

I peeped this wonderful idea on the Internet and am very grateful to the author for it. Unfortunately, the author has closed her videos for playback on third-party resources. Her YouTube channel is called "Knitting and crochet, Irina Zagorodnia channel".
Knit with pleasure! There will be questions - write in the comments. Good luck! 🙂


Knitting an owl pattern is very simple and even beginner craftswomen can cope with it. The whole secret of the pattern is in crossing the loops, with the help of an additional knitting needle, as when knitting a braid. You can decorate with this pattern both children's and women's clothes.


An owl pattern with knitting needles is perfect for knitting hats, mittens, mittens and even socks and bracelets. You can diversify the pattern with beads, buttons and contrasting colors. With a little imagination, you can create a whole look with this simple pattern.

pattern scheme owl1

Description of the owl pattern scheme
The report of the owl pattern, for the ornament, is 12 loops along with the background of the wrong side. For a single pattern placed on a hat, pocket or other product, the number of loops of the pattern = 8 + the required number of loops of the wrong side on both sides of the owl. There are only 16 loops in our scheme; 8 loops of embossed owl and 4 loops of the wrong side on both sides.
Knit a pattern according to the proposed scheme. On rows 7, 17 and 23, do crossing loops as follows:
Remove 2 front loops on the auxiliary knitting needle and leave it at work, knit the next 2 front loops, and after the loop from the auxiliary knitting needle. The next 2 front loops, again remove to an additional knitting needle and leave, now before work. Knit 2 front loops, and after the loop with an additional knitting needle. That's the whole secret of the pattern.
If you understand the principle of weaving loops for an owl pattern, it will not be difficult for you to change the pattern a little, making the owls larger or more embossed. In the ornament, you can simply reduce or increase the number of loops of the wrong side between the owls. As an example of changing the pattern, try knitting the owls according to the second option.
ALL SCHEMES ARE INCREASED, JUST CLICK ON THEM WITH THE MOUSE

Owl knitting 2
The second version of the owl pattern knitting needles is slightly different from the previous one, but the principle of knitting is the same - crossing the loops. The main difference is the embossed belly of an owl, it can be knitted using rice knitting or tangle.
Description of the scheme 2 patterns owl
For the sample pattern, 20 loops were taken without taking into account the edge ones, please note that both front and back rows are indicated in the diagram.
1st and 2nd rows: all loops are facial;
3rd row: purl 1, knit 18, purl 1;
4th, 18th, 19th, 20th, 21st, 22nd, 23rd, 24th rows knit according to the pattern;
5th row: 2 purl, 4 facial loops cross to the right (crossing the loops, as in the previous pattern); we knit the next 8 loops alternately 1 front, 1 purl (for a relief abdomen, later on these loops knit with a tangle pattern or rice knit , that is, shifting the pattern by 1 loop in each row or through a row); Cross 4 facial loops to the left, 2 purl;
6th, 8th, 10th, 12th, 14th, 16th rows: 2 facial loops (for the background of the wrong side), 2 wrong loops (sides of an owl); we knit the next 12 loops alternately 1 front, 1 purl (for the relief abdomen (pattern pattern); 2 purl loops (owl sides), 2 front (background);

7th, 9th, 11th, 13th, 15th rows: 2 purl loops (for the background), 2 facial loops (sides), knit the next 12 loops with a patchwork pattern; 2 facial (sides), 2 purl (background);
17th row: 2 purl loops, cross 8 loops to the right, knitting as follows: put 4 loops on the auxiliary knitting needle and leave at work, next. Knit 4 loops, then knit 4 loops from the auxiliary knitting needle; cross 8 loops to the left: put 4 loops on the auxiliary knitting needle and leave now before work, next. 4 loops knit facial, and after 4 loops from the auxiliary knitting needle, 2 purl;
25th row: 2 purl loops (background), cross 8 loops to the right, 8 loops to the left, 2 purl (background);
26th row: 2 facial, 4 purl, 8 facial, 4 purl, 2 facial loops;
27th row: 2 purl, 4 facial, 8 purl, 4 facial, 2 purl loops;
28th row: all loops are facial;
29th row: purl all loops;

owl pattern 2
By decreasing or increasing the number of loops of the report, you can slightly change the pattern itself, making it larger or wider. For example, the 3rd version of the pattern is very similar to the 2nd, but still different.


owl pattern 3
Description of the scheme 3 patterns owl
To knit a sample of pattern 3, cast on 24 loops on the knitting needles: 22 pattern loops + 2 edge loops (edge loops are not indicated in the pattern) and knit according to the proposed pattern and symbols.
Edge hinges- this is the 1st and last loop of the row. As a rule, the last loop in each row is knitted on the wrong side, and the 1st loop in each row is removed without knitting. At the same time, the loop is removed as if it were a front loop, that is, in such a way that working thread did not create a knot. Then, along the edge of the product, an even spikelet is obtained from elongated loops. Edge loops are also knitted in other ways, but in any case this does not affect the main pattern.

pattern pattern owl-3
1st row: all loops are facial;
2nd row: purl all loops;
3rd row: 1 out., 20 persons., 1 out.;
4th row: 1 person., 20 out., 1 person.;
5th row: 2 out., 6 loops to cross to the right (3 p. remove to additional knitting needle and leave FOR work, wire 3 persons, and after 3 persons from additional knitting needles), 6 loops with a tangled pattern (* 1 out ., 1 person. *), cross 6 loops to the left (3p. remove to an additional knitting needle and leave BEFORE work, pass the next 3 persons. p., and after 3 persons from an additional knitting needle), 2 out .;
6th row: 2 persons., 3 out., 11 loops with a patchwork pattern (* 1 out., 1 persons. * 1 out.), 4 out., 2 persons.;
7th, 9th, 11th, 13th and 15th rows: 2 out., 4 persons., 11 loops with a patchwork pattern (* 1 out., 1 persons. *, 1 out.), 3 persons., 2 out.;
8th, 10th, 12th and 14th rows: 2 persons., 3 out., 11 loops with a patchwork pattern (* 1 out., 1 person. *, 1 out.), 1 person., 3 out., 2 persons.;
16th row: 2 persons., 18 out., 2 persons.;
17th and 25th row: 2 out., 8 loops to cross to the right (4 p. remove to an additional knitting needle and leave FOR work, pass the next 4 persons. p., and after 4 persons. from additional knitting needles), 2 persons., 8 loops cross to the left (4p. remove to an additional knitting needle and leave BEFORE work, wire the next 4 persons, and after 4 persons from the additional knitting needles), 2 out.;
18th, 20th, 22nd and 24th rows: 2 persons., 18 out., 2 persons.;
19th, 21st and 23rd row: 2 out., 18 persons., 2 out.;
26th row: 2 persons., 4 out., 10 persons., 4 out., 2 persons.;
27th row: 2 out., 4 persons., 10 out., 4 persons., 2 out.;
28th row: 2 persons., 2 out., 14 persons., 2 out., 2 persons.;
29th row: 2 out., 2 persons. 14 out., 2 persons., 2 out.
Perhaps you were looking for a completely different owl knitting pattern. Then how do you like this idea?

pattern scheme multicolor owl

This owl is knitted with contrasting yarn, and the front or back surface can serve as a background for it. Pretty creative in my opinion.
pattern owl with knitting needles, knitting pattern owl, description of the scheme of the pattern owl
Every mother-needlewoman loves to pamper her child. Mothers of girls especially try. With the onset of cold weather, little fashionistas have mountains of hats, mittens and scarves of the most incredible colors.
If you find that your fashionista needs a brand new warm headdress, we present to your attention knitted owl hat. The scheme with the description here is quite clear and does not present much difficulty even for beginner craftswomen. But the finished product will come out warm, fashionable and very creative.
Materials and tools
For the “Owl” hat (description diagram a little lower), you need to stock up on yarn and tools in advance. Most likely, you will find everything you need at home, if not, you will have to go to the store.
If you decide to knit an “Owl” hat with knitting needles, a pattern with a description for which we offer in the article, first of all, select yarn. For warm winter things, it is best to use a thick and soft woolen thread. If it is supposed autumn version, then you can get by with a half-wool. We choose the color at our discretion, but you can also show a little creativity here. For example, to improve the contrast of the pattern, you can combine 2 yarns. From a lighter one, knit the main canvas, and use a darker thread for the image of an owl. You will get a two-tone hat.
The "Owl" pattern with knitting needles (schemes with a description may be different) is easy to knit. What kind of tools to choose for work depends on what experience in knitting you already have. The product can be created on two or five knitting needles (like socks), or you can use circular ones.
In addition, you will need an extra needle or a large pin to remove the stitches when making the pattern. Also prepare a "gypsy" needle and beautiful buttons for decoration (eyes).
"Owl" weave
So let's start. We offer the first scheme with a description of the "Owl" cap.

The entire pattern is knitted with knitting needles (LP) and purl (FROM) loops. The former are indicated by a vertical line, the latter by a horizontal one.
The silhouette of the owl itself is only 8 loops and 4 more on each side must be done with the wrong side. This is necessary in order for the owlet to look as convex and spectacular as possible.
All rows are knitted by alternating front and back loops in the order indicated in the diagram. And only three rows of all have additional features. At 23, 17 and 7 it is necessary to cross the loops. It is done like this:
- 7th row, knit 4 OUT, then 2 LP, remove them on a pin or an additional knitting needle and leave them behind the knitting fabric.
- Knit the next 2 sts, and then return the loops from the pin to the main knitting needle and knit them to the st.
- Now repeat everything again, with the only difference being that the loops taken on the pin must be taken out in front of the canvas.
- Do the same in the 17th and 23rd rows.
You may not succeed the first time. But when you understand the principle of weaving, you can change the pattern yourself. If desired, the owl can be made a little larger or more embossed by adding a few loops in the right places.
A slightly different "Owl"
And here is another way to knit an Owl hat. The description scheme here is slightly different from the previous one, although the notation is similar:
- horizontal dash - purl loop (FROM);
- vertical - front (LP).

The main pattern "Owl" is enclosed in 33 rows, each of which has 24 loops. The owl itself makes up 20 loops and 2 loops on each side are added to make the pattern more voluminous.
- 1st-2nd row: we knit 6 LP + 12 OUT + 6 LP.
- 3rd row: we begin to knit the pattern. 4 LP + 4 loops cross to the right (2 sts are removed on a pin and left behind the canvas, we knit 2 LP, and then we return the loops from the pin to the main knitting needle and also knit them LP) + 8 loops alternate FROM \ LP + 4 loops with crossing left (2 p. remove on a pin and leave in front of the canvas, knit 2 LP, and then return the loops from the pin to the knitting needle and also knit their LP) + 4 OUT.
- 4th row: we knit the loops according to the picture.
- 5th row: make out the tummy. To do this, it is enough to reduce the number of side loops and increase the number of embossed central ones. We knit like this: 2 FROM + 4 loops with crossing to the right (similar to how it was in the third row) + 12 loops with alternating FROM / R + 4 loops with crossing to the left + 2 FROM.
- 6-17th row: 2 PI + 2 LP + 16 loops of alternation from / LP + 2 LP + 2 OUT.
- 18th row: we finish the design of the tummy. Now you need to reduce the number of central loops and increase the number of side loops. We knit like this: 2 FROM + 4 loops with crossing to the left (we leave the pin before work) + 12 loops with alternating FROM / LP + 4 loops with crossing to the right (pin behind the canvas) + 2 FROM.
- 19th row: knit according to the scheme.
- 20th row: 4 FROM + 8 loops cross to the right (4p. remove to a pin and leave behind the canvas, knit 4 LP, and then return the loops from the pin to the main knitting needle and also knit their LP) + 8 loops with crossing to the left (4p. remove in front of the canvas , we knit 4 LP, and then return the loops from the pin and also knit them with the LP) + 4 OUT.
- 21-29th row: 4 OUT + 16 LP + 4 OUT.
- 30th row: knits similarly to the twentieth. 4 OUT + 8 LP with crossing to the right + 8 LP with crossing to the left + 4 OUT.
- 31-32 rows: knit ears. 4 OUT + 4 LP + 8 OUT + 4 LP + 4 OUT.
Hat decorations
When the knitted product is ready, it remains to decorate it a little. For the eye, you can take beautiful large buttons. The nose can be embroidered with black threads, or you can outline it with a triangular button.
Well, the most important decoration is the tassel ears. We cut the yarn into segments of 10-15 cm and collect two small bunches. We fold each of them in half and tie a knot at the inflection point. You should get small brushes. Now sew the ears to the corners of the hat.
Cap "Owl" without a scheme
And what about those for whom the Owl hat pattern seems too complicated? Often, novice craftswomen, having only learned how to knit purl and front loops, already want to create some kind of masterpiece for themselves. But the skill, unfortunately, is still lacking. But what if there is no diagram with a description of the Owl pattern? A hat with knitting needles will not work?

Do not despair! If there is a little lack of skill, you can simply tie a rectangle with an elastic band along the long side. Now fold and sew the short sides of the rectangle and the top. You have a hat-square, with an elastic band and with small protruding ears. Now it's just a matter of decorating it:
- Cut out a nose and large round eyes from thick felt.
- We sew them on the front of the product.
- From the remnants of the yarn of a contrasting (or matching) color, we cut the tassel ears and fix them in the corners of the product.
That's all, the Owl hat is ready without using the scheme!
One of the most beloved and popular characters in Lately became owls. Cute and cute faces of these birds can be found on postcards, and on clothes, and in jewelry. But most often they can be seen on hats for babies, which needlewomen mothers knit for their crumbs.
Before knitting the “Owlet” hat, it is necessary to prepare everything that we may need in the process of work, namely: any “not prickly” yarn, which is intended for knitting things for children infancy(four colors), hook No. 1.9 mm, centimeter tape (for measuring the circumference of the baby’s head and the depth of the cap), scissors, a needle and thread, Grass yarn, Iris yarn in white and black colors (for the eye).
We knit five air loops from "children's" soft yarn.

We close the first and last loops of the knitted chain into a ringlet.

Now we knit three air loops - for lifting, and then we knit two double crochets in each loop. As a result, in the 2nd row of the cap you will get 10 double crochets. We complete the first row with a connecting column, which will fix the beginning and end of the row.

We knit the rest of the rows in the same way, only we do not add loops to each loop, but through a loop (in the 3rd row), through two loops (in the 4th row), and so on. In general, you should have about 5 rows of double crochets - for a child of 4-5 months.

Now we stop adding loops and knit single crochets, without making any additions or subtractions. Thus, our hat will automatically take the shape of a bowl.

As soon as this happens, we continue to make columns with one crochet until the depth of the cap reaches the level of the middle of the forehead of the child.
Once the desired depth is reached, change the color of the yarn and knit two rows of single crochets.

After that, we again change the color of the yarn to the third one and again we knit two rows of single crochets.
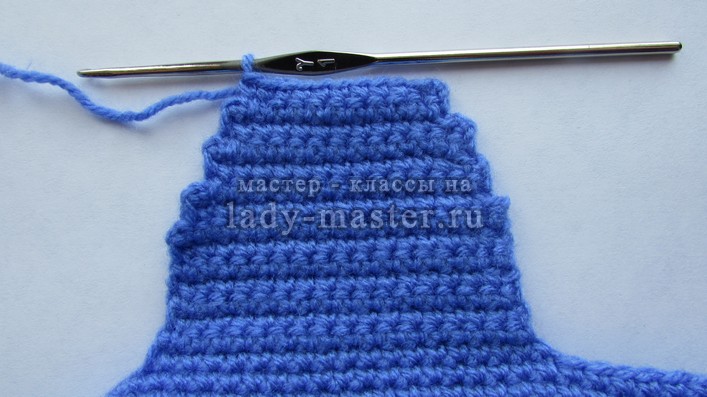
Now we fold our base of the cap in half and find its middle. She is tagged in the photo. We also mark points that are equidistant from the median. They are marked with black dots in the photo. These points determine the beginning for knitting the "ears" of the hat.

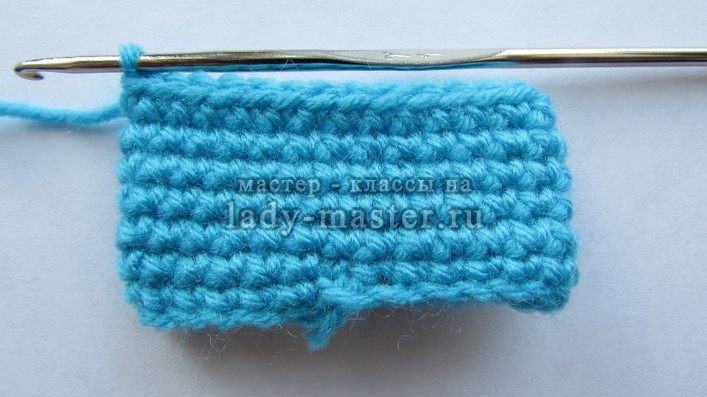
Now we take the yarn that was used to knit the edge of the cap and attach it to the point, which in the photo is to the right of the middle one. And we knit 20-25 single crochets.


In the same way, we knit 2 more rows.

Now we will begin to “round off” the edges of the “ears”: in the new row we knit the first loop with a half-column, then one air loop, then a row of single crochets, and leave the last loop not knitted.
We turn knitting and repeat the steps. We knit in the same way until 9-10 loops remain in the row.
We tear off the thread and similarly knit the second "ear" from the opposite side. Only in this case, we count 20-25 loops from the point on the left side (in photo No. 9) and start knitting from this point so that the knitting of the ear also starts from the front side of the product.


After that, we knit single crochets along the knitted chain to the base of this chain.
Next, we tie the edge of the base to the middle of the second eyelet with single crochets, after which, in the same way as in the previous case, we make a rope. And then we tie the remaining part of the edge of the cap with single crochets.

To make eyes, we collect 4-5 air loops from Iris yarn, close them into a ring, tie single crochets in a circle, while making additions in each row so that the circle is flat. We knit loops until the eyes are the diameter we need. The desired diameter can be determined by attaching the part to the base of the cap.

edge knitted circle for the eye we tie with yarn “grass”.

The pupils are knitted similarly to the “whites” of the eyes, only in this case we fold the “iris” yarn in half so that the circle of the pupil is denser.

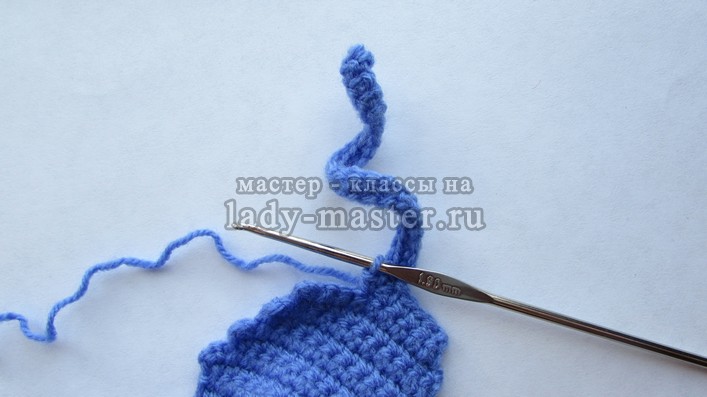
We knit owl ears like this: we collect 20 air loops from the yarn with which we started knitting.

Now we take the hook out of the loop and insert it into the first loop of the chain, and then into the last loop and connect the ends. This method of connecting the edges of the chain will not allow it to twist.

After that, we will "sharpen" the owl's ear. We will do this only at the edges, so as not to disturb the drawing. To do this, we fold the connected eyelet cylinder in half and make one decrease at the bend points. We knit the next row without decreasing loops, and after it we again make 2 decreases at the bending points along the edges of the ear. Then we knit a row again without decreasing loops, after which we decrease in each row until one loop remains on the hook.
And now we tear off the thread, tighten it and hide the tip inside the ear.

The reductions at the bending points of the owl's ear will look like this:

To make a nose, we collect five air loops.

We close the ends (the first and last loops) into a ring.


We turn knitting, we knit two single crochets to the end of the row. Get a semicircular knitted figure.

We knit the third row in the same way as the second, only at the upper point of the semicircle we make 3 double crochets in the same loop.

We tear off the yarn and hide the tip on the wrong side of the part.
We make tassels at the tips of the ears from scraps of yarn used in knitting. To do this, we thread each piece of yarn through the tip of the ear with a hook:

We tighten the scraps with another piece of yarn.

Knitting: hats with a pattern "Owl"
Knitting patterns and descriptions
many photos
Knitting: pattern "Owl"
Cast on 22 sts for sample.
1st row: persons. P.;
2nd row: persons. P.;
3rd row: chrome., 1 out., 8 persons. p., 1 out., chrome;
4th row knit according to the pattern;
5th row: chrome., 2 out., 4 p. cross to the right: 2 persons. n. postpone to auxiliary. knitting needle at work, next. 2 persons. p. knit faces., then knit 2 p. with auxiliary. knitting needles 1 persons. p., 1 out. P.; 1 persons. p., 1 out. p., 1 person. p., 1 out. p., 1 person. p., 1 out. p., 1 person. p., 1 out. p., 4 p. cross to the left: 2 persons. n. postpone to auxiliary. knitting needle before work, next. 2 p. Knit 1 person. p., 1 out. n., then knit faces. 2 p. with auxiliary knitting needles; 2 out., chrome;
6th, 8th, 10th, 12th, 14th, 16th rows: chrome, 2 persons. p., 2 out. p., 1 out. p., 1 person. p., 1 out. p., 1 person. p., 1 out. p., 1 person. p., 1 out. p., 1 person. p., 1 out. p., 1 person. p., 2 out. p., 2 persons. p., chrome;
7th, 9th, 11th, 13th, 15th rows: chrome, 2 out. p., 2 persons. p., 1 person. p., 1 out. p., 1 person. p., 1 out. p., 1 person. p., 1 out. p., 1 person. p., 1 out. p., 1 person. p., 1 out. p., 1 person. p., 1 out. p., 2 persons. p., 2 out. p., chrome;
17th row: chrome., 2 out. p., 4 persons. n. postpone to auxiliary. knitting needle at work, next. 4 p. Knit faces. n., then knit faces. p. 4 p. with auxiliary. knitting needles, 4 persons. n. postpone to auxiliary. knitting needle before work, next. 4 p. Knit faces. n., then knit faces. p. 4 p. with auxiliary. knitting needles, 2 out. p., chrome;
18th, 19th, 20th, 21st, 22nd, 23rd, 24th rows knit according to the pattern;
25th row: chrome., 2 out. p., 4 persons. n. postpone to auxiliary. knitting needle at work, next. 4 p. Knit faces. n., then knit out. p. 4 p. with auxiliary. knitting needles, 4 persons. n. postpone to auxiliary. knitting needle before work, next. 4 p. n., then knit faces. p. 4 p. with auxiliary. knitting needles, 2 out. p., chrome;
26th row: chrome., 2 persons. p., 4 out. p., 8 persons. p., 4 out. p., 2 persons. p., chrome;
27th row: chrome., 2 out. p., 4 persons. p., 8 out. p., 4 persons. p., 2 out. p., chrome;
28th row: persons. P.;
29th row: out. P.;
30th row: close the loops according to the pattern.
Sew on eyes or make them with a needle and black thread.


In the original, the author knits his owl with knitting needles No. 6, threads 75 m / 50 g. Composition - 50% acrylic, 25% alpaca, 25% wool. I knitted from merino and camel wool, and the hat is soft. With acrylic, I think it would hold its shape more and the weaves would stand out more.
She knitted it in a circle with a rectangle, knitted it on three knitting needles at the top.
Initially, I picked up loops around the circumference of the head, a twisting rim about 3 cm high. Then I evenly added several loops so that the owl itself did not pull off the hat. My bottom of the owl turned out to be somewhat "opened", that is, the wings, as it were, were set aside. But in the process of knitting, I realized that, as it seems to me, the author does not add loops after the rim, but first knits the first row of braids (weaves) in an owl, and then between the wings (2 front) and the pearl pattern, first adds 2 loops (on both sides ), and in the next row 2 loops. Thus, the owl's body receives volume compared to the head, and the cap does not shrink. When the body of the owl ends, you need to reduce those loops that we added, and the head is already knitted on 12 loops, and the braids are not on 2 * 2 loops, but on 3 * 3.
Owl hat, linked from a picture from the Internet


