DIY copper wire earrings. DIY earrings: a master class of extravagant ear jewelry
Fashion is changing every day. This process always happens, because with every passing minute new fashion trends. But the fashion for handmade accessories is still relevant. Earrings are especially in trend, because they are part of the image of any woman. Every lady needs to learn how to make them on her own. It is worth at least once trying to make your own earrings yourself, and a master class will help you with this.
How to make earrings with your own hands with a master class
Before work, it is necessary to prepare materials: earrings for earrings, pins, acrylic and Czech beads, carnations, stones, bead huggers, pliers, wire cutters.
Getting Started: Put a Czech glass bead on a carnation.
Then put on an acrylic bead.

Now you need to attach a bead hugger.

And fine-tune with your fingers.
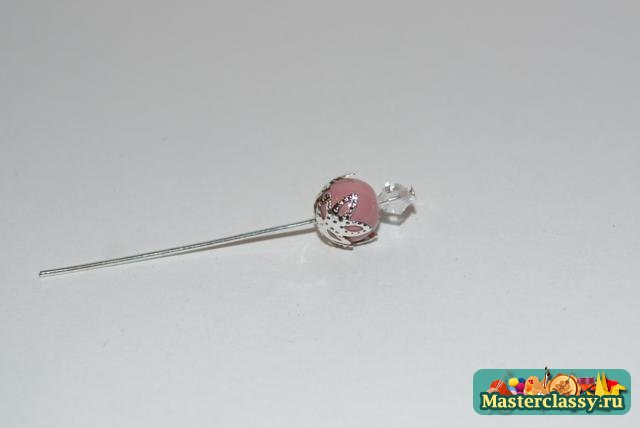
Gently bend the nail.

Now bite off the excess part of the clove with wire cutters.
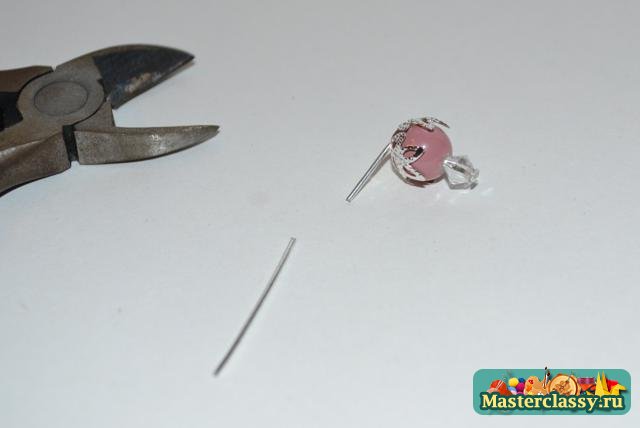
Bend with round pliers. There was a preparation.
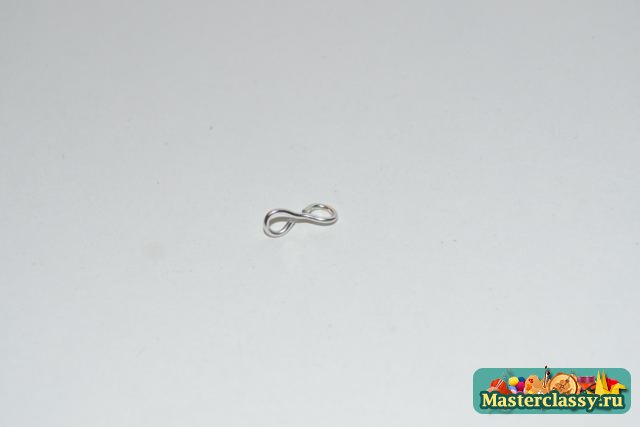
From the excess part of the carnation, use round-nose pliers to wrap the ring to make a pin.

Bend the other side too, so that the sign of infinity comes out.
Bend the bent end on one side and put the workpiece on the resulting loop.
Bend the workpiece to its original position.

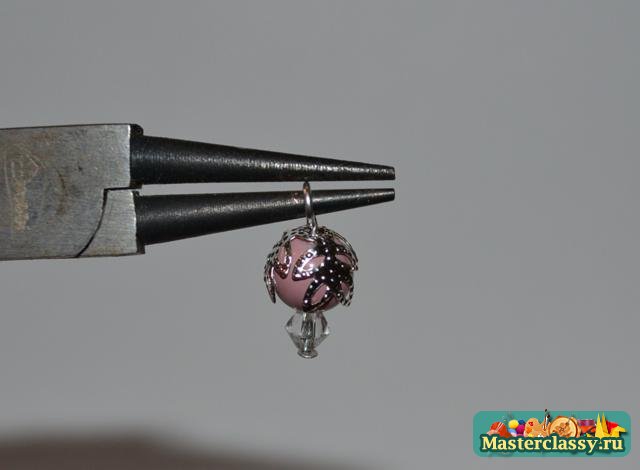
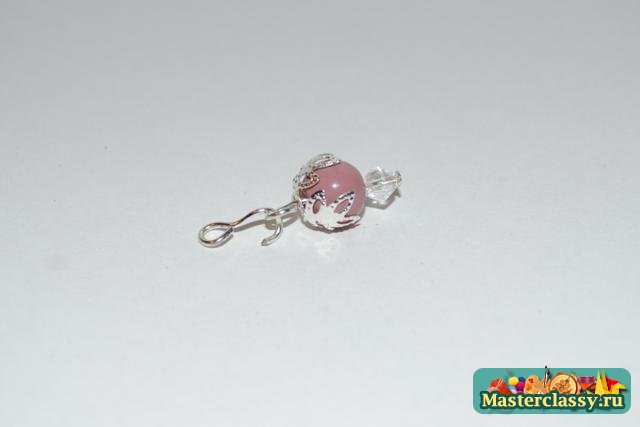
Now take a pin, a larger Czech bead.

Put the bead on a pin, bite off and bend.

Take the fastener and fasten it with this blank.

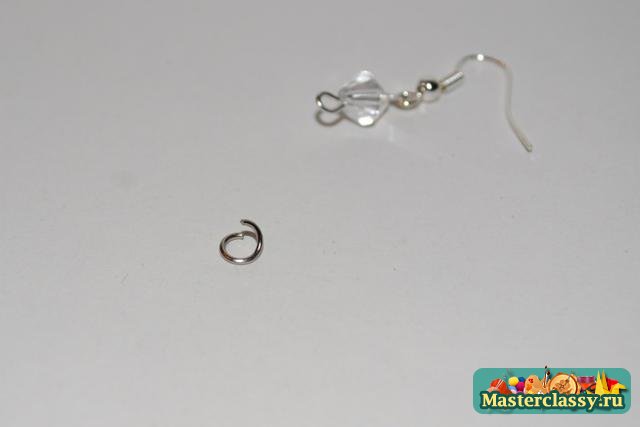
Prepare a ring by bending one end a little.
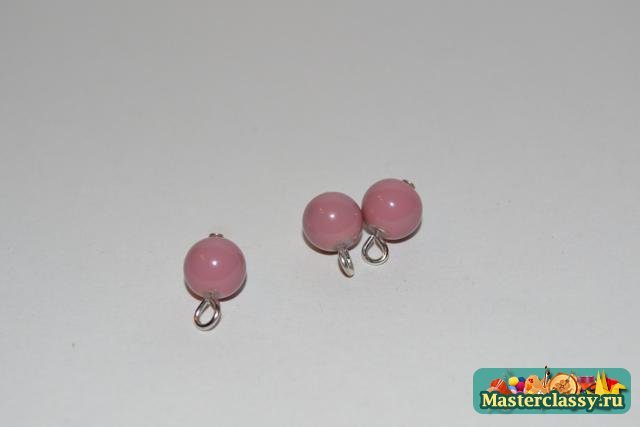
Take three acrylic beads and three cloves. Put a bead on the carnation, bend it, cut off the necessary piece of carnation.

Bend to the bead to make a ring. Do the same work with all acrylic beads.
We collect the earring itself. Take all the blanks and the ring made before.
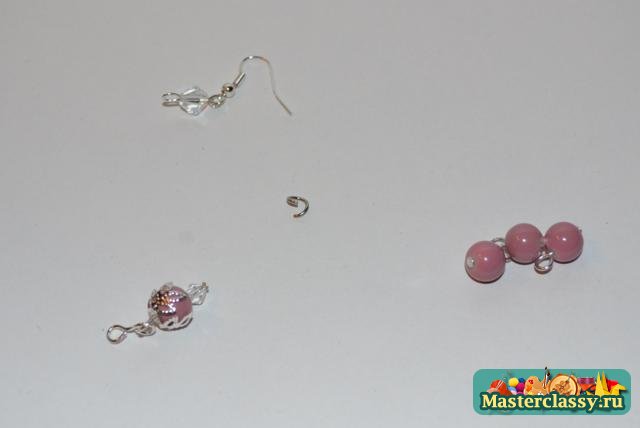
We begin to put blanks on the ring in this order: a pink bead, then a bead with a small bead and two pink ones.
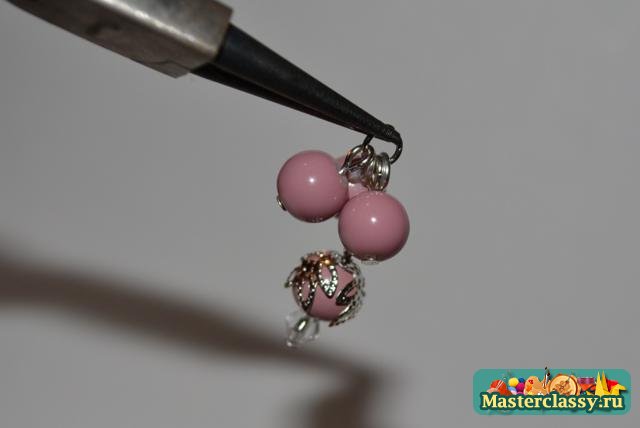
And attach a larger bead with a fastener here.

Very beautiful earrings.

This master class showed how to make original earrings in interesting technique do it yourself, the description is suitable especially for beginners.
We make stylish wire earrings ourselves
Interesting works are obtained from wire, this affordable material will help to bring to life any product, step by step photos very helpful at work. Beginners should just carefully study the essence of the work and get beautiful wire earrings.
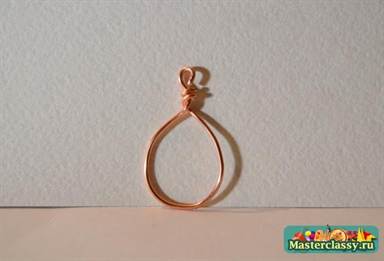
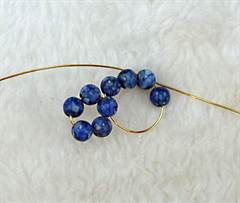
Take out a regular copper wire and bend it into a blank, as shown in the photo. So create a second ring. Beads are needed for decoration.
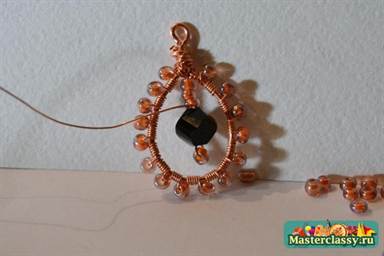
Now attach a thinner wire to the base.

It's time to put on the beads. After each it is necessary to make about five turns of wire.

Take again a thin wire and attach it in the middle of the product from the top. Put on three beads, one bead, another bead. Pull the wire itself through the last and large bead and fasten.
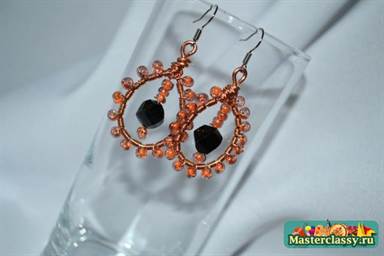
Repeat all steps for another earring. Decoration is ready!
We create beauty from beads in a master class
Beaded earrings are a great option. The principle of operation is similar to the previous ones.
For such a model, you need a special dense wire that will not break from frequent wear, wire-colored ear hooks and round beads.
Put four beads on the wire and bend it in the form of a loop, stretching the ends of the wire into the fifth bead.

We put three beads on one end of the wire, and one on the other. Now thread the right wire into the third bead that you put on. Tighten. Now there are two rounds.

And in this way, make circles until you get a big circle. Eight small circles should come out, and the ninth will be the last. The photo shows how to add the final beads and tighten. Attach the fastener, for this you need a small eye.


Cuff earrings are the hit of the season
This version of fashionable earrings is very interesting for its design. They can be worn by girls who are afraid to pierce their ears. Cuff earrings are very extravagant and are easily attached to the ear. Fashion for such earrings has gone since ancient times. During excavations, women were found wearing such jewelry.

In the last century, cuffs were very popular, but their disadvantage was large sizes. Now they are back in fashion again. Famous actresses wear these jewelry. Cuffs are put on one ear, hair should be laid on the opposite side of the earring. An ordinary earring is worn in the second ear, which matches the image.
With the help of accessories, you can add sophistication to your image. Especially earrings are able to create a highlight. Any girl can build unique earrings with her own hands, from improvised materials.
Every housewife will surely have beads, ribbons, pieces of wire and so on. It remains to complete this set with hooks for earrings, and you can start the creative process, which will take a minimum of time. Photo ideas on how to make earrings with your own hands.

Earrings "Ganutel" do-it-yourself
The history of the origin of the popular technique "Ganutel" originates from the monks of the Mediterranean Sea.

Tools for work:
- Wire (50 cm), or wire spiral (4-5 cm), wire for beads is acceptable.
- Wire with a diameter of 3 mm, length 20 cm;
- For decor (beads, beads, colored threads, etc.);
- Pliers and pliers tools.
Making Earrings
In the absence of a finished spiral, we make it. Tightly wind the wire around the knitting needle with a diameter of 4mm. Next, we release the finished spiral from the knitting needle and stretch it out a little, increasing it 3 times in length.

We thread a thick wire into the center of the spring, create the basis of the desired geometric shape. We twist the ends of the wires.

We fix the end at the top of the base, and wind the thread in the desired order (vertically or horizontally), but following the rule, the thread should fit into each turn of the spiral.

By winding the thread, you can decorate to taste by threading beads or glass beads into it.
We tie the thread with high quality, and with the help of wire cutters we bite off a thick wire, and twist it in a thin spiral, make a loop out of it. Having picked up a bead of the desired color, we attach it to the fastener.

Ear decoration "Ganutel" made by hand, ready!

Improvised means for making exclusive earrings
From fabric
To make long earrings with your own hands, the following materials are needed: fabric (ribbon, braid), scissors, wire, beads and beads, tools (nippers, pliers).
- We cut obliquely 10 cm of the wire, for a more convenient puncture of the material;
- We process the ends of the fabric with fire so that they do not sprinkle. We thread the wire into the tape (braid), stitches 2 mm long;
- From two edges of the material, we thread beads of the desired color;
- Carefully twist the wire with pliers;
- We remove the twists into beads, construct a loop from a metal thread and fasten a fastener on it.


Thread earrings
Do-it-yourself brush earrings with the help of threads are not at all difficult to make. Required Tools colored threads (mulina), narrow ribbons, wire, scissors, pliers, wire cutters. The color of the threads is selected based on taste preferences.
We make cuts from threads of 10 cm each thread. In the center we wrap with wire, very tightly. Twist the wire with pliers, and remove the excess with wire cutters. We hide the twisted metal thread in the product, fasten the ring.

We bend the threads in half, and wrap them tightly in the center with wire several times (about 5 times). We make a tight twist with pliers and hide the earrings inside. Carefully align the threads with scissors. You can hide a twist under the beads. Another original set is ready!

Earrings made of wire
Jewelry for ears made of metal thread is always exclusive.

This section presents a master class on how to make earrings with your own hands.
Necessary materials wire, hooks for earrings, 6 connecting rings, decorative elements, metal pendants, tools (nippers, pliers) are still needed.


- Cut 3 pieces of metal thread;
- Divide one of the cut pieces in two, wrap a large coil in the form of a loop;
- Decorate the free edge with beads and pendants, on the other hand, make a loop;
- Do the same with a small ring;
- Put a larger circle, a smaller one and a ring on the connecting ring;
- Duplicate on the other side;
- Engage the ring with a fastener and secure with a loop.

Beaded earrings
Earrings made of beads and beads with their own hands are made very quickly. Necessary materials beads, accessories and round nose pliers.
- Insert decorative elements in the form of beads into the wire;
- Cut off the remaining metal thread, leaving 8 mm., for the loop;
- Hook the loop on the fastener;
- Repeat with the second earring all of the above.

DIY cuff making
Cuffs have been at the peak of popularity for several seasons. Wire and pliers are required.
- Bite off a piece of wire 7.5 cm long.
- Bend 2.5 cm, and bend one more time.
- Bend the wire into rings on both sides, fold the product in half, and clamp the ends with pliers. Cuffs are ready!
Earrings made by hand will always be unique. This is a great addition to the wardrobe, which will not lose its relevance, as well as skillfully emphasize the individuality of the owner.

DIY earrings photo


One day, while leafing through a magazine, I came across a photo of actress Scarlett Johansen wearing homemade earrings in her ears. I wanted to repeat them and present a master class:

Having closely examined the photo, it became clear that the silver beads are a wire twisted into a “ball”.

For these earrings, you will need tools: Ruler, round nose pliers, side cutters, "platypuses, needle file" and pliers 2 pieces.

Wire thickness 1.0 cm, 0.8 cm, 0.6 cm.

Not too big chain, four glass beads blue color in the form of a drop, 4 suspensions are also in the form of a drop.

Additional tools of different diameters.

For fasteners, from a 1.0 mm wire, cut 2 pieces 8 cm long with side cutters.

Finish the ends with a needle file so as not to scratch your ears.

Curl a loop with round nose pliers.

With "platypuses" holding the loop, bend the wire.

Make two identical spirals. Tails 4.5 cm.


And bend the ends a little with round nose pliers.

Such bows or earwires turned out.

Cut 15 cm of 0.6 cm thick wire. Wind it around a stick or toothpick.

Unroll the spiral.

And from such a twisted wire, form a ball so that it does not fall apart, pass the free end several times through the future bead.

Trim with pliers so that the bead is round.

If there is no wire, you can use silver beads with a diameter of 0.8 cm.

6 beads are wound, that's how much you need for earrings.

Let's make a ring on which a glass bead and a pendant will hang. Cut 12 cm of wire 0.8 cm thick. Wrap around a round object (here a bottle of mascara) with a diameter of more than 1.0 cm. Leave one end longer.

Insert a bead and a pendant into the resulting ring. Hold the long end of the wire with pliers, wrap the short end 2-3 times, cut off the excess.

Put a bead ball on the rod. With the help of round pliers.

Here's what should happen. Let's call it a block.

Make 4 of these blocks..


Attach, passing through the center, oval rings to the earwires.

Remove 12 links from the chain. Attach the fifth link to the earring ring. Attach wire beads to the ends of the chain, opening the links. Attach another piece of 4 links to the bead on the short chain. And now to the free ends of the chains, unbending the links, attach the block.

Earrings with a photo are ready, it remains to clothe them worthy.

I decided not to stop there and did it with green drops.

This is an option with ready-made beads.

And the evening version.

Rich result for the master class: how to make earrings with your own hands. I named the collection of earrings "Scarlett".
Creative success, friends!
I would be grateful if, when copying my articles to your website, blog, personal page or diary, you provide a link to the source.We bring to your attention a master class, after which you can make such wonderful earrings.
DIY wire earrings
To create such jewelry, a certain technique is used. Literally, it is called "the art of twisting wire" and implies the creation of individual compositions by twisting and interlacing wires of various sizes and from various materials.
Interestingly, this art is by no means new. This technique carries its history from the Middle Ages, where most of all jewelry was created in this way.
DIY wire jewelry
To create earrings, you will need materials:
- pliers;
- wire cutters;
- wire of two sizes;
- various beads and a shape with which the earrings themselves will be created.

Tools and materials
This photo shows all the tools that were used. The first tool that is simply necessary for any wire work is pliers. Here they are combined with wire cutters and represent a single multifunctional tool. Then follows the wire: in this lesson, a copper wire of two sections 1.0 mm (larger) and 0.3 (for winding) is used.
From a large wire, the basis of the future decoration, its frame, is created. With the help of a thin wire, the lines of the pattern are emphasized, and a braid is formed.
For individual patterns, such a device as a wig jig (shape) is used. It allows you to create even and symmetrical patterns.

Files, crossbar and blanks
You will also need needle files, a crossbar (or any suitable shape) and beads. Needle files are needed to clean off imperfections and notches from the tool from the surface of the future decoration, as well as to correct the lines of the pattern, to make them thinner and more elegant. Around the crossbar, the shape of future earrings is formed. It needs to be symmetrical and smooth. There are two types of beads used in earrings: droplets and balls. It is better to use similar beads made of crystal or glass with an internal uniform color. This is necessary so that in the process of work the beads do not lose their color and do not spoil the whole look. copper wire jewelry.
So, the beginning of the process: we cut off two identical pieces from a thick wire using wire cutters. The length of these pieces should be approximately 5 cm. They are the main part of the earrings.

Two pieces of wire
Then at the same time we bend these two pieces with the help of a crossbar. It is important to bend both pieces at the same time, because thanks to this, both earrings get the same and symmetrical shape. Get two "fish". This will be the basis of future earrings.

We bend both pieces on the crossbar
Then one of these bases unfolds in such a way that its wide base rushes down, and the “tails”, on the contrary, up. After that, the two tails are bred in opposite directions.

Then, with the help of round-nose pliers, each tail is smoothly bent, forming an "ear".

We form "ears"
After that, each tip coming from the ear is also smoothly bent with the help of round-nose pliers. It turns out here is such a "monogram".

We continue to bend the wire
Then we do wire patterns for an earring. To do this, cut off a piece of thicker wire about 2 cm long. Using round-nose pliers, “curl” one end of it.

How to make a wire pattern
We do the same manipulation with the other end of the wire. We try on the resulting double-sided curl in the middle of the base, it should completely fit in size.

Trying on a curl for an earring
Then we move on to the formation of the upper part of the earring or its “cap”. We cut off a piece of wire about 2 cm and form a "loop". Cut the ends of the loops to the same length.

We make a blank for the "hat"
Again, with the help of round-nose pliers, we twist the ends of the loop. Both tips should be curled symmetrically and equally.

We twist the ends of the loop
We collect the design of future earrings.

We form the frame of the earring
After that, all the details must be beaten off with a hammer on the anvil. This is necessary in order for the elements to become more voluminous, as well as for the wire to become stronger and more resistant to any loads.

Then the most painstaking and time-consuming part of the master class begins. A braid is formed. It is she who determines the future type of work, and therefore it is necessary to lay each turn of the braid evenly and slightly pulling the wire.
First you need to fix the first turns. For this, several test turns are made on the basis. After that, the short tip is pulled under these turns and cut off “under the root”. Then a few more turns are superimposed on the place of the cut. After that, a part of the pattern is placed inside the base and several turns of wire are made, wrapping both parts of the earring.

Let's start wrapping
Then two small turns are made on the inside of the earring and the wire is transferred to the outside, where it also forms two small (or short) turns. After a series of short turns, two general (or large turns) also follow. Thus, the lower part of the base of the earring is braided, its decorative appearance is formed and the internal pattern is attached. At the end, the unnecessary end of the wire is cut off and fixed.

Wrapping the bottom of the earring
After that, all attention switches to the upper part. Here, the upper part of the future earring will also be decorated with a braid, and a drop-bead will also be fixed.
First, several initial turns are also made and the braid is fixed. After that, a long section of wire is pulled through the bead and a coil is also formed on the opposite side.

We start wrapping the upper part with a bead
Then the wire is transferred to the wrong side, wraps around the drop and on the other side makes one or more turns in the same way. After that, it is transferred to the front part and the rhythm of the pattern continues.

The braiding rhythm is done until a “ribbed” pattern is formed on the drop bead. The ends of the wire are cut off.

We proceed to the final part - attaching the "cap" to the base. The already familiar beginning and fixation of the braid are performed, and then both parts of the base are wound to each other by the “ears”.

We fix the "ears"
After that, the wire is transferred to the upper part of the ear and wraps around it and the lower part of the "cap". After that, all parts of the cap are wound sequentially “clockwise”, and the remaining tips are cut off and hidden.

We wind the "hat"
In order to decorate the earring and hide the braid, a bead is placed in the hole between the ears of the base and the upper cap. After fixing the beads, the ends of the wire are brought out in one direction. After that, they are twisted together, forming a twisted wire. With this twisted decorative wire, the bead is wrapped in a circle.
Before the last round, the wire is wrapped around one of the warp wires, then the last round is made around the bead and the warp wire is wrapped around again. After that, the tips are still cut off and hidden.

The second earring is made in exactly the same way. At the end, the blanks are placed in a solution of ammonia for patination, polished and put on earwires.
This is how we created beautiful decoration in engineering wire work with your own hands. But that is not all…
In one of the following master classes, you will see a continuation that will definitely arouse your interest!
All for sim today. Good luck in your work and see you at our
Earrings with copper-colored wire in the base can look very bright and summery. To do this, we will use unusual decoration techniques and simple materials that work perfectly in combination with each other. Details in step by step instructions.
materials
To make rainbow wire earrings with your own hands, prepare:
- copper wire;
- ruler;
- epoxy resin;
- plastic container;
- hooks or studs for earrings;
- small dry spangles of different colors;
- baking parchment;
- double tape;
- liquid PVA glue;
- scissors;
- wire cutters;
- pliers.

Step 1. From the coil of wire, cut two pieces 15 cm long. You will need to form the base of the earrings from them. You can give them any shape, for example, make a circle, drop, wave, square, etc. Make sure the base is flat. Be sure to fix the ends of the wire by twisting them.

Step 2. Take double tape of the appropriate width. Glue one side of it onto a piece of waxed paper and lay it all out on a flat work surface. Attach blanks for earrings to the adhesive tape. Push them into adhesive tape so that they stick to it thoroughly.

Step 3. In places where the wire does not fit snugly against the adhesive tape, apply a strip of PVA glue. This step cannot be skipped. As decorative base there will be epoxy and if there are holes left, it will flow out of the borders of the earrings. The product will either not work, or it will not look neat.
Let the glue dry.

Step 4. Take small sparkles of the shades you need and start pouring them in layers on the earrings. Do not apply them in a dense layer. Translucent earrings will look more interesting.


Step 5. After pouring out the sparkles, press them down with your fingers. Remove excess material, including from the metal rim.


Step 6. Dilute the epoxy solution according to the manufacturer's instructions.

Step 7. Gently fill the middle of the earrings with resin. Make sure no bubbles form in the solution. Be careful not to spill the resin over the edge of the wire ring. Leave everything to dry completely.

Step 8. Remove the adhesive tape from the back of the earrings.


Step 9. Use scissors or a sharp knife to cut off the remnants of the dried PVA glue.

Step 10. If desired, you can carefully bend the earrings.


