How to make a bracelet from a plastic container. Cork keychain from a plastic bottle
Many people prefer to have accessories that emphasize their individuality. One of the options for such a detail is a keychain.
This is a versatile piece that can adapt in style to any thing, whether it's a backpack, keys, a wallet, a pencil case.

Such a trinket as a keychain can become a unique item if you make it yourself. A handmade keychain will be a nice gift for family and friends. This is one of the economical options for accessories.
There are many suitable materials for manufacturing that can be found at home.

Materials for manufacturing
A handmade keychain is not just a thing, it is a kind of talisman and amulet that can bring good luck to those who really believe in it. Most of the materials can be found at home, among them will be:
- paper:
- beads;
- threads;
- textile;
- tapes;
- plasticine;
- rubber bands.
For manufacturing, suitable: straps, corks, buttons, pencil remnants. The main assistant in the work will be fantasy. Thanks to her, an unpredictable long-awaited result will turn out.

Leather keychain for a backpack or handbag
Made of leather keychain will suit any style, from classic to sporty. Will be a good addition to the preferred image.

For work you will need:
- a small piece of skin;
- threads;
- fork;
- needle;
- glue;
- key ring.
The next step is the manufacturing process:
- A template is selected and a shape for the keychain is cut out.
- Glue is applied to the previously cleaned surface of the skin in order to more securely fasten the material.
- A border is drawn along which the thread will be threaded further.
- Holes are made with a sharp fork.
- A ring is inserted and the product is sewn with a thread.
- The edges of the skin are cleaned.

The finished accessory can be attached to a bag or purse to decorate or replace the slider.

Keychain from beads
Beaded accessories can be made in any colors, shapes and themes.

The most popular are animal figurines, vegetables or fruits, flowers and hearts. However, certain skills are required to perform such work.

To make a keychain, you will need:
- a set of beads of the desired colors;
- fishing line;
- scissors;
- scheme for work;
- key ring.

The scheme for work can be found on the Internet. For example, to make a keychain in the shape of a flower, you need:
- Cut the line and bend it in half.
- At one end, advance the beads and advance to the middle. Pass the other end of the fishing line through it.
- Put on the next row of beads one more bead. So repeat with each row. The petal will turn out to be more interesting if you thread beads of a different color along the edges, starting from 3-5 rows.
- Having reached the middle, reduce the number of beads in a row. The number of beads is optional.
- For the core of the flower, take large bead yellow color.
- Connect each element to each other, twist the fishing line and secure with a yellow bead.

The product can be attached to a bag or pencil case, which will serve as a decorative element.
Textile keychain
From small remnants of fabric, you can sew a keychain and present it as a nice gift to your friends. You just need to have basic knowledge.

To make an owl keychain you will need:
- fabric (multi-colored);
- lining;
- leftover felt (for eyes, beak and paws);
- pattern;
- threads;
- scissors;
- needle;
- buttons;
- keychain ring;
- piece of lace.

Note!

To make a keychain in the shape of an owl, you must first prepare a pattern and get to work.
- To begin with, the lining is connected to the fabric and processed. After, the details of the owl's body turn out to be obvious.
- Now the front of the owl is decorated. Felt circles are sewn in place of the eyes, and buttons are sewn on top, a beak is added.
- Next, the front and back parts are connected manually or using sewing machine. At the same time, it is necessary to leave a small hole for the lace.
- A ring is attached to the sewn lace. After that, the hole is sutured.
Below are photos of key rings and their phased production.

IN Lately products are gaining popularity polymer clay and key rings, including.

The finished clay product is baked and for a long time pleases the eye with its brightness and originality.

The matter remains only with imagination and materials, some of which can be found at home or purchased in needlework stores.

DIY keychain photo

Note!


A universal selection of gift ideas for every occasion and occasion. Surprise your friends and loved ones! ;)
Hi all! The series of gifts will never stop, so today I offer you something interesting. You will find a fascinating article on how to make a keychain with your own hands.
This is a necessary, but at the same time, a miniature gift for all occasions. I have prepared 25 master classes and just original needlework ideas that will help you make the very keychain that you want.
First of all, advice: if you want to make a cool keychain, then be sure to get good fasteners (rings, laces, etc.) At the end of the article, I will tell you what to buy and where to do it.
How to make a keychain with your own hands: 25 workshops and ideas
Soft keychain made of "Fluff" fabric
What do we need?
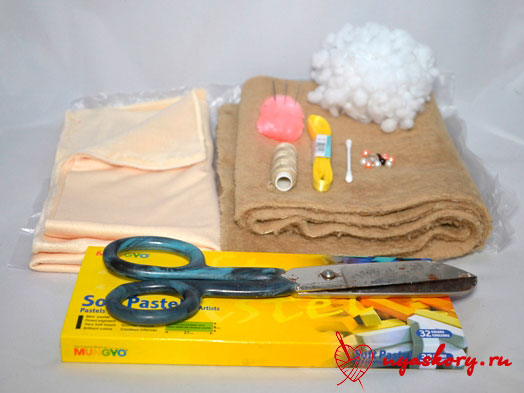
- velsoft (you can also use faux fur);
- fleece or minky fleece;
- satin ribbon for fastening;
- threads;
- pastel for painting the nose and cheeks (you can take acrylic paints);
- synthetic winterizer for stuffing;
- cotton swab;
- scissors;
- needle;
- eye beads.
DIY keychain - sew a bunny Pushka
Patterns Cannon (given in full size):
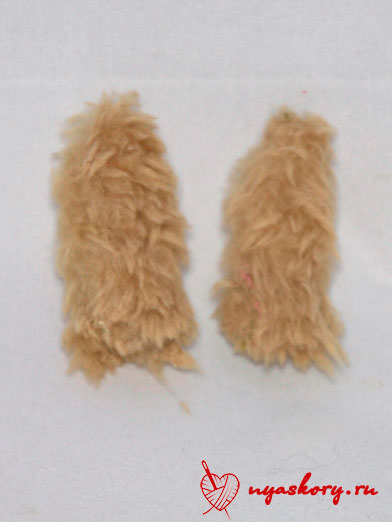
First, sew the ears, folding them with the right sides inward. Turn them out.
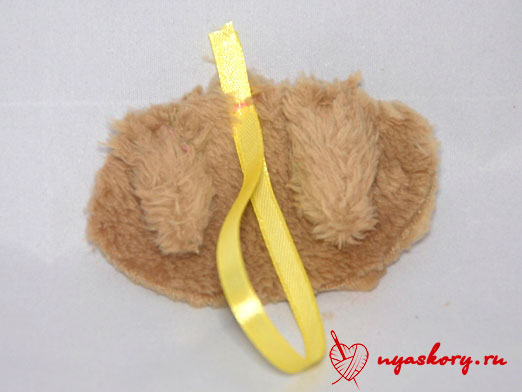
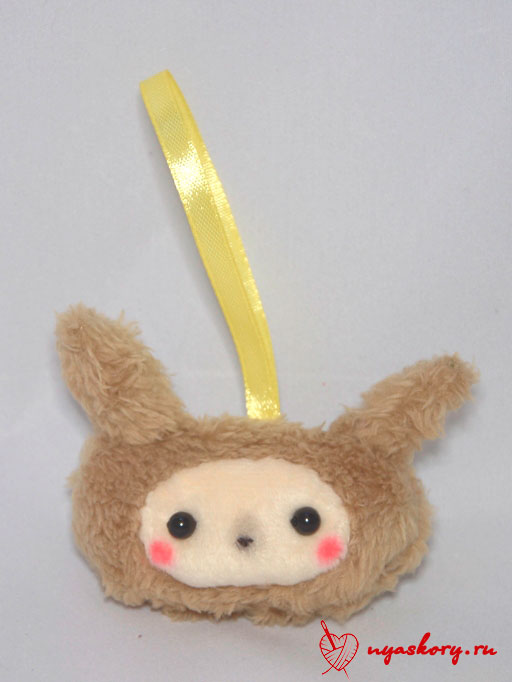
Now take a pre-prepared piece of tape. Fold it in half and attach it to one of the parts of the head approximately in the middle. Also attach the ears. So that they do not move out, you can attach them with a thread.
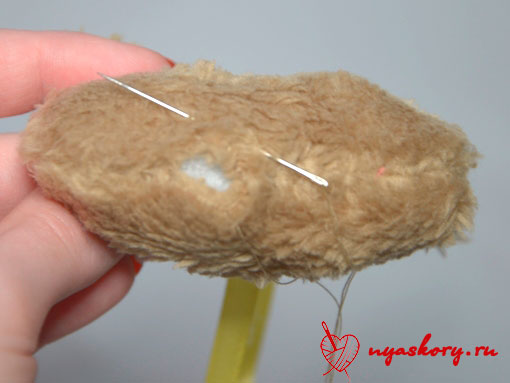
Now attach the second part of the head to our workpiece and sew, leaving a hole for eversion. Turn out the future keychain.

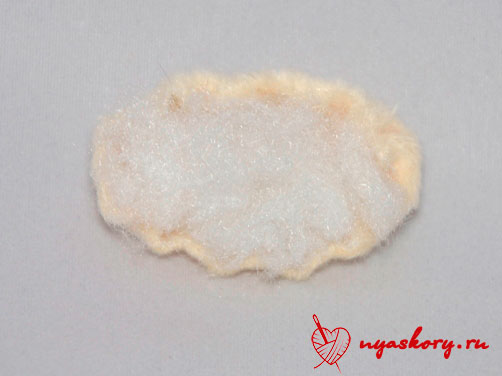
We fill the workpiece Cannon. Stuff tightly, but in moderation. Sew up the opening of the keychain with a blind stitch.
Take the muzzle detail and go over it with a running stitch. Pull off the future face a little (but not much).
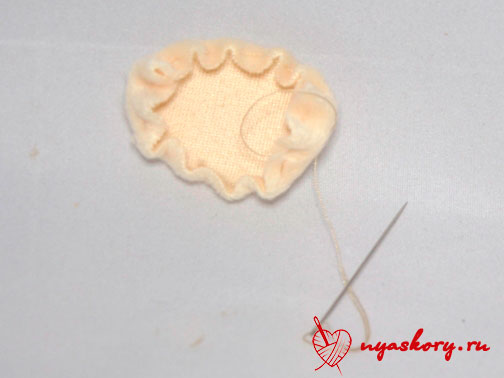
Lightly stuff the muzzle with a padding polyester. Attach the muzzle to the head with a hidden seam. While sewing, gently hold the face so that it does not “run away”.
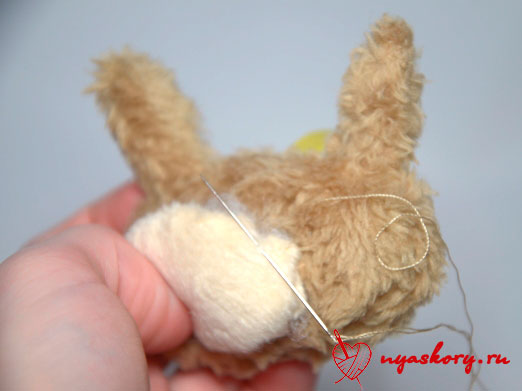
Now sew on the eyes and embroider a small nose on the hare with black thread, making a few stitches between the two eyes for this.
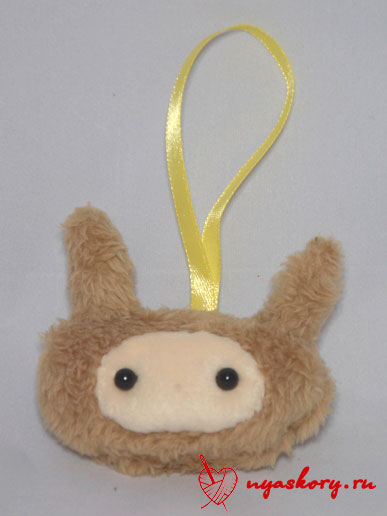
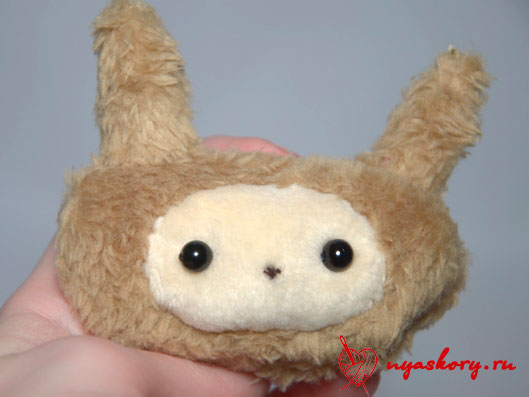
Take a cotton swab and rub it lightly desired color pastel little thing. Then just rub this cotton swab muzzle Fluff in the cheek area. You can also paint the nose area, but now with black pastel.
Keychain is ready
More Keychain Ideas
The matter will not be limited to one Fluff - as promised, 24 more cool ideas for making key chains.
Beaded orange
Enough simple circuit accessible even for beginners. You will need a thin fishing line and beads (for sure, monofilament is also suitable).

Blackies from fur
For them you will need a circle of black fur with a long pile, a little felt and the bindings themselves.

Leather keychains on the bag
A very stylish and simple option, obtained by folding a rectangle with a fringe at the ends into a tube. Inside is a piece of leather with a carabiner. By the way, any key chains of a simple shape from two parts can be made leather.

Cute animals for keys
Absolutely simple forms of such cats allow you to fantasize endlessly with colors, accessories and materials. And yes, you can use any mounts here.

Beads on the go!
You can make a very original accessory from wooden and plastic beads. Two beads, a keychain ring, knitting needles or sticks, paper tape, a brush, acrylic paints and an elastic cord will come in handy. First, color the beads as you wish, leave to dry on the needles. Fasten the elastic on the ring and thread the elastic through both beads, tie a knot at the bottom.

Fantasy on wood
All you need here is a wooden base and acrylic paints. And then only your artistic abilities and imagination.

Interesting key chains made of polymer clay
From it is just a fairy tale to sculpt simple little cuties. Cupcakes, animals, snacks - whatever! For you, as many as 6 ideas from this malleable material.


Great gift option for boyfriend different holidays(including February 23) — two pieces of polymer clay puzzles. Roll out the pancake, cut out the puzzles, making holes for fastening, bake them and paint them.

Made of felt and wool
I want to show you some interesting ideas performance of different animals (and not only with the help of these materials).


Other materials
Something is just not used when they want to make beautiful and cool key chains and more! Look, for example, at these seals - they are made of special beads that melt when ironed. You can find similar ones in the departments for children's creativity.

But even there you have to keep your eyes peeled. More recently, I successfully purchased some elements for making key chains there, I share the links:
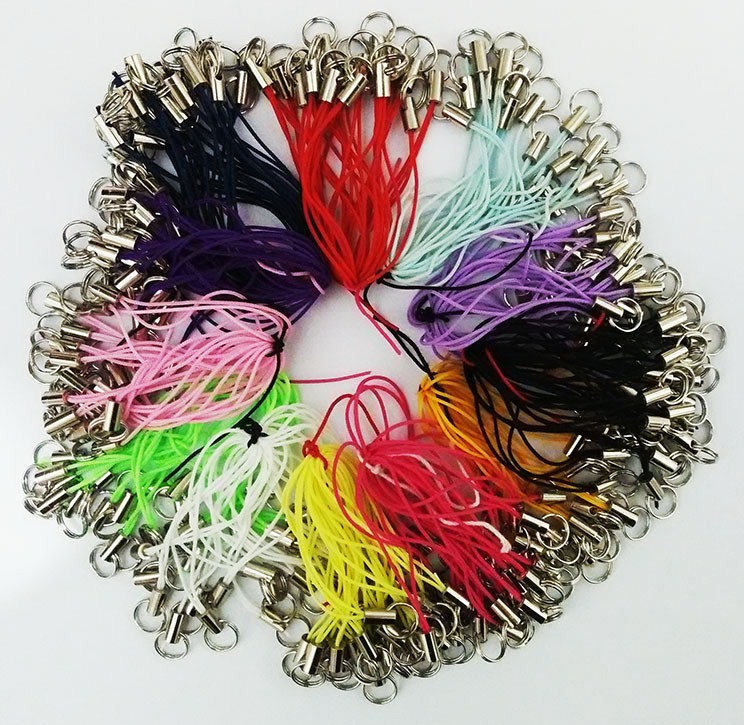
Thread fasteners- perfect for soft accessories.
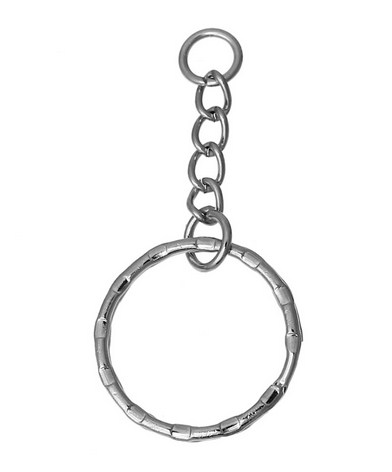
chain rings- good for all options.
Rings with drop-down fasteners and a flat chain - can be used for solid key chains.
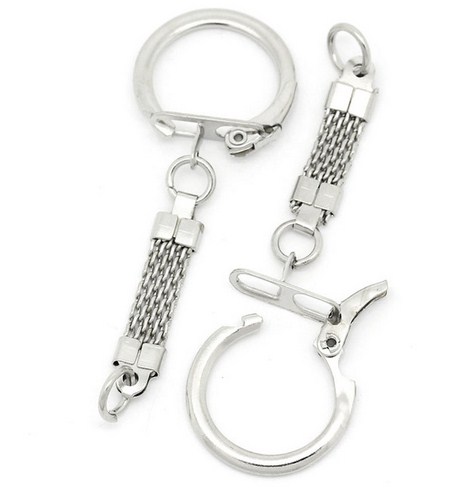
And finally small threaded loops for screwing into solid products (chains are attached to them).
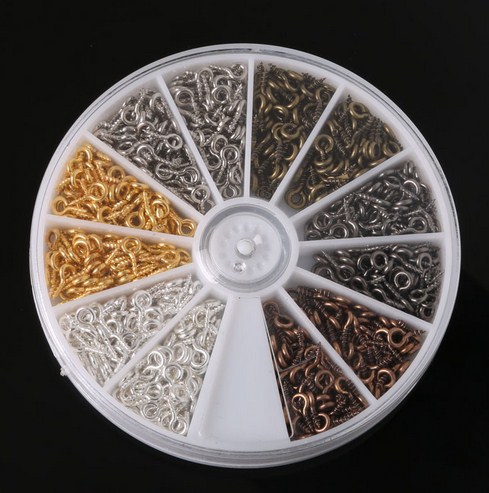
These are the most profitable offers that I myself have used - I can recommend
On this I say goodbye to you! Share your experience and link to interesting material with friends!
Sincerely, Anastasia Skoreva
To stand out from the crowd and make your image more original, it is not at all necessary to buy expensive jewelry. Even from ordinary plastic, you can make beautiful accessories. This does not require special equipment and professional tools - just a few minutes are enough, and you will become the owner of unique badges or key chains that will accompany you everywhere.
To make do-it-yourself badges for a backpack or jeans, as well as original and stylish jewelry for everyday wear, you will need a simple disposable tableware plastic of any shape (for example, packaging from cakes, cookies and other sweets, storage containers food products, empty bottles, etc.).
To beautifully decorate a backpack, jacket, bag or outerwear, you can make key rings in different styles, depending on the desired image: romantic, free, rebellious, etc. Moreover, please note that for the manufacture of plastic key chains in the oven at home, it is advisable to choose the most transparent products with a flat and smooth surface.
Tools and materials


For home "experiments" with plastic, it will be necessary to prepare a basic set of tools in advance:
- scissors or stationery knife;
- hole punch to make holes;
- colored markers for drawing;
- tassels with acrylic paints.
As a future ornament, it is allowed to use any ready-made template with an interesting pattern. It can be an image on paper or even a photo on your phone. You will only have to make a plastic blank of the required size, attach it to the “object” of copying and circle the drawing.
For copying and tracing the outline of images, it is best to use special permanent markers various colors that do not fade. Do not forget to make holes with a hole punch for a rope or chain.


Please note that the pictures that will be used as a stencil should be large, since the size of the made key chains, badges and other homemade jewelry from plastic after "cooking" will decrease at least three times.
What plastic is needed
To make a badge from a plastic container beautiful and original, and most importantly - of high quality, you need to use only smooth surfaces, corrugated ones will not work for this purpose. And, of course, the packaging must be transparent.


If there is no suitable container at hand, use the most common plastic bottles. By the way, to quickly and securely stick pins for badges, use hot glue for this.
The better to color
As already mentioned above, for coloring blanks of icons cut out on the basis of a template or stencil of the desired size, it is best to use not ordinary school felt-tip pens, but permanent markers that cannot be erased with a simple finger movement. Whereas ready-made key chains can be painted with acrylic paints or nail polish.
Temperature and baking time


One of the important stages in the manufacture of do-it-yourself plastic key chains is their obligatory “baking” in the microwave. After all models of badges and key rings are ready, simply transfer them to a baking sheet, which must first be covered with parchment, and send the baking sheet to languish in the oven or microwave oven.
The baking temperature should be about 150-160 degrees, and the “cooking” time should be no more than 2-3 minutes. If you overexpose the icons, they will become brittle and quickly become unusable. After baking plastic jewelry look very presentable and original. As you can see, there is absolutely nothing complicated about how to make a plastic keychain at home.
Plastic container bracelet
From plastic, you can make not only badges with key chains, but also more sophisticated jewelry and jewelry - for example, a wrist bracelet. You just need to cut small pieces rectangular shape(35x45 mm), paint them, and then bake in the oven, as described above.


Before baking, using a hole punch, holes must be made in the corners of the plastic rectangles, and the edges can be rounded. Finished products are connected using ordinary metal jewelry rings.
Plastic bottle bracelets
Crafts from plastic containers can be very different. Badges, key rings and pendants are just a small part of what you can do with your own hands. For example, from plastic bottle, as well as improvised tools and materials (scissors, iron and stationery tape), you can still make original bracelets and rings.
Interested in
SaveYou probably immediately throw them in the trash - plastic packaging in which we bring home cakes, ready-made salads from the supermarket, cookies ... But do not rush to get rid of them. With this trick, you can turn trash into an adorable masterpiece.
Need to:
- plastic box
- scissors
- hole puncher
- colored permanent markers
Let's start:
We take a clean package and cut out the bottom (flat part).
You can choose any picture of your choice, the main thing is that it should be easy to copy. For example, a character from the beloved cartoon about Winnie the Pooh. Keep in mind that at the end the figure will decrease by about 70%, that is, initially the drawing should be large enough. We draw a picture on plastic.

Now we color the picture and use a hole punch to make a hole above the top of the picture. Cut out along the contour, grabbed a small "loop" with a hole on top.

We put the plastic blank on baking paper and "bake" for 2-3 minutes at 165 ° C. The heat will cause the plastic to shrink and curl, but don't worry, it will flatten out again in the end.

After baking, small plastic figures will become not only smooth, but also thick and strong. Now you can make such a charming bracelet out of them.

Once again, the whole process will show the video:
Sets of such plastic blanks with drawings are even sold in some children's stores - children are delighted with such a transformation. But why spend money if everything is at hand? You can choose any patterns, motifs and colors. Now what should have just rotted in a landfill will be pleasing to the eye for a long time to come. Beautiful and eco-friendly!
Working with plastic is a pleasure. There are so many ideas with this material, and it is quite easy to implement them. Take, for example, a keychain for mobile phone or keys. After all, I want it to be interesting and original, and even better fun. You can make a bright caramel on a stick! Let's consider in more detail how to make a plastic keychain.
Materials required for work:
Plastic 5 colors;
- stationery knife;
- plastic lacquer (if not, you can take a glossy nail polish, but only transparent);
- scissors;
- 1 toothpick;
- polyethylene file;
- accessories for a keychain.
Progress.
We cover the working surface with a plastic file, it is convenient to work on it. Cut off plastic with a clerical knife different color in a small piece. By the way, choose bright, colorful shades, then the finished product will be tempting and interesting.

We knead the plastic with our hands (you can work with gloves) until it becomes soft and pliable for modeling. From each color of plastic we make a long thin "sausage".

Then we twist all 5 sausages together and scroll to create a rope.

We scroll this rope so that it becomes a little thinner, you can swing the rope with your fingers a little on the file. We cut off the ends, they are still uneven.

Now we make a beautiful curl from a multi-colored plastic rope. We twist it in a circle, slightly pressing each new row to the previous one.


It turned out such a multi-colored curl.


We pierce the caramel with a special nail-pin. And on the other hand, we attach a stick - half a toothpick.

Now the plastic needs to be baked. We act according to the instructions on the package. In this case, the plastic should be baked in the oven for 20 minutes at a temperature of 110C. Read what is written on your package, as the baking time may vary. Don't forget to line the baking sheet with baking paper. It is advisable to periodically check the product in the oven, if you press lightly with a stick and the plastic is not pressed through, then it is ready.


