How to knit a vest for a child description. We knit different models of a vest for babies and newborns
Knitting is a skill that every woman can master. This is an amazing needlework in which you show your imagination and make unique things.
Women are happy to knit things for themselves, for their relatives and, of course, for children. You always want to see them neat, smart and different from other kids.
In addition to beauty, you also need to take care of the warmth and convenience of products..
The smallest kids need warm and comfortable things. You can independently dress in beautiful wardrobe items and children at the age of 1 year.
At this time, frequent walks in the fresh air are made, and a warm sleeveless vest will be very useful. Currently knitwear very popular, especially fashionable sleeveless jackets, knitted.
Moms have a lot of questions about raising children, including.
Knitting front
At the beginning, the knitting process is absolutely similar to the previous stage. Also cast on 69 stitches and knit elastic the same length as the back.
We begin to decrease the loops. We calculate the average on the front and leave it, do not knit. After that, to the right and left of it, gradually decrease 1 loop (in each row) - for 12 rows. The work can be considered completed at a height of 34-39 centimeters.
We collect details
Take both parts of the future product and sew one seam on the shoulder.
Now we make a border at the future neck: pick up the extreme loops on the knitting needles, those located on the edge of the neckline (do not forget to grab the unknitted one in the middle) and then knit several rows with the selected elastic band (2 * 2 or 1 * 1).
Please note - in each of the rows you must knit two loops together from the missed middle loop of the front.
Finished? You can make the remaining shoulder seam and sew the piping at the neck.
Now it remains to tie only the armholes. At the edge of each of the armholes, take all the loops on the knitting needles and knit them with a similar elastic band (which was used when knitting the back and front). Everything, you can close the loops.
The final stage of work is the connection of the remaining edges of the vest with threads that match the color of the yarn.
We hope that everything worked out for you! We are very happy to be of service.
If you want to know how to crochet such a vest, write in the comments.
How to knit a vest - video
Another way to knit such a vest for a baby, see the following video:

One of the popular hobbies is knitting. Create unique clothes for children, be it a boy or a girl, you can use ready schemes. Any thing, including vests and blouses, is easy to find in a schematic image. If you want to create a unique thing for your child, you can decorate it with drawings, patterns or bright accents in the form of ribbons and lacing.
Vest pattern options
"Pearl" pattern
Despite the simplicity of execution, this pattern gives things an interesting look. The first and second rows are knitted by alternating 2 front and 2 wrong loops. The next two tracks are knitted in the same way, but the arrangement of the broaches must be done in a checkerboard pattern.
Pigtail pattern
Among needlewomen, knitted vests for girls decorated with this pattern are very popular. Schemes of "braids" are very diverse, as can be seen from the figures below. To make the pattern neat, needlework masters advise purchasing a special curved knitting needle for knitting braids. It will also come in handy for creating the “bundles” pattern.
Vests for girls knitted. Schemes and descriptions can be found in the article and in the training videos.
On appearance braids affect the material of the threads.
Double braid:
- The number of loops cast on must be a multiple of 12. In the center of the sequence, 3 folds are counted for the symmetry of the pattern and 2 loops along the edges, the so-called edge yarns. In each line, the final 3 bends are knitted with the wrong side.
- In the first row, the loops are alternately knitted with front and wrong stitch, 3 pieces each.
- The second line is knitted on the wrong side. At the same time, it is necessary to ensure that the purl and facial folds in the upper strips correspond to the location of similar loops in the lower cycles (Fig. 1).
- In the third row, the binding of the pattern is formed in left side. In this work, you will need a knitting needle for knitting braids. First, the front nakida, purl loops are stretched, then the bends are thrown onto a curved knitting needle, the next ones are knitted from the wrong side. Each time 3 loops are taken.
- The seventh cycle is performed symmetrically to the third, with binding to the right side.
- The ninth sequence starts knitting again.

Rice. 1. Scheme of the "braid" pattern
Volume braid:
- 15 loops are cast on knitting needles, including 4 folds for the edge and symmetry.
- In the first, third, seventh and ninth lines, 2 crochets are knitted on the wrong side from the edges and 11 facial loops in the middle.
- In odd sequences, mating is reversed. It is important to ensure that the loops in the lower and upper lines correspond to each other.
- The fifth row is a braid binding. It is formed by pulling 2 purl stitches, then 3 loops are shifted to a secondary knitting needle and knitted with a purl stitch after 3 facial folds, in conclusion there are 3 facial loops, the remaining 2 are knitted with a purl stitch (Fig. 2).
- The eleventh sequence begins with 2-purl and 3-facial yarns. The middle 3 bends are shifted to an additional knitting needle and knit stockinette stitch after 3 purl yarns. The remaining 2 stitches are knitted in stockinette stitch.

Rice. 2. Scheme of a volume braid
Spit "track":
- An even number of stitches are cast on the knitting needle.
- In the middle of the first track, 2 pairs of facial loops are knitted. On both sides, the pattern is knitted in a mirror way. On the right side, a 2 × 2 braid is knitted with a slope to the left, on the left side the slope goes to the right. Symmetrically, they are knitted in 2 loops of the front and back. The front and edge bends close the track.
- The second, fourth and sixth lines are knitted in the same way. In the center of the cycle there are 16 loops connected with the wrong side. 2 facial loops are knitted symmetrically to them. At the end of the row, knit one purl and edge bend.
- The third and fifth rows are knitted similarly to the first with a decrease in the number of bends by 4 pairs.
Pattern "harnesses"
Scheme:
- The number of loops cast on should be divisible by 10. 2 folds are added to the resulting number to form an edge and symmetry.
- At the beginning of the first row, 2 purl, 4 front folds are stretched. The next 2 yarns are removed back onto a curved knitting needle and, after 2 bends, they are knitted from the main row with the front stitch. The cycle ends with 2 purl loops.
- The scheme in fig. 3 shows the knitting algorithm for even rows.
- In the third sequence, all loops are knitted in pairs. The first and last two pairs must be knitted on the wrong side, then in stockinette stitch on the right edge and a mirror pattern on the left end. The fifth and sixth loops are removed back onto the auxiliary knitting needle. After 2 front stitches, the removed loops are also knitted with the front stitch.
- In the fifth line, the first 4 pairs are knitted in the following algorithm: 2 purl loops, the next 2 loops are removed, 2 front loops, loops from an additional knitting needle are knitted with front stitch. The final 3 pairs of bends are divided into 4 facial and 2 purl loops.
- From the seventh cycle, the pattern is repeated from the first sequence.

Rice. 3. Scheme of the pattern "plaits"
"Cell" or "honeycomb" pattern
Scheme:
- An even number of loops, a multiple of 4, is cast on the knitting needles. 2 edge folds and a loop are added to them to form the symmetry of the pattern.
- The first row is the alternation of the front and 3 purl. Before the edge bend, 1 loop should remain, which should be stretched with the front surface.
- The scheme of the second cycle mirrors the pattern of the first row.
- The third sequence is framed at both ends with an edge stitch. After the front bend, 3 loops are removed. In this order, the entire strip is knitted.
- Fourth stripe: edge bend, alternation of 1 purl loop and 3 front loops, edge yarn over.
- Knitting 3 and 4 cycles is repeated from 5 to 10 rows.
- The eleventh line is knitted as follows: edge bend, 2 purl yarns, 4 broaches, 1 front loop and 3 purl yarns. Alternate to the end of the track and close it with 2 purl loops and 1 edge bend.
- In the twelfth strip, 1 hem broach, 2 purl stitches, alternating 1 purl loop and 3 facial yarns are knitted.
- In the thirteenth sequence, the edge bend continues the removal of 2 yarns. The pattern continues the alternation of 1 purl loop, after which 3 stitches are removed.
- In the fourteenth line, the edge broach is followed by a pair of loops connected with the front surface. After that, the scheme continues with the alternation of the purl loop and 3 front stitches. At the end of the track, 2 facial broaches should be tied and the edge bend should be closed.
- 15 to 20 cycles are stretched similarly to the 13th and 14th row.
simple vest
For a girl of 4-5 years old, you will need 350 g of yarn of the selected color. For a warm version, it is recommended to take threads containing up to 50% wool in the composition. For a lightweight version, cotton yarn is suitable.
The back and the front side to the neckline are knitted identically in two different parts. 90 loops are cast on knitting needles, which are knitted with an elastic band 2 × 2. At a height of 5 cm, the cycles are knitted with a garter stitch.
To round the neck from the back at a height of 55 cm, the middle 27 loops are closed, and the remaining tracks are knitted separately. They are closed as follows: 1 time 3 crochets, 2 times 2 folds, 1 time 1 broach. At a height of 60 cm, all loops are closed. To create a V - shaped neckline, the middle bend is closed in front at a height of 48 cm from the bottom edge.
Hooded vest
The model is suitable for beginner needlewomen. The vest is made in garter stitch. The edges of the product can be made in a contrasting color. Based on size 2 summer baby you need to take 150 g of yarn of the main color and 50 g of thread for tying the contours.

Rice. 4. Pattern of a vest with a hood
Each part of the vest is knitted separately, as shown in fig. 4. The number of loops is calculated on the average size of a child of 3 years. To obtain armholes on the back and side zones, after 20-22 cm from the first strip, 2 bends are closed on both sides and 3 loops are removed in each 2nd cycle. After 32-34 cm, all bends are closed.
To make a cutout for buttons, you need to step back from the side edge of the 3rd track and stretch 2 crochets together with the front surface. In the purl row, the yarn over should be knitted with the front stitch. The first armhole should be placed at a height of 2-3 cm from the bottom line, subsequent armholes at a distance of 6 cycles from each other.
To assemble the parts, they must be moistened, slightly stretched and allowed to dry. For slats around the edges, tie a strip 1 cm wide in garter stitch. Details stitch mattress seam.
Openwork vest knitting
The size of the knitted vest is designed for a girl 6-7 years old. For the back, you need to dial 95-100 loops on the knitting needles and knit them according to the pattern of the selected openwork pattern. At a height of 30-32 cm, close the middle 20 loops to form the neck. Further on every second sequence you need to close 2-3 loops from the center.
At a height of 35 cm close the remaining row. The sides of the jacket are knitted in the same way. The neck level starts from 25 cm and 4 broaches are closed in every second strip. To create a tapered sleeve, in every second cycle, 1 yarn is added on both sides (Fig. 5).

Rice. 5. Vest with sleeves
Pattern option number 1.
Description:
- The number of loops must be a multiple of 16.
- The first sequence is knitted as follows: knit 6, yarn over, knit 2 together, yarn over, continue alternating to the end of the row.
- Even tracks need to be knitted with purl loops.
- Odd lines are knitted similarly to the first cycle, reducing the number of first facial loops by one unit (Fig. 6).

Rice. 6. Scheme of an openwork pattern
Pattern option number 2.
Description:
- The number of loops is dialed in multiples of 16.
- The first and seventh strips are knitted by alternating 1 crochet and 1 broach. After repeating it 4 times, knit 8 purl loops.
- The second, sixth and eighth cycles are knitted with 8 knit and 8 purl yarns.
- In the third and fifth rows, yarn over and broach are knitted alternately 4 times, then 8 facial loops.
- The fourth and twelfth lines are completely knitted with the wrong side.
- The ninth, eleventh and fifteenth tracks begin with 8 purl loops, then the alternation of yarn over and 2 front loops on the right is knitted.
- The tenth, fourteenth and sixteenth row consists of alternately knitting 8 purl and 8 facial loops.
- The thirteenth sequence starts with 8 facial loops, then knits a crochet and 2 facial folds in turn (Fig. 7).

Rice. 7. Scheme of an openwork pattern
Vest - poncho
The vest is a one-piece figure with a hole for the neckline in the center. It can be connected in the form of a trapezoid, circle, triangle or rectangle. The advantage of the model is the almost complete absence of seams. The scheme in fig. 8 is presented in the form of a trapezoid for a girl adolescence. For work, it is recommended to use circular knitting needles.
Description:
- The first line is recruited from 184 loops. IN simple version The poncho vest is knitted in garter stitch. Experienced craftswomen can decorate the product using patterns. In this case, 2 extreme loops are knitted in garter stitch, and the remaining 178 according to the scheme of the selected pattern.
- Starting from the neck, 44 folds are closed in the middle of the strip. Then each side is knitted separately.
- To round the vest in the shoulder area, in every second cycle, the loops are closed according to the scheme 1x3, 1x2, 1x1 (Fig. 8).
- After reaching the desired length, an elastic band is knitted.

Rice. 8. Scheme of a poncho vest
Vest with ornament
You can choose a rather simple vest model: a yoke with thin straps without fasteners. The basis is recommended to knit on circular needles so that the product turns out without seams. For a waistcoat with a diamond pattern, you will need red, yellow, blue and black yarn. The pattern is knitted with front crochets on the front side, purl folds on the inside according to the scheme in fig. 9.
The broaches should be crossed from the wrong side.
The straps are knitted separately in garter stitch. If you have the skill, they can be attached to the vest with a hook.

Rice. 9. Scheme of the ornament "rhombuses"
Raglan sleeve vest
This vest is knitted in one piece. The size in the diagram (Fig. 10) is calculated for a girl of 12 years old.
Description:
- 96 loops are typed on knitting needles.
- From the bottom of the 8 rows are knitted in a garter way.
- In the following cycles, the knitting looks like this: 8 loops of garter stitch, 8 facial loops, 2 raglans with the wrong side, 16 loops of the sleeve with knitting, 2 wrong side raglans, 24 front broaches (back), 2 raglans with wrong knitting, 16 front loops, 2 raglans , 8 front and 8 loops of garter stitch.
- In each strip of raglan, you need to add one crochet on each side. Having connected 17 cm of raglan, it is necessary to knit 8 loops for each strap, 74 bends for the back, 62 loops for the sleeves and 33 yarn for the shelves.
- After that, the sleeves are laid on additional knitting needles, and the back and side parts are knitted in a single fabric: 9 cm is a pattern and 2 cm is a garter stitch.
- The sleeves are knitted for another 4 cm. In the last row, 4 loops are knitted with front stitch, 2 folds together. This alternation continues until the end of the line. The edges are sewn with a regular seam.

Rice. 10. Vest with raglan sleeves
Bolero
The size of the vest in fig. 11 is presented for a girl 7-8 years old.
Description:
- The first cycle of the back is dialed from 70 loops. The vest is knitted in garter stitch. After 5 cm, according to the scheme, 7 loops for armholes are closed on both sides. After 15 cm, 18 loops are closed in the middle to form the neck. Then both sides are knitted separately. In every second line closes 1 time for 2 crochets and 2 times for 1 loop. Having knitted 15 cm of the armhole, the surface should be closed.
- The left and right shelves are knitted symmetrically to each other. There are 30 stitches on the needles. In each 4 rows, 1 yarn is added 2 times. After reaching a height of 6 cm in each 2 strip, it is necessary to decrease 1 loop 17 times. At the same time, at a height of 5 cm, 7 loops for the armhole are closed. At 15 cm, the remaining bends are closed.
- For sleeves, 60 loops are typed on the knitting needles. At a height of 5 cm, to draw an armhole, in every 2 cycles, 7 loops are removed from both sides 1 time and 1 broach 16 times.
- Before stitching the pattern, the parts must be moistened and slightly stretched.

Rice. 11. Pattern of a classic bolero
Bat sleeve vest
Model of a knitted vest for a girl with a sleeve " bat"will become not only a warm thing, but also a beautiful addition to the dress, both for the baby and for the teenager. The product consists of 2 parts. On fig. 12 shows a diagram of the left half of the vest, identical to the right side.
Description:
- On knitting needles for circular knitting, 190 loops are typed. For 6 tracks, the loops are knitted with front stitch. After that, you can continue knitting with the selected pattern.
- For the formation of corners in every third sequence, 1 yarn is added. Continue like this for 20-24 cycles.
- Having connected 20 cm, bends should be reduced. For this, 3 broaches are closed in each 2 lane.
- The neck is formed by closing 1 crochet in every second line.
- The right side is knitted in the same way.

Rice. 12. Pattern of the left side of the bat vest
In cold weather, a knitted vest for a girl is an irreplaceable thing. Depending on the chosen model, it goes well with trousers, a skirt and even a dress. To date, the choice of patterns and patterns for knitted vests for girls is very large. You can knit a simple vest with an ornament for school or an openwork bolero for a holiday. Patterns and drawings will add an unusual look to the product.
Video: knitted vests for girls. Schemes and description
How to knit a simple vest, see the video clip:
Beautiful vest for girls:
Warm vest for 2 years knitted embossed pattern, an indispensable element in children's wardrobe. On a walk or at home, he will perfectly protect the baby from the cold and at the same time will not hinder movement, which is very important for a little fidget. In order for the vest to retain heat well, it is better to choose woolen or half-woolen children's yarn. She will not "bite" and will easily endure frequent washing.
For a vest for 2 years you will need:
- 200 g yarn of medium thickness,
- knitting needles No. 4.5
- and detachable "lightning" 35 cm long.
The product combines two patterns: "rice" and fantasy. The first should be knitted, alternating 1 persons. p, 1 out. n. In the purl rows, the facial ones must be knitted with the purl, and the purl with the facial ones.
A fantasy pattern in the form of embossed rhombuses is performed according to the scheme:

The calculation of the loops is given for a density of 16 p. x 20 p. = 10 x 10 cm.
The vest for 2 years with knitting needles consists of three parts: a back and two symmetrical shelves.

Back
For the back, cast on 53 sts. Work the first 4 rows with a “rice” pattern. It will perfectly replace the traditional rubber band and will not allow the fabric to curl.

Then move on to the fantasy pattern. Knit should be even, without changing the number of loops in the work.

At a height of 22 cm from the typesetting edge, reductions must be made to form armholes. In order for the edge to turn out to be rounded, you need to close 1 time 3 sts on each side, 2 times 1 st.

As a result, 43 sts will remain in the work. They should be continued to knit evenly with a fantasy pattern. When the depth of the armhole reaches 14 cm, all the loops must be transferred to the auxiliary knitting needle and this part should be set aside.
Right and left shelves
Dial 27 p. The shelf is knitted together with the bar, the loops of which are included in the calculation. As on the back, the bottom of the shelf is made with a “rice” pattern. After 4 rows, on the first three loops (not counting the hem), you should continue the “rice” pattern, and on the remaining loops, switch to a fantasy pattern.

The height and decrease pattern for the armhole on the shelf are exactly the same as on the back. Close the loops only on the left side. Further work must be continued until the 30th cm. Here you need to form a cutout for the neck.

From the right edge, close 1 time 5 p., 2 times 2 p., 1 time 1 p. 12 p. will remain on the needle.

When the total length of the shelf is 36 cm, the part must be set aside. After that, in mirror image, you need to connect the left shelf. On it, the strap loops and the neckline should be located on the left edge, and the armhole on the right.

Ruffle, collar, armhole, zipper
Before tying the stand-up collar, you should connect the open shoulder loops on the back and shelves (12 sts on each part). For this, a vertical loop-to-loop seam is best suited. It is practically invisible on the finished product, which avoids a rough thickening on the shoulder. The remaining 18 sts of the back should be transferred again to the knitting needles No. 4.5.

Along the edge of the neckline right shelf dial 66 p. (24 from each shelf and 18 p. back).

Knit with a rice pattern for 8 cm and close without tightening.

Pick up loops along the edge of the armhole and knit 2 rows with a “rice” pattern. Then close all the loops in one step.

Run side seams.

Sew the "zipper" to the straps.

Turn the outer edge of the collar inward and pin it to the neckline.

A vest for 2 years with knitting needles is ready. It remains to wash and dry on a towel.


Like the product and want to order the same from the author? Write to us.
More interesting:
See also:
How to change an adult sweater into a children's cardigan
If you have a sweater, for some reason you don't need it, new or well-preserved, master class...
Beret for girls (crochet)
Maria Nikitina crocheted such a beret for a girl. With the advent of autumn, we all remember the need ...
Light and simple knitted jumper
Delicate and airy jumpers have become very fashionable. And so we will knit such a soft and light jumper with...
Baby panama (crochet)
We continue the theme of hats for the summer. 2 MK - a classic panama for a girl and a cartoon "minion". ...
Knitted vest (raglan)
Sofyanchuk Marina knitted herself such a vest (knitting needles) with raglan sleeves and sent a description of the work...
Appliques for girls, crochet
Knitted appliqués look very nice on clothes. They can also be used as brooches....
How to crochet a swimsuit
Swimsuit, crochet Summer is just around the corner, and Svetlana offers to create a rather original...
Knitted vest for a boy (knitting needles)
Knitted vest for a boy (knitting needles) A charming knitted vest for a baby will make his image stylish...
Knitting is an ancient craft that has long served not only for practical purposes. Even today it has not lost its value. After all, every woman can show her imagination, ingenuity and skill here. To tie original thing for yourself or your child, even beginner needlewomen can do it. And if you wish, you can improve your skills, develop your skills and learn how to create real masterpieces.
For every woman, the greatest pleasure is knitting for her child. The best knitted things are created by mothers and grandmothers for their babies. After all, it is very important that children's clothes are not only beautiful, but also warm and comfortable.
In addition, related products can grow with your children from year to year. Plus, knitwear never goes out of style. Their diversity is great. These are sweaters, sleeveless jackets, dresses, suits, sundresses, tunics, hats, mittens. On our site you will find patterns for every taste and age, as well as models for beginner needlewomen. Knitting a sleeveless jacket is easy!
Thing in the wardrobe of a child from a year and older
Every mother knows that a sleeveless jacket is a necessary element of every child's wardrobe. She'll come in handy and cool summer evenings, And cold winter, and in the off-season, you simply cannot do without it. After all, sometimes you don’t know how to dress your baby so that it’s neither hot nor cold, and most importantly comfortable. In addition, there are never many sleeveless jackets, for every season you can find the necessary schemes on our website.
An excellent pattern for beginners in knitting vests for children, see below:


Also, knitted sleeveless jackets are perfect for schoolchildren's wardrobe. The assortment in stores is not particularly pleasing with a variety of models school uniform especially for boys. With the help of a vest, you can not only provide for a child warm clothes, but also to emphasize his individuality, to distinguish from the gray mass of the same type of clothing. On our site you will always find a lot of original models knitted vests. Our collections are constantly updated, do not miss the new items.
Before starting knitting, especially beginner craftswomen, you need to familiarize yourself with some of the nuances. We suggest starting your creativity with the creation of a children's sleeveless jacket with knitting needles.
It consists of only two fabrics, which are then sewn together and for beginner knitters it will be easy.
And after you get a vest, you can move on to knitting more complex things.


1. To knit a vest for children, we need two sets of knitting needles of different thicknesses, for example, No. 4 and No. 6. With thinner knitting needles, you need to knit an elastic band, and with thicker knitting needles, the main fabric of the product. Next, you need to take measurements from the person for whom the sleeveless jacket will be knitted. Based on the desired length of the thing, we take measurements of the circumference of the hips, waist or chest. We divide the result in half and get the width of our product. For example, we have 60 hips, which means that the width of the canvas should be 30 centimeters. According to this indicator and the thickness of the knitting needles, we determine the number of loops that need to be typed on the knitting needles for knitting one shelf of the sleeveless jacket.


2. Next, we knit a sample of gum. To do this, it is enough to tie a piece of 10 by 10 centimeters. We measure the width of the resulting sample. For example, in one centimeter there are 3 loops. We multiply the required width of the canvas (we have 30 centimeters) by three. We get 90 loops that we need to dial. We add 2 edge loops to them, for a total of 92 loops.
3. We collect loops on 2 knitting needles folded together. Then we take out one of them and start knitting an elastic band. To do this, we alternately knit 2 facial and 2 purl loops, about 10 centimeters high. In the last row, you need to switch to knitting needles of a larger thickness.


4. It is necessary to knit a shelf from the desired length of the product. It is recognized by a simple measurement of the person for whom you are knitting a sleeveless jacket. You also need to measure the length from the hip to the armhole and from the armhole to the shoulder. Based on these dimensions, the first shelf is knitted, usually the back. For the armhole, we begin to close the loops evenly on each side of the shelf, 1-2 loops in each row, in the amount of 6-7 loops. Next, we knit the product according to the size to the shoulder. We close the row and the first shelf is ready.
5. The front of the sleeveless jacket for children is also knitted. The difficulty lies only in the fact that it needs to make a neck. Its shape and depth must be determined in advance. For a beginner knitter, the easiest way is to make a v-neck. Having measured the length from the hips to the beginning of the neck in advance, we carefully monitor so as not to miss the right place.


6. Having reached it, we divide the knitting into two halves, marking it with a pin. We knit one half, gradually closing one loop in each front row. Having tied up to the shoulder, we close the last row. We put the loop remaining on the pin on the knitting needle, tie a thread from the skein to it and knit it in the same way as the right half. Our product is almost ready.
7. Next, the two halves are recommended to be washed and steamed, then carefully sewn. To finish the product, it is necessary to process the armhole and the neck. To do this, you need to tie 4-5 centimeters of elastic, having previously measured the width and sew to their places.

This was the easiest version of knitting a sleeveless jacket for only beginner needlewomen. Subsequently, you can diversify your work with interesting patterns, intricate cutouts and your own original styles. They will delight you and all your loved ones.
Watch a video about knitting vests for children.
Here is another scheme to knit a children's sleeveless jacket from a year and older:


 Vest for girls
 Knitting a vest for your baby is a pleasure. The choice of threads today is very large, and the assortment and variety of colors are unlikely to leave anyone indifferent. Many models are quite easy to perform. Delight your kids with another soft, warm, bright new thing.


Children's knitted vest for beginners, a diagram with a description
The most simple model, made in garter stitch. There are no intricate patterns that complicate the work. It looks equally good in both pastel and bright colors.

 Rear end
After we have typed loops on knitting needles 3.5, we knit 3 cm of gum (10 rows, with a pattern of 1 lp for 1 ip). In the 10th row, we make the transition from knitting needle 3.5 to knitting needle 4, we knit the fabric.
When the canvas reaches in length for No. 1 - 20, for No. 2 - 23, for No. 3 - 26, for No. 4 - 29, for No. 5 - 32, for No. 6 - 35 cm, we begin to form the armhole.

When making cuts, you will knit for No. 1 - 4 cm, for No. 2 - 5 cm, for No. 3 - 6 cm, for No. 4 - 6 cm, for No. 5 - 7 cm, for No. 6 - 8 cm. loops will remain, for No. 1 - 43, for No. 2 - 47, for No. 3 - 51, for No. 4 - 55, for No. 5 - 61, for No. 6 - 65. We knit to the beginning of the neck and side sections of the shoulder, for No. 1 - 14 cm, for No. 2 - 15 cm, for No. 3 - 16 cm, for No. 4 - 17 cm, for No. 5 - 18 cm, for No. 6 - 19 cm.
Now you need to divide the number of loops of the front part into two halves, start building round shape neck . We cut in the middle of the loop, for No. 1 - 15, for No. 2 - 17, for No. 3 - 19, for No. 4 - 21, for No. 5 - 23, for No. 6 - 25. Through a row on both sides inside we cut twice three loops, through a row once two loops.

From the beginning of the armhole to the end of the reduction of the loops should be knitted, for No. 1 - 19 cm, for No. 2 - 17 cm, for No. 3 - 18 cm, for No. 4 - 19 cm, for No. 5 - 20 cm, for No. 6 - 21 cm.
Front end
Before the product, knits similarly to the back until deep neck molding . To do this, you need to tie from the armhole for No. 1 - 4 cm, for No. 2 - 5 cm, for No. 3 - 6 cm, for No. 4 - 6 cm, for No. 5 - 7 cm, for No. 6 - 8 cm. Then along in the middle, cut the stitches for No. 1 - 5, for No. 2 - 7, for No. 3 - 9, for No. 4 - 11, for No. 5 - 13, for No. 6 - 15. In the middle on both sides you need to cut for a smooth cut after 1 p. 3 p., after 1 p. 2 p., twice more 1 p. Further in the next 4 p. 1 more p each. We measure the height of the front and the bevels along the back of the product, similarly we shorten the loops for the shoulder bevels.
Assembly . Sew the two parts with a neat seam, and then proceed to tying the neck and armholes.
Tying an armhole with a knitting needle 3.5
Option 1. You can perform tying by lifting the loops for No. 1 - 71, for No. 2 - 75, for No. 3 - 81, for No. 4 - 85, for No. 5 - 91, for No. 6 - 95. Tie two cm of elastic. The second armhole is tied in the same way as the first. The loops don't close very tightly.
Neck tying . Raise along the edge of the loop, for No. 1 - 101, for No. 2 - 103, for No. 3 - 105, for No. 4 - 113, for No. 5 - 115, for No. 6 -117.
Option 2
Dial the same number of loops. Tie 3 cm elastic, followed by a tight closure. Connect the finished planochki with the main product with a neat seam.
How to tie the armhole of a baby vest
The armhole is an important part of any product, whether it is a vest or a blouse. It initially needs to be done correctly, then the whole product will look symmetrical, will not cause discomfort while wearing. Initially, calculate the width of the triangle in which the loops should be reduced.

This calculation is for an adult vest. For a baby vest, you need to use the following proportions to close the loops: 4,2,2,1,1.
After the front and back shelves are connected, the product is sewn along the side seams. Now you can start tying the armhole. Dial on it the number of loops that will correspond to each row. To do this, you need to pick up the loop from the row and put it on the knitting needle. Pre-calculate how many rows along the armhole on the front and back shelves.

After all the loops are raised, start knitting. The armhole is tied in the same way as the main elastic band. If you have it made viscous 2 persons. on 2 out., so in the same way and tie the armhole. You can tie it in a circle, or in a straight line, then sew it.

The width of the elastic depends on personal preference. Armhole tying standards have not been established.

When the required number of rows is connected, proceed to the final step, closing the loops.

When closing the loops, you do not need to tighten them strongly. The last closing row forms the finished product, and if it is too tight, the work will be spoiled. Will have to untie and bandage again.

Children's knitted vests for girls, with a description
Option 1
Original vest for a little fashionista. For such a model, warm pastel shades are well suited. It is comfortable to wear, does not hinder the movements of the baby. Pretty simple knitting, which even the most inexperienced mom can handle. The density of knitting depends on the volume of knitting needles and thread. The thicker you pick up the thread, the faster you finish the job, the vest will be plump and warm.


Option 2
Vest for a teenage girl "Emerald Superiority". Decorated with voluminous braids and English elastic. They are perfectly combined with each other, complete the image of a young fashionista.

It is better to knit with a needle of medium thickness, ideally with the 5th number. Threads need to be selected bright, the pattern on them stands out well, looks rich. This model, according to the description provided, is designed for a girl of 7 years. 
Children's knitted vests for boys, with a description
Option 1
Vest for a boy for the age of 4-5 years. It is better to perform in light, warm colors, then the small pattern will be clearly visible. For knitting, you need to select a thread of medium density and knitting needles No. 5. This model is decorated with a zipper, work of medium complexity, stand-up collar and armhole with an elastic band no more than 2 cm wide.
Also, you will need to complete two decorative elements, they are necessary to imitate pockets, sew on two buttons. Detachable zipper for the provided model, 35 cm long.

Before starting work, calculate the knitting density by first tying a small piece of 10 by 10 cm. Then you can make the correct calculation of the loops and not tie up the elastic several times. The model provided has a knitting density of 10 by 10 cm = 16 loops for 20 rows. 
The pattern shifts in each row, so look carefully at the diagram.
For the back you need to dial 53 loops. When the product reaches 22 cm, start working on the armhole. Decrease 1 stitch in every 2 rows, repeat 5 times. After reduction, the number of stitches on the back will be 43 stitches.
When the height of the knitted fabric is 33 cm, begin to cut the loops to form the depth of the cut. To do this, on the front of the product, count 14 loops on the sides, 15 loops should remain in the middle, cut them in one row. You will have 2 parts of the back shelf, knit the face further along the pattern. Wrong side as the loops look. Inside the cutout on the front side, cut another st, after 1 p. 2 more. Shoulder bevels should have 12 loops each, and the height of the shelf is 36 cm, close all the remaining sts in one p.
For the front shelves, cast on 27 loops. Further, following the scheme, you need to tie 22 cm, proceed to the formation of the armhole, it closes identically to the back shelf. When the canvas reaches a length of 30 cm, proceed to the formation of the neck. To do this, reduce 5 loops from the front side, after another 5 loops in a row, after another row the number of reduced loops is reduced to two, repeat again, then 1 loop twice. Close 12 shoulder loops in one row when the length of the finished shelf reaches 36 cm.
For pockets cast on 15 loops and knit 6 rows. Attach the finished strips to the product, sew on the buttons.
Collect items . Sew all seams neatly together.
Neck. Collect on circular needles all the loops from each p. on the armhole. Tie 8 cm, close the p. So that it does not stretch in the sock, when tying the last 4 cm, you can add a thin elastic thread of the same color to the thread. You need to tie it tighter than the entire vest, the last row also closes tightly, but does not tighten.
Armhole. Collect loops from each row of the armhole on the knitting needle. Tie 2-3 cm and close the loops. Tying the armhole is carried out tightly.
Lightning. Sew the zipper to the side seams of the front shelves. Ideally, the canvas should go over the zipper a little.
Option 2
Warm vest for a boy aged 7-8, decorated with a pigtail and garter stitch stripes. The pattern is clearly visible in light-colored yarn. The scheme is simple, even mothers who have never knitted before will cope with it.

Before starting work, do not forget about the density of knitting.


Sew the vest on the sides. On the neck of the front and back shelves, collect the loops from each row on the knitting needles. You can adjust the height of the band as you wish. Before closing, we close the loops tightly so that the product does not stretch much. To knit an armhole, also collect loops from each row, the total number for one armhole is 87. Tie an elastic band 3-5 cm. The last row closes tightly.
Do not forget to moisten the finished product. Dry only in a horizontal position.
Knitted vest for children with a hood, a diagram with a description
Kids love hooded clothes. Therefore, by tying such a vest with your own hands, you will definitely please your baby. The model is quite simple, applying the proposed scheme is unlikely to cause difficulties during knitting.

Before starting work, calculate the density of your knitting. This is a necessary condition, otherwise you will not be able to get the right size according to this scheme and description, use needle number 4.

This scheme is designed for the same number of loops for the front and back. Do not forget that the number of loops for the front must be divided by gender:
The pattern for the back and front of the product is the same. The height of the armhole is identical for the entire product at a height for No. 1 - 21.5 cm, for No. 2 - 23.5 cm, for No. 3 - 26 cm.


For the front , from the beginning of the armhole we knit for No. 1 - 10 cm, for No. 2 - 12.5 cm, for No. 3 - 13.5 cm, according to the pattern. From the inside half of the front shelf we begin to form smooth transition for the neck . To do this, cut along the inner edge of the loop:
- for No. 1 - first four, through a row twice in two, three times in one,
- for number 2 - first four, through a row twice in two, three times one,
- for No. 3 - first five, after a row two, four times one at a time;
The neck height should be 3.5 cm. The rest of the loops for No. 1 - 13, for No. 2 - 13, for No. 3 - 14, we knit to the total length of the front shelf for No. 1 - 31.5 cm, for No. 2 - 35 cm , for No. 3 - 36.5 cm. Close the loops in one row.
Assembling the vest . Gather the sides of the product with a neat seam. Sew a detachable zipper on the front shelves.
Hood. On the perimeter of the neck, pick up one loop from each row on the needle number 4. It is better to knit on circular needles. At a height of 20 cm, we begin to cut the loops for all sizes equally. To do this, divide the number of loops by sex, cut through the middle row twice three into one, seven times four into one, two times three into one. Connect the remaining loops with a knitting needle.
It is not necessary to wash the product to align the seams. Humidify it with a spray bottle. Lay out on a towel to dry. You can walk over the product with a steam iron, the seams will even out. Just do not touch the knitted fabric, spoil the work.
Crochet children's vest, a diagram with a description
Crocheting requires skill. It will be quite difficult to cope with the first time without experience. Therefore, if you want to knit such an openwork vest, practice first on a small sample.


Knitted children's vest, a diagram with a description
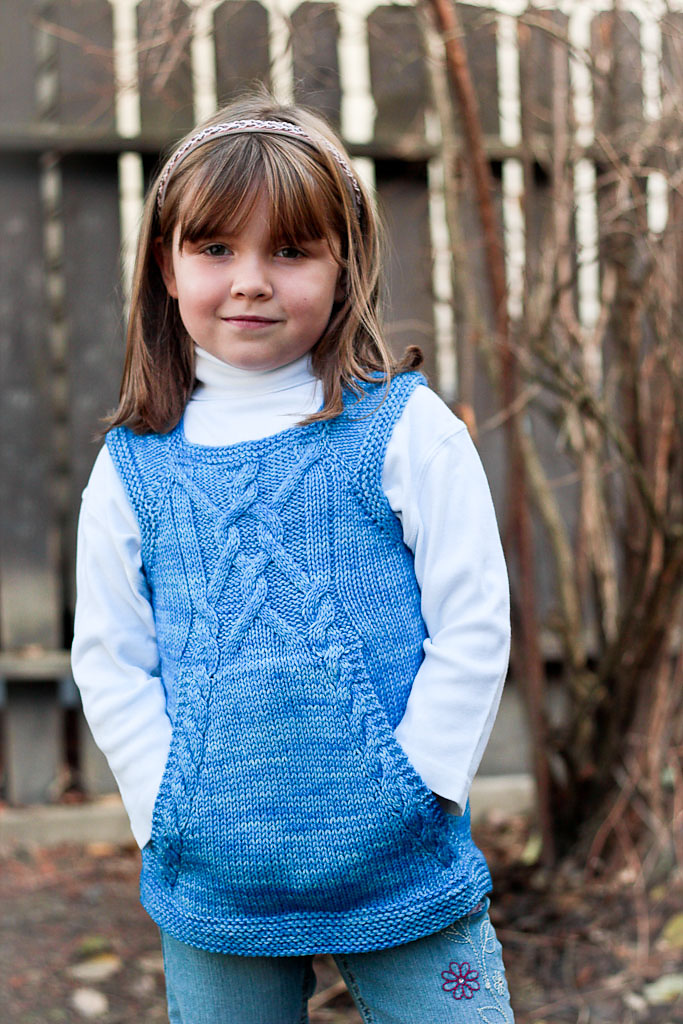
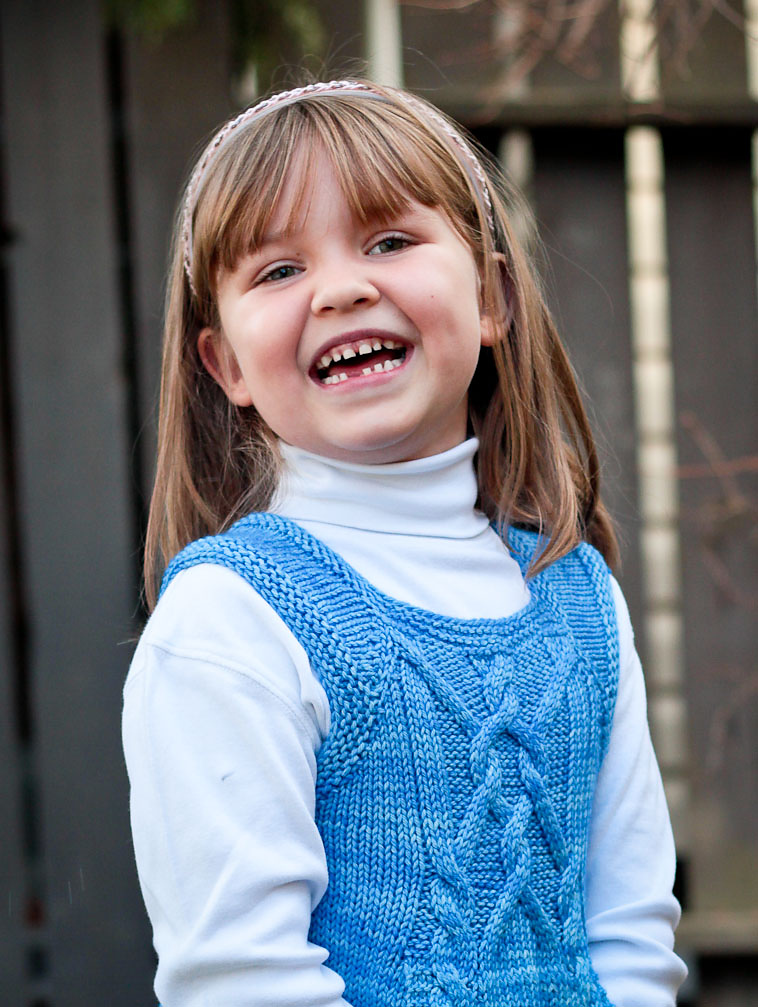
Warm elongated vest for girls 2-3 years old. The perfect addition to jeans. She covers the ass, does not hinder the movements of the baby.


Children's vest with buttons, a diagram with a description
Excellent functional item with buttons. Most babies do not like to dress up, and blouses and vests worn over the head cause tears and tantrums. Mom needs to take care of her daughter’s wardrobe in advance, knit a comfortable buttoned vest.
The model is very simple, straight, does not require the formation of an armhole. On the front shelf, you need to tie two strips on which buttons will be sewn.


