Decoupage of foam plastic toys. Ideas for decoupage of Christmas balls with your own hands
In preparation for the new year, I began to disassemble the toys for the Christmas tree. Some toys are no longer suitable, others are a little outdated, but I keep them as a rarity, and now I can update and decorate some myself. I found Christmas balls that are absolutely faceless and small in size and decided decorate in different ways.
Went from simple to complex.
First ball decided to do it with the help of technology direct decoupage.
For this I needed:
- Nail polish remover, cloth
- Foam rubber sponge and stationery clip
- brushes
- PVA glue
- white paint
- Two-layer napkin with bullfinches
- Acrylic lacquer
The ball was degreased with a napkin and nail polish remover. I took the liquid without acetone, since the ball is plastic (Photo 1).

For convenience, when staining, I put the ball on a thin stick. I primed it with white paint and waited for it to dry (Photo 2).

I pasted a small torn fragment on one side of the ball. I applied glue from the center to the edge, if necessary, made tears on the sides so that the napkin fit the ball (Photo 3).

Then on the other side I pasted the same small fragment. I chose such a picture so that it fits on the ball and does not deform much when pasted on a round surface (Photo 4).

After the whole ball was glued and dried, it was varnished (Photo 5).

The first ball is ready (Photo 6).

Second ball decided to do it using .
- Red acrylic paint
- Craquelure varnish
- bituminous varnish
- Three-layer napkin
I degreased the ball in the same way (Photo 7).

Primed with red paint all over. Dried (Photo 8).

I applied craquelure varnish and left it to dry for 15-20 minutes (Photo 9).

The varnish was not dried until completely dry, as stickiness should remain. Inflicted a contrast white paint touching only once in one place (Photo 10).

After some time, cracks appeared (Photo 11). I waited for it to dry completely, and started working after a while. Otherwise, the paint would get wet and smear all the cracks.

I pasted fragments of napkins on one side of the ball, then on the other, and pasted snowflakes between the pictures (Photo 12.13). Dried up.


The whole work was varnished several times (Photo 14).

Dry each layer well. To give the ball an “antique” look, I “stained” it with bituminous varnish a little (Photo 15).

The second ball is ready (Photo 16,17).


Decor of the third ball I decided to do it in style mix media.
Here, in addition to the available materials, tools and decor elements were needed:
- glue gun
- Narrow lace
- Buttons
- fabric flowers
On a pre-skimmed ball, glued lace with glue gun(Photo 18).

I toned the ball with a thin layer of paint, painted over the lace more densely (Photo 19).

I glued the flowers onto the lace with a glue gun (Photo 20), then the buttons in a free order (Photo 21).


I painted the entire composition red again (Photo 22).

Dried well. The final touch was painted with white paint, giving the ball a "snowy" appearance.
The third ball is ready.


Christmas balls turned out different, each is good in its own way:
Like the product and want to order the same from the author? Write to us.
More interesting:
See also:
How to crochet a snowflake
Crochet. Snowflakes For the New Year, as a rule, we decorate our house with snowflakes. They can be made...
Long before the New Year, you can feel the approach magical holiday, if you captivate all household members with preparation for it, and as a manifestation creative imagination we offer to master New Year's decoupage Christmas balls with your own hands.
On sale is a wide range of ready-made Christmas balls in a wide variety of styles. But it is always more pleasant to hear from friends and acquaintances praise and admiration for the exclusive outfit of the forest beauty. Decoupage is a popular type of decoration, which prompted many lovers of originality to make a New Year's outfit using this technique with their own hands.


Step-by-step instructions for decoupage a ball


Decor for beginners is to stick a picture of napkins or thin paper on the surface of the ball. With further processing with paints or other auxiliary means, the toy looks like hand-painted. The starting material is Christmas tree decorations: wooden, plastic and foam.


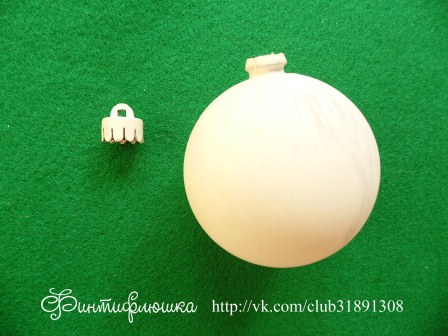
Preparing the ball for decoupage. At the beginning of work, the wire fastener should be removed from the ball, tightly fastened to the rod for convenience. Then, with fine sandpaper, clean the glitter from the toys, and wash off the paint by moistening a cotton pad with nail polish remover. Rinse with water and sand again. After such processing, the adhesion of the pattern and the surface of the ball will be better, since it is more difficult to make decoupage on a perfectly smooth base. Next, you need to degrease the prepared material.

The next stage is the primer, which is the underlying basis for the pictures. To do this, add PVA glue, about 5 ml, to 20-30 ml of white acrylic paint. Apply this composition to the workpiece with a sponge and leave to dry, then repeat the application of the primer.

This is followed directly by the decor of Christmas balls using the decoupage technique. Having picked up a New Year's motive in accordance with the size Christmas ball, cut it out and glue it to the surface. best material in this case, they are napkins in which the selected pattern must be torn off from the top paint layer.
Advice! It is recommended to make incisions on a torn or cut out picture, which will allow the picture to take the shape of a toy and avoid the formation of wrinkles, which must be carefully smoothed out.
For gluing, you can use PVA glue, diluted with water in equal proportions. The drawing is glued in one of two ways: you can attach the image and smear it on top with a soft bristled brush, or apply glue to the surface of the ball, and stick a festive motif to it. In both cases, care is required so as not to tear the picture.

After complete drying, the ball must be opened again acrylic paint to equalize the line between the background and the pasted image. Everyone selects the main color at will and depending on colors drawing.

After drying, the glue may leave rough marks that need to be slightly corrected with sandpaper. The decor at the final stage depends on the imagination. There are enough options: add sparkles, highlight the contours of the image itself with a thin brush and paint, etc. The final touch is applying a glossy varnish in several layers with each completely drying. For greater clarity, we offer a color step-by-step instruction on how to decoupage Christmas balls with your own hands with the attached photos and videos.
Master Class
To work in the decoupage style you will need:
- Christmas balls;
- napkins with New Year's motifs (preferably three-layer ones);
- acrylic paints;
- PVA glue;
- glossy varnish;
- brushes;
- sponge;
- contours;
- semolina.

All necessary accessories are ready. When the toys have been processed in accordance with the above recommendations, you can start decorating with your own hands. With a sponge we apply paint mixed with semolina to the surface in a dotted way - we get a snow effect. While the balls are drying, prepare the napkins. Separate the top paint layer and tear off the drawing approximately along the contour. Glue, gently smoothing from the middle to the edge.

After the napkin dries, artistic creativity. After sanding the edges of the glued image, we paint the untouched part, choosing a shade of paint that matches the tone of the picture. We open the finished decoupage with varnish - and the DIY craft is ready. Those who have already worked in this technique and can show their master class will go further in decorating. For example, he uses sparkles or with the help of a structural paste will add volume to the image, etc.

Balloon decoration options


Unusual decoration christmas tree do-it-yourself decoupage of Christmas balls will become photos of your loved ones. The process is the same, only instead of napkins - a photo that is pre-soaked in warm water, and then pry off the edge with a needle and separate unnecessary paper. It remains a thin image, and glue it. You can make a frame around the napkins rolled up with a tourniquet. Next, a little fine art and, as a conclusion, varnish the surface.

Colorful toys will bring joy to children. Decoupage of Christmas balls using foam plastic is carried out according to the usual scheme, and if you add a few strokes of glitter and apply 3D varnish to the drawings to give them a three-dimensional image, then such foam balls will replace the expected gift from Santa Claus. A training master class with relevant photos can be viewed on the Internet.
About popularity decoupage christmas balls may be evidenced by the fact that not a single article about manufacturing is complete without this quick and spectacular way decoration. In fact, although such a craft has become fashionable with us relatively recently, decoupage has a glorious and long history, so you will get not only bright and fashionable Christmas tree decorations, but also those that could still hang on the Christmas trees of our great-grandparents. So in our today's article, we will separately touch on not only workshops on making such crafts, but also tips on creating a vintage style of balls.
Do-it-yourself decoupage of Christmas balls
The technique itself decoupage Christmas balls do it yourself, in the event that you hear about it for the first time, consists in applying a thin layer of paper on the surface of the workpiece. When liquid glue soaks into a thin cloth or special paper, then after drying it already forms a single whole with the surface, as if a skillful drawing had magically appeared on the ball. Technique gives us the opportunity to create highly artistic even if we do not have any painting talents.
To make it easier to understand right away, let's take a look at a small implementation decoupage Christmas balls master-class, paying attention to the photos of the main stages, which are located above.
I must say that you are practically unlimited in choosing a base, but you need to be extremely picky with the selection of a picture or paper on which it is applied. Ideal, of course, are special motifs for decoupage, which can be bought in specialized stores and hobby centers, where they usually buy everything to perform.
But, firstly, they are not very cheap for the first pen trials, and secondly, you can’t always choose among their assortment the drawing that you like and is suitable for work. Therefore, high-quality multilayer napkins are often used for table setting.
The desired part of the drawing is torn out of them, only the thin top layer, on which the image is located, is carefully separated, and this fragment is already applied to the workpiece.
The workpiece is subject to mandatory initial preparation. When the paper is glued to the surface, it cannot have paint on top of it, you cannot sand or sand it. So first we paint and prepare the base, glue the drawing, and already on top of it you can apply a transparent varnish for fixing or a special craquelure varnish, apply shine, textured stripes, patterns using special stained-glass contours.
It is worth talking about blanks in more detail, since their quality will depend appearance toys, and the task can either become more complicated or easier. Wood is considered the ideal surface for decoupage, it is these balls that are most easily painted, glue dries quickly on them, they do not deteriorate for a long time, do not break and can serve your children faithfully. Glass looks very elegant, but for its processing you will not need any paints, but special, stained glass ones, which increases the cost of crafts, and gluing paper can be more difficult than with wood.
Styrofoam balls are a fairly cheap blank, but if their surface has a strong graininess, then the paper will stick unevenly. That is why the foam surface must be covered with an even layer of paint, and maybe not even one, but only then a paper motif is applied.
Decoupage Christmas balls master class
Let's look at a simple option decoupage of Christmas balls, master class which is below. Do not be surprised that classes in this technique are included in almost any program of children's circles. early development, children from the age of 3-4 are not only learning how to make decoupage balls, but also successfully mastering this science.
The best choice for children's crafts would, of course, be the image of a cartoon character, funny animals, birds. So the choice of napkins with cats for the lesson is more than justified. From the napkin we tear off a piece on which the image of a cat is located and remove the upper part.
The question may arise why it is advised not to cut, but to tear - the point is simply that the torn edge has a finer structure, when the glue soaks it, the transition from paper to base will be imperceptible either to the eye or to the touch, as on real, painted on canvas.
Whereas, if you cut the edge of the paper, it will remain the same density and form a fairly noticeable border of the pattern, which will not benefit the entire product as a whole.

The wooden ball, as we said above, is covered with a layer of base color paint, in our case it is yellow. We apply a piece of paper on a dry and even surface and gently paint over it directly on top of it with a brush well dipped in glue. Regular PVA is not suitable for work, it is too thick and forms a dense film.
So it’s better to either take a special glue for decoupage, or dilute the PVA in proportions that are easy to find on the Web. The most popular proportions without third-party additives are 1:1 or 2:1 (twice as much glue). It is necessary to prepare the adhesive composition at one time, do not store it, because after the time the water evaporates, it will lose its properties.

After all the motifs are glued and the glue has dried, you can cover the ball with a transparent top coat. As with the drawings, you need to understand that the protective properties of the adhesive film are not very high, if there is a mechanical effect on the surface, it will be scratched or peeled off.
Therefore, it is better to protect it with a transparent varnish or a special fixative. If you want to add details such as sparkles, glitter, textured stripes, then it is better to do all this in stages, and leave the varnish for last.

A few more ideas for you and your kids, what beautiful crafts you can make using the technique decoupage Christmas balls, video with classes on which you can even remove yourself and lay out for review.
Christmas balls in decoupage style
We have already mentioned several times with you about the use in working with decoupage Christmas balls special stained glass contour to create relief patterns. This material differs from ordinary stained glass paint in its thicker consistency and quick drying, thanks to which you can work even on an inclined surface, and curls and stripes do not drain or deform. Plus, such a contour is usually packaged with small tubes or pencils, so it is convenient to apply it, draw rather thin patterns with it.

In the photo you can see another small master class, which shows, in addition to the decoupage main stages, the application of relief patterns. This is a great solution for a retro style, as it is vintage toys that most often have such a surface.

The contour is applied in two ways - these are golden curls on the main background, as well as underlining the lines of the drawing itself with a black outline. With this technique, the lines will become more expressive, the drawing will acquire volume, and the whole toy will look elegant and quite expensive, it will be able to successfully decorate any Christmas tree, even.

The decoupage technique is quite similar to the papier-mâché technique, the only difference is that there are more layers of paper impregnated with glue and because of this, the base is not required at all. The following ones are just inspired by the theme of papier-mâché, because they are decorated with sheets of paper, whether it be newspapers, napkins with ornaments or notes.
The execution technique will differ slightly in that the surface is completely covered with paper, even with a margin, and it is better not to immediately glue the material itself with a brush, but to soak it well with glue in a separate container so that it becomes softer and fits better on the ball.
Decoupage Christmas balls in vintage style
Difference in decoupage Christmas balls in vintage style from the usual ones lies in the choice of the main pattern, drawing, and in the design, which has peculiar canons, and in the use of decoration techniques, also characteristic of handicrafts 100 years old. Such work requires already an average level of skill and some investments in materials and tools. But in the end you will get the perfect Christmas decorations that will be nice to present as a gift to loved ones or keep as a family heirloom.

In the photo in this section, you can clearly see how retro toys differ from modern ones. Napkins in this case will not suit you, since very rarely you can find similar motifs on them. Rather, you should go to the store or to the page of the online store and choose from the options presented there. Pay attention to images of vintage photographs, postcards, Provencal flowers, and so on.

Also pay attention to the design, as already mentioned - this is an important part of the image of the entire retro toy. A fastening loop is necessarily elegantly decorated, it can be a small bow made of lace, organza, silk, complemented by an appliqué of beads, sparkling stones and the like.
The main surface may also be subject to decoration - often an application from a row of beads is allowed along the side parts of the ball, leaving the pattern only in the center, or they make out a kind of window on the front of the craft. Also, for applying patterns, we arm ourselves with our favorite contour material, only curls and patterns are best done not in contrasting shades, but close in color to the background shade. So you get the desired effect of antiquity, muffled, pastel.

Approaching New Year and now is the time to think about holiday decoration interior and Christmas tree. Of course, today, without any problems, you can buy any Christmas tree decoration in the store. But they look much more interesting and original Christmas decorations made by hand.
One of my latest handicraft hobbies is decoupage. It is in this technique that I want to decorate the Christmas tree ball. Let's see what I get as a result. As a basis for creating your own original and unique christmas decoration I decided to use the most ordinary and cheapest plastic Christmas ball purchased at the nearest supermarket:
And I absolutely do not care what color it is - anyway, I'm going to transform it beyond recognition.
In addition to the Christmas ball, I prepared for work:

- a beautiful decorative napkin with a New Year's pattern,
- primer,
- acrylic paints (white and gold),
- brushes,
- small piece of foam
- fine-grained sandpaper,
- scissors,
- decoupage glue,
- thick cotton thread white color(I have a cotton "Lilac", but you can take No. 10),
- PVA glue,
- gold glitter,
- glossy acrylic lacquer
- golden organza ribbon
- golden lurex thread
Master class: how to make decoupage of a New Year's ball with your own hands
To begin with, I disassemble the Christmas ball into parts, which I then cover with a layer of white primer.
When the primer is dry, I apply white acrylic paint to the surface of the ball with a foam rubber sponge in three layers. Let each layer dry well.

After making sure that the paint is completely dry, I process the surface of the ball with fine-grained sandpaper. I really want the surface of the Christmas ball to be as smooth as possible.

Of course, it was not possible to achieve a perfectly flat surface. Lack of patience and fear of overdoing it and rubbing a hole in the paint layer interfered.
After removing the dust from the surface of the ball with a dry napkin, I proceed to decorate it using the decoupage technique.
While several layers of acrylic paint were drying, I did not waste time - I cut out two drawings from a decorative napkin and, having layered the napkin, left only the top paint layer for work.

Now I glue the prepared napkin motifs to the surface of the ball on one side and the other, using decoupage glue and a wide flat synthetic brush.
For the first time in my decoupage practice, I manage to paste both motifs without a single crease. And this despite the fact that the surface of the product is not flat, but spherical! Perhaps the dusty and uninteresting work of preparing a smooth surface for decoupage was not in vain?

The pasted motifs must also be allowed to dry. While the glue dries, I paint the eyelet for fastening Christmas ball with gold acrylic paint, again using a piece of foam rubber for this purpose.

Since the drawings I have chosen do not cover the entire surface of the ball, I decided to decorate the empty spaces in an interesting and completely simple way.
I cut a few pieces of white cotton thread 12 cm long. You can use longer pieces, but my ball is quite small, so I don’t need long pieces of thread.
I alternately moisten each piece of thread with water, and then cover with PVA glue. Glue can be applied with anything: brush, sponge. But I prefer to do it with my fingers.

Wet threads are laid in the form of a pattern on the surface of the ball. My imagination was only enough for curls and loops, but in general, of course, the pattern can be absolutely anything.
In those places where the thread lay unevenly, I correct it with a thin flat brush dipped in water.

Thread patterns dry very quickly. Therefore, as soon as the last thread is laid, I begin to cover the curls with gold sparkles, drawing each element of the pattern with glue glitter.

Finishing work on decorating the New Year's ball, I cover it with a glossy acrylic varnish the ball itself and a loop for fastening. I apply the varnish in two layers with intermediate drying.

Having meticulously examined the finished ball, I decide to complement it with a bow of a translucent golden ribbon. I tie the ribbon to a loop and thread a golden lurex thread there so that the ball can be hung on a Christmas tree.
I admire a completely transformed cheap Chinese plastic ball and think that a small New Year's miracle even an untrained magician can do it with his own hands.


The most long-awaited holidays of the year will come to us very soon: New Year's and Christmas. a good gift a vintage, aged craquelure, Christmas tree ball can become close.
For work, we need the following materials and tools:
- plastic or foam ball(although glass is also possible).
- ribbons, lace, beads.
- white acrylic primer.
- acrylic paints.
- synthetic brushes.
- sponge or sponge
- acrylic varnish.
- craquelure MAIMERI 753 and 754 from IDEA DECOUPAGE.
- eyeshadow.
- napkin.
- PVA glue.
Step 1. We take the ball. We remove the decorative holder, put the ball on the stick. We prepare a piece of foam in advance, into which we will stick balls to dry.
If you have glass bowl or foam, you can immediately cover it with white primer and dry it. If your ball is plastic, and even covered with sparkles or bright paint, then you have to work hard. Be sure to clean the sparkles with sandpaper, because. no soil will cover them up.
.JPG)
Why is it necessary to remove bright colors? Some paint migrates into the ground and colors it again, in order to completely "drown out" the color, five layers of primer will have to be applied to the balls. Easier to clean off the paint, in my opinion.
Advice: when buying balls specifically for decoupage, choose silver or gold. This paint does not migrate into the ground and you can easily cover them with primer right away.
Step 2 The soil is dry, and we cover the balls with white paint. It is advisable to leave the primer to dry overnight, cover with paint in the morning, leave for a couple of hours and proceed to the next step.
.JPG)
Advice: dry with a hair dryer as a last resort! The best result is obtained after drying in natural conditions.
Step 3. We glue the motive. We choose a beautiful napkin. I took a black and white plot, quite famous, but rarely used.
.JPG)
.JPG)
I cut out small pieces. Why didn't she vomit with her fingers, as usual? Because the drawings are very close to each other and for fear of damaging them, I decided to use scissors.
Then I wet the brush and smeared the edges of the carved motif and carefully removed them. And only then I removed two layers of the napkin, leaving the top paint layer.
.JPG)
.JPG)
As glue, I used ordinary PVA. First, I outlined the places where large motifs would be located, then figured out where the small ones were. I folded the "scheme" on the table, and then glued it to the ball. Dry the glue for about an hour.
Advice: if PVA is thick, dilute it with water.
Step 4 Now comes the most interesting stage. We paint the edges of the motif with white paint, and we “revive” the motif a little with black. You can not draw the whole motive, but only a part. Don't be afraid to experiment! I also used a leaf stencil and filled in the empty spaces.
.jpg)
.jpg)
Advice: When choosing a sponge for a stencil, pay attention to its porosity. A sponge with small pores is ideal. Due to the large pores in the sponge, air bubbles remain in the paint, which are not removed in any way, dry out and spoil the whole look.
Step 5 When the paint is dry, take the finest sandpaper and sand the surface. Thus, we level the paint layer, remove wrinkles on the napkin motifs and compare the background a little. Immediately after that, remove the dust from the surface with a soft cloth and apply a layer of acrylic varnish. We dry.
.jpg)
Advice: in the arsenal of a decoupager, there should always be sandpaper of a different “caliber”.
Step 6 Now the hardest part - craquelure. Some decoupage makers are terribly afraid of him and admire those who made him. In fact, everything is simple. I will try to explain everything very clearly and in detail. For example, I'll take a Maimeri craquelure pair.
.jpg)
I will make a small digression and tell you a little about some points in working with a two-step craquelure. Some beginners face problems in using it, and in master classes on the Internet they often do not write about the most banal things, for example, that there are washable and indelible craquelures. Or why craquelure "does not work"?
Firstly, before the craquelure, it is necessary to apply a layer of varnish, then it will definitely work out. If the first step is applied immediately to the paint or motif, then this layer will be very thin, the second step will not be able to crack it, or the cracks will be very small. Therefore, the larger the cracks you want, the more layers of varnish should be placed under the first layer of craquelure, but two or three will be enough, no more.
Secondly, craquelures are washable (as, for example, Maimeri) and indelible. We wash off with a simple acrylic varnish. For indelible acrylic varnish is not suitable, it will “curl” it. For this there are special varnishes. If you have allergies (either you are in position) or have children at home, then avoid using such products because of the pungent odor.
So, the layer of acrylic varnish has dried up and we apply the first step of Maimeri craquelure, number 753 (in order not to get confused with the numbers, to distinguish it from the second step simply by color and consistency, the first step is always milky in color, quite dense and not transparent).
.jpg)
Dry it until it becomes transparent. Better to forget about him for a couple of hours. Then we apply the second step. Here it is better to use a universal tool - a finger! No, I'm serious! Only with your finger you can apply the varnish so evenly.
We try to coat the entire surface, this is very important! And let it dry. Leave again overnight or all day. If your home is cool, you can dry the second layer with a hairdryer.
.jpg)
Advice: if we dry the work with a hairdryer, then we keep it at a distance so as not to overheat the varnish!
Step 7 And now you pick up the ball and see on it the treasured mesh of cracks! Great! So, everything worked out! In order for cracks to become noticeable, they need to be shown. I used regular black eyeshadow.
.jpg)
We overwrite the cracks and go to the bathroom to wash off the second step. You need to rinse off under running warm water, you can help with your hand, but without effort, carefully. The ball becomes very sticky!
.jpg)
Now we can cover with acrylic varnish, by the way, you can again use the “universal tool”, dip your finger in varnish and lubricate the entire surface of the ball. By the way, there are no streaks, brush marks, etc. after the finger.
And that means no sanding or sanding required! For a ball, one layer of varnish will be enough, because it will be used rarely and not as actively as, for example, a jewelry box.
Step 8 Now you can decorate the balloon further. I just tied a ribbon - I think the balloon is pretty enough without the fussy bow, but you can make an intricate decoration with lace, ribbon, beads and glue it to the balloon with hot glue.
.jpg)
Advice: It will not be superfluous to decorate the finished ball with glitter contours, if this is, for example, a New Year's motif. But this, of course, is up to you.
I hope my master class will help you in your work and you will definitely get the most beautiful, well, just gorgeous balls for the Christmas tree!
.jpg)
What are you going to give your friends and family this year?


