Bactus knitting needles description. Knitting a bactus scarf with knitting needles with diagrams and descriptions
Every day such an unusual accessory as an openwork bactus becomes more and more popular. A knitted or crocheted product looks not only unusual, but also very beautiful.
A bit of history
This scarf appeared many years ago in Norway. It has long been knitted completely different ways both by hand and by machine. Bactus became widespread thanks to active bloggers who spread information about an unusual accessory. The scarf is named after a knitter named Carius, who is associated with Bactus in Norwegians. In general, Carius and Baktus are the heroes of a fairy tale by a famous Norwegian writer. In it, they are tooth trolls, which are caries and bacteria. This theory is little known and more like a fairy tale. In fact, bactus is part of the ancient folk costume Norwegians. For many centuries, triangular and women's shawls have been an important component of bunad costumes.
More recently, the popular scarf in Norway has conquered the whole world. Now almost every fashionista has an unusual accessory with an original decor in her wardrobe.

basic information
Bactus is a triangular-shaped scarf that resembles a scarf and is knitted in garter stitch from one end to the other. Such an unusual accessory due to assorted yarn can be used not only in winter, but also in summer. In addition, various color options make it possible to match any outfit. For example, baktus knitted from black or white cotton threads perfectly diversify the image in classical style. For younger people, a scarf made from sectional dyed yarn will be a great accessory. Do not think that such products are suitable only for women if they are made from rustic yarn or from threads of gray or Brown, the accessory is ideal for men. In general, to summarize, we can conclude that the bactus (the knitting needles for knitting it were chosen or the hook - it doesn’t matter) gives a lot of room for the realization of one’s fantasies and talents.

Advantages of this accessory
The main advantage of this triangular scarf is that it is multifunctional. For example, baktus can be used as a regular scarf or as a shawl to keep warm in cool weather. Also, this accessory can be used as a scarf on the head, it all depends on the style and the chosen image. In addition, the advantages of this accessory include the fact that, due to the variety of colors, it will become a favorite wardrobe item of even the most strict fashionistas. Another major plus: knitting a bactus with knitting needles is a very simple task that any woman who does not have much experience in this area can handle. If you can’t knit with knitting needles, then this scarf can also be made using a crochet hook. Products will differ in execution scheme.
You can choose yarn according to your wishes. The only recommendation is not to take thick and textured yarn, as the final product will turn out to be quite massive, and it will not be so easy to wrap it around the neck. As for the knitting needles, it is best to choose circular ones, although a pair long knitting needles will be able to complete the task.
Baktus cannot be attributed to one particular style of clothing, as it can easily complement any look. Best of all, this scarf is suitable for sportswear or for a similar accessory is best paired with skinny jeans, blouses or warm dresses.

How to knit bactus with knitting needles?
The knitting process begins with a set of 4 loops on the knitting needles. An openwork bactus is knitted with knitting needles, that is, all rows will be knitted either only in the front or only in the back. It all depends on who is comfortable and familiar. For knitting many products, the first loop does not need to be knitted, in this case the process changes dramatically.
Knitting pattern for bactus with knitting needles
You need to knit both the first and the last loop, as well as the entire row, with any chosen knitting option. You also need to knit the next 3 rows, while you do not need to add or subtract loops. Now, only from the 4th row it is necessary to make a yarn over, which in the 5th row must be knitted with the front loop behind the back wall in order to get rid of the hole. If you did everything correctly, then there should not be a gap in this place.

The next time the yarn over according to the principle of the 4th row must be done in the 8th. It is very important to understand: in order for the baktus to be a perfectly even triangular shape, the increase must be done only on one selected side. According to this principle, that is, every 4 rows, the yarn must be knitted to the middle of the product.
The width may be different, as it all depends on the chosen model. On average, for such a scarf, it is about 40 cm, if you increase it, then the final product will look more like a shawl. Bactus for children has a width of about 20 cm, it is not recommended to choose a smaller value, as in the end you will get something awkward. Most often, women choose options from 130 to 160 cm long. To quickly determine the size of the scarf before knitting, you can wrap any scarf around your neck. Basically, the length depends on how exactly you are going to wear your bactus. For example, the length of a scarf you wear under your coat will be different from one you wear over your outerwear.
After you get to the middle, you need to make a decrease in the same way as you did the increase, that is, in every 4th row. The decrease is as follows: in every 4th row you need to knit 2 loops together with the front stitch. Thus, you need to knit until you have only 4 loops on the knitting needle.

Decoration and decor
We figured out how to knit a bactus with knitting needles, it remains to decorate a scarf to get the perfect product. You can decorate, for example, only the ends or the entire product around the perimeter. As decorations, you can choose pompoms, tassels or fringe. In addition, the protruding edges of the bactus are recommended; as a result, you will get an unusual openwork edge. Jewelry will make a scarf for a woman even more original. For children's bactus, embroidery can be used as a decor, for example, you can embroider the child's name, flowers, animals, etc.
Other options
If you knit according to the considered principle, but only then you will end up with a scarf called carius. Its difference from bactus is that you will definitely need to tie the edges so that they do not twist and do not spoil the overall appearance of the product. In addition, you can knit this accessory not only with front and outer loops, but, for example, with an unusual pattern, for which you need to constantly add and decrease loops.
Another tip to diversify appearance baktusa: make the first yarn over not in the 4th row, but in the 6th. In this case, the ends of the scarf will turn out to be more elongated and elastic. Thanks to this, tying the accessory will be much easier. If you want to knit a baktus from the remnants of yarn, then you need to start knitting a scarf from the middle of the product and move in different directions.

In addition, baktus with knitting needles with an openwork edge, made in the Turkish, Japanese or Bosnian style, is very popular. Exists great amount sizes and techniques for making this unusual accessory. Today you can find mini-variants that are about 70 cm long, as well as real giants that reach about 25 m in length.
How to wear?
It is important to know not only how to knit a bactus with knitting needles, but also how to wear it. To date, there are a huge number of ways to tie this type of scarf. The simplest and most widespread is to simply wrap the bactus around the neck like a regular standard scarf. It is important that the angle is directly under the chin. There are also several ways to diversify this way: you can place a corner on top of a scarf, or, conversely, use the edges to drape a triangle. To secure the accessory, you can simply tie the ends into a bow or secure it with a brooch or some other fastener.
Now you can easily tie yourself an unusual bactus that can decorate gray everyday life and emphasize your appearance at any time of the year and in any situation. In addition, an unusual scarf can become a wonderful gift for any person.
We knit triangular scarves. 5 options for knitting bactusTriangular scarves or bactus slowly but surely captured the knitting world. And this is not surprising. After all, if a classic shawl requires a certain image (especially an openwork one), then bactus will easily fit into almost any wardrobe. And you can knit such a scarf from almost any yarn.
In total, we will consider 5 options for knitting scarves:
Classic triangular
Semicircular
With wide central part
Bound from the bottom corner
Scandinavian scarf.
For each option, a general description will be given, according to which it will be possible to knit a bactus from any yarn.
⠀
Yarn recommendations
For the winter, you can take an alpaca, an alpaca with wool, smooth, even or fluffy in a lace.
For autumn and spring, merino and any mixtures with it, cashmere, yak are suitable.
For the summer, you can knit a scarf made of linen or cotton.
The consumption of yarn per scarf is on average about 200-250 grams, depending on the yarn length.
The optimal footage is 250-300 meters per 100 grams of yarn and knitting needles 3.5-4.
Knitting should not be tight, the fabric should be plastic, drape well.
Part 1. Classic triangular scarf

Triangular scarf knitted from the middle.


The triangular scarf is the most common type of scarf. It is knitted from the middle, due to the execution of four increases (two along the edges and two around the central loop) it takes the form of an isosceles triangle.
Design options:
Front surface with the addition of shadow patterns;
Front surface with addition openwork patterns;
Original design of the central loop (patent loop, several loops, “pigtail”, etc.);
Knitting a scarf with stripes of yarn of different colors;
Various options for making increments: * yarns knitted with a simple loop (then we get a hole in the place of the increase), * yarns knitted with a crossed loop (there is no hole in the place of the increase), * increases from the broach, * lifting the loops of the bottom row.
As you can see, there is plenty to choose from, it all depends on what yarn you are knitting with, for what season and in what style. With medium-weight yarns (for example, wool, wool mixture, merino, merino blends), shawls look great without holes, with the addition of simple shadow patterns and garter stitch. From thinner yarn, you can knit a light scarf with lace, you can use thin merino wool with silk or summer yarn.
So, the principle of knitting a classic triangular scarf very simple.
For beautiful design to start knitting, you need to complete a set of loops with a “ribbon”.
To do this, you need a waste thread (preferably cotton) and a hook. From the waste thread you need to crochet a chain of 4-5 air loops and fasten the thread. In the tubercles of the resulting loops, dial 3 loops with a working thread and tie 7 rows of garter stitch (knit all loops in each row). Tubercles form on the edge, they need to be hooked with the left knitting needle and knitted with facial ones. Then loosen the waste thread, while removing the loops on the left knitting needle. They are also knit facial. You should end up with 9 stitches on the right needle. Three loops along the edges form a border, and the central loops are the body of the scarf.
Row 1: K3, yarn over, knit to marker, yarn over, slip marker, k1 (center st), slip marker, yarn over, knit to last 3 sts, yarn over, knit 3.
Row 2: K3, purl to last 3 sts, k3.
And that's it! The principle of knitting is these two rows. In the front rows we make increases (in the description these are yarns), in the wrong rows we knit everything according to the pattern (or according to the pattern, if you add it). Nakida can be knitted with a simple purl (then there will be a hole at the place of the increase) or a crossed loop (then there will be no hole).
Part 2. Semicircular scarf
Semicircular scarf.


Such a scarf is knitted similarly to a triangular one, but the increases are made in other places, due to which the scarf takes on a semicircular shape.
Increasing can be done in various ways, with yarn, from a broach, by raising the loop of the bottom row. If the yarns are knitted with a simple loop, there will be a hole in the place of the increase, if it is crossed, there will be no hole. The scarf in the photo is knitted from Naturafil Alpaca Nublado yarn
from three skeins.
Design options:
Front surface with the addition of shadow and / or openwork patterns;
- knitting in strips of plain and section-dyed yarn (2 rows of one yarn, 2 rows of colored yarn). This option looks very impressive, especially if the stripes are made of yarn in contrasting colors. When knitting in stripes 2 rows wide, you do not need to break the thread each time. If you change the thread at the beginning of each front row and do not tighten the threads, then their change will be almost imperceptible.
Original border along the body of the scarf. This model of scarf allows you to knit a border along the body. The simplest version of the border is a garter stitch, which repeats the border that goes along the edges of the scarf. More complex - various variations on the theme of leaves, rhombuses and even braids.
Description of knitting
Beginning - a set of loops with a "ribbon".
For a beautiful design of the beginning of knitting, you need to complete a set of loops with a “ribbon”. To do this, you need a waste thread (preferably cotton) and a hook. From the waste thread, you need to crochet a chain of 4-5 air loops and fasten the thread. In the tubercles of the resulting loops, dial 3 loops with a working thread and tie 7 rows of garter stitch (knit all loops in each row). Tubercles form on the edge, they need to be hooked with the left knitting needle and knitted with facial ones. Then loosen the waste thread, while removing the loops on the left knitting needle. They are also knit facial. You should end up with 9 stitches on the right needle.
Row 0: K3, p1, place marker, p1, place marker, p1, k3.
Row 1: K3, yarn over, knit to marker, slip marker, yarn over, knit to marker, yarn over, slip marker, knit over last 3 sts, yarn over, knit 3.
Row 2: K3, purl to last 3 sts, k3.
Repeat 1-2 rows until the scarf reaches the desired size. After that, you can perform 3-5 rows of garter stitch and close the loops.
Or tie a border along the body of the scarf, while closing the loops of the body.
After the body of the scarf of the desired size is knitted, a certain number of loops are typed on the knitting needles for knitting the border.
The border is knitted in turning rows, while the last loop of the border is knitted together with the loop of the body closest to it, thus joining the border to the body and closing the loops of the body of the scarf.


Part 3. Scarf with a wide central part

A scarf with a wide central part.


The principle of knitting such a scarf is 4 increases in each front row: one from each edge and 2 along the central part.
The easiest way to knit this type of scarf is garter stitch (in all rows, all loops are knitted).
In this case, the scarf turns out to be very plastic, especially if it is knitted from chain yarn.
You can wear it with the wide part forward, leading the ends behind the neck. The width of the flat part in this case should be approximately equal to ¼ of the girth of your chest.
You can diversify this model by knitting in the central part various patterns- openwork, shady or relief patterns. In this case, the scarf will have a face and a wrong side.
Description of bactus garter stitch .
Knitting a scarf with a wide central part begins with a simple set of loops. The number of loops is equal to the number of loops of the central part + 6 loops. For example, the central part is 30 p. Then you need to dial 36 loops on the knitting needles and mark the central 30 loops when dialing with markers.
Abbreviations:
persons - facial loop;
PN - right (reverse) yarn - throw working thread on right needle movement from left to right, under the thread;
LN - left (straight) yarn - throw the working thread on the right knitting needle from right to left.

1 row: 2 persons, PN, 1 persons, PN, reshoot the marker, 30 persons, reshoot the markers, LN, 1 persons, LN, 2 persons.
2nd row: knit all loops, while knitting yarns crossed, right - behind the back half-loop, left - behind the front.
3 row: 2 knit, PN, knit to the marker, PN, reshoot the marker, 30 knit, reshoot the marker, CL, knit to the last 2 loops, CL, 2 knit.
4th row: knit all, knit yarn over crossed.
Repeat 3-4 rows. Loops close freely, as facial.

Part 4. Scarf from the corner

Scarf knitted from the bottom corner.
This is the simplest scarf of all options. Such a scarf is best knitted from yarn with an unusual texture, fluffy, boucle.


In the photo, a dry rose scarf is knitted from Nako Paris yarn, and dark purple from Naturafil Superfine Alpaca delgado yarn. In both cases, the consumption of yarn is 200 grams. The lilac bactus alternates knit and garter stitch stripes.
Such a scarf is knitted from the bottom corner, 2 increases are made in each front row, due to which the bottom corner is sharp. But it also depends on how you block the handkerchief.
It is important to remove the edge loops at the beginning of each row as facial ones, and knit them with purl ones at the end so that an elastic pigtail forms along the edges.
Design options:
Garter knit;
- alternating stripes of front and back surface or garter stitch;
- adding openwork patterns.
Description of knitting.
Cast on 3 sts on the needles.
- 1 row: remove the hem, nakid, 1 person, nakid, knit the hem purl.
- 2nd row: remove the hem, faces to the last loop, hem - out. Knit crochets crossed
- 3rd row: remove the hem, yarn over, faces to the last loop, yarn over, hem - out.
- 4th row: remove the edge, faces to the last loop, edge - out.
Repeat 3-4 rows until the scarf reaches the desired size, close the loops freely, as if they were facial.


Part 5. Scandinavian scarf


This is the most difficult scarf to make. The triangular shape is formed by simultaneously making increases and decreases on both sides of the scarf.
There are two knitting options - from the wide side to the corner and from the corner to the wide side. In both cases, the shape of the scarf is the same.
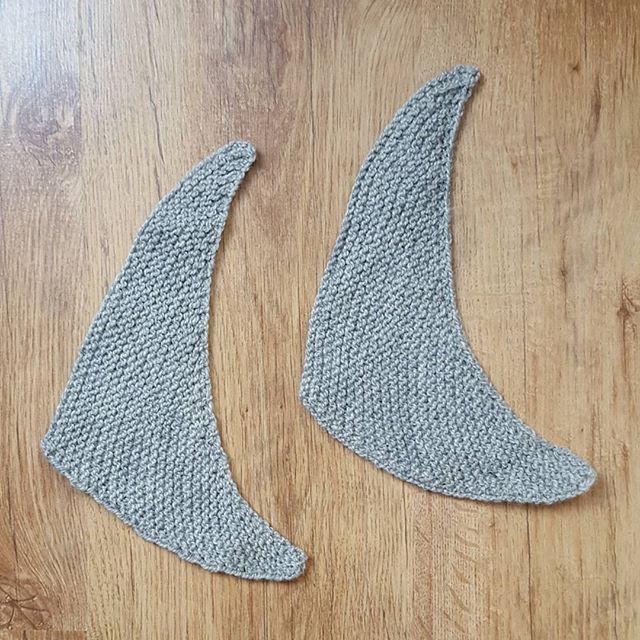
In the photo with samples, one is connected from the corner, and the second from the wide part. As you can see, the difference is barely perceptible. But we will consider both knitting options.
Design options:
- knitting garter stitch,
- adding openwork and shadow patterns (some patterns require knitting from the bottom down, in this case it is more convenient to knit from the wide part to the corner),
- tassels at the ends of the scarf.
Classic variant- This is knitting from the wide part to the corner.
A certain number of loops are cast on the knitting needles, then in each front row 2 decreases are made from the right edge of the scarf, and in every second front row (that is, the 4th row in a row) - increases from the left edge of the scarf.
When knitting in this way, you need to know exactly how many loops you need to cast on to start knitting. To do this, you need to knit a sample, wash and dry it, calculate the knitting density and find out how many loops you need to dial in order to end up with 130-140 cm along the edge of the scarf.
Another important feature is that on the side of the reductions, the hem lines must be knitted at the beginning and at the end of the row (at the beginning - the front, at the end - the wrong side), and on the side of the increments at the beginning of the row, remove, and knit the wrong side at the end.
Second option- knitting a scarf from the corner towards the wide part. In this case, increases are performed in each front row (2 loops are added at a time), and decreases are made in every second front row. At the same time, there is a feature of knitting edging. From the side of the increments, knit the edging at the beginning and at the end of each row (at the beginning - the front, at the end - the wrong side), and from the side of the decreases - remove at the beginning of the row, and knit the wrong side at the end.

Description of knitting 1 option from the wide part (for Naturafil Merino medium yarn, 100% merino wool, 90 m in 50 g).
Cast on 180 sts on needles #6. Continue knitting with knitting needles No. 5.
Installation row (wrong side): all loops are facial.
1 row (face): 1 knit, 2 loops together with an inclination to the right, 2 loops together with an inclination to the right, persons to the last loop, out.
Row 2 (purl): remove chrome, purl to the end of the row.
3 row (face): 1 knit, 2 together, 2 together, knit to the last 2 loops, increase, 1 knit, 1 out.
Row 4 (wrong): remove chrome, purl to the end of the row.
Repeat from 1 to 4 rows until 3 loops remain on the needles, knit them together. In the course of knitting, add patterns (shadow and / or openwork) at your discretion. An excellent video on knitting a Scandinavian scarf from a wide edge is on the channel Svetlana Kolomiets. We recommend watching it if you need a more detailed analysis of knitting.
2 option Scandinavian scarf - from the corner.
I repeat that the shape of the scarf is identical to the first, you just need to close the loops of the last row more freely so as not to tighten the edge.
Description:
Increasing - knit 2 from one loop, knitting it first behind the back, then, without removing it from the left knitting needle, behind the front wall.
Cast on 3 loops.
Installation row: 1 persons, increase, 1 out.
1 row: 1 persons, 2 increases, 1 out.
Row 2: Slip 1, purl to end of row.
3 row: 1 persons, 2 increases, 2 together with the front with a slope to the right, 1 out.
Row 4: Slip 1, purl to end of row.
5 row: 1 persons, 2 increases, facial to the last loop, 1 out.
Row 6: Slip 1, purl to end of row.
7 row: 1 person, 2 increases, facial to the last 3 loops, 2 knit together with a slope to the right, 1 out.
Row 8: Slip 1, purl to end of row.
Repeat from 5 to 8 rows until the scarf reaches the required size. Cast off loosely using larger needles.
If in the purl rows the loops are knitted with facial loops (except for the hem ones), then you get a bactus with a garter stitch. In this case, patterns are not needed.
https://5motkov.ru/blog/view/2243/
Beautiful and sophisticated wardrobe items emphasize the sophistication of every woman. In this master class, we will learn how to knit such items on our own. A large number of visual master classes will help you create a bactus.
To knit a beautiful and original baktus with knitting needles, you need to be patient, because sometimes the length of this accessory exceeds 1.5 m. But, it is difficult to scare a real needlewoman with such trifles, and therefore not only many experienced, but also novice craftswomen pick up knitting needles and start knitting.


 Today, especially for beginner craftswomen, we want to talk about how, according to the scheme with detailed description tie bactus. The work is quite simple, as the product is knitted with a garter stitch.
In order for knitters who are just starting to be able to knit the same original and stylish bactus as in the photo, they need to prepare the following materials in advance: melange yarn and a couple of needles.
During the description of the knitting pattern, we will use some cuts:
- Loop - p.
- Row - r.
- Facial - persons.
Progress:

Video: Warm scarf - bactus
Bactus with openwork edges
Having connected a simple scarf with even edges, beginner needlewomen can try to complicate the task a little and knit a model with openwork edges. To do this, you just need to be patient and study several schemes with a description:

Description of knitting with an openwork border of sock yarn: 
When the work is completed, you should get the same original and elegant scarf with an openwork border as in the photo.
We knit a bactus with a scalloped edge
 A beautiful bright bactus with a jagged edge will definitely not leave anyone indifferent. With the help of such an unusual accessory, you can “revive” any outfit and at the same time attract increased attention to yourself. The length of the scarf is 145 cm, and the width in the central part is 28 cm.
To work, novice craftswomen will need the following materials and tools:
- Pair of knitting needles No. 4
- Acrylic threads "adelia" - 1 skein
In the description of knitting technique female model meet with a jagged edge cuts previously unused:
- Edge - chrome.
- Air - air.
Progress:
First we dial 4p .. Then we knit in rows:
No. 1: edge, from 1 p. we knit 2 (that is, from 1 p. we perform the front for the front wall and for the back wall), faces., Chrome ..
No. 2: chrome, persons. - 2 pieces, from 1 we make 2, chrome, air ..
No. 3: chrome, from one - two, to the end of the row of faces, and then 1 chrome ..
No. 4, 6: 1 chrome, front, from 1 we perform 2, front.p. and air.p..
No. 5, 7: knit in the same way as in 3 p ..
No. 8: close 5 p., facial, from 1 p. 2, persons. and air..
We repeat the pattern from 1 to 8 p. 
When there are 144 sts on the needles, the number of gear parts should be 21 pcs. 
Now let's describe the knitting of the scalloped edge in more detail:

Pay attention to the fact that the penultimate jagged detail on the edge must be knitted not on 7, but on 6 p..
The last jagged detail consists of 4 rows. It is connected by persons. P..
At the end of the loop must be closed.
An elegant bactus with jagged edges for beginners is ready: 
Video: Bactus with a jagged edge
Openwork bactus - quickly and easily
 Another model that we want to present to novice craftswomen is knitted from Superwash Paints yarn.
The model in the photo is 81 cm long and 35 cm wide.
To create it you will need:
- 1 skein of yarn
- Pair of regular knitting needles
- 2 markers
The description will use the same abbreviations as in the previous master classes.
We begin work with a detailed description of all actions:

Bactus with knitting needles with a simple diagram and description is ready.
Video: How to tie a bactus
Triangular scarves or bactus slowly but surely captured the knitting world. And this is not surprising. After all, if a classic shawl requires a certain image (especially an openwork one), then bactus will easily fit into almost any wardrobe. And you can knit such a scarf from almost any yarn.
In total, we will consider 5 options for knitting scarves:
Classic triangular
Semicircular
With a wide center
Bound from the bottom corner
Scandinavian scarf.
For each option, a general description will be given, according to which it will be possible to knit a bactus from any yarn.
⠀
Yarn recommendations
For the winter, you can take an alpaca, an alpaca with wool, smooth, even or fluffy in a lace.
For autumn and spring, merino and any mixtures with it, cashmere, yak are suitable.
For the summer, you can knit a scarf made of linen or cotton.
The consumption of yarn per scarf is on average about 200-250 grams, depending on the yarn length.
The optimal footage is 250-300 meters per 100 grams of yarn and knitting needles 3.5-4.
Knitting should not be tight, the fabric should be plastic, drape well.
Part 1. Classic triangular scarf
Triangular scarf knitted from the middle.
The triangular scarf is the most common type of scarf. It is knitted from the middle, due to the execution of four increases (two along the edges and two around the central loop) it takes the form of an isosceles triangle.
Design options:
Front surface with the addition of shadow patterns;
The front surface with the addition of openwork patterns;
Original design of the central loop (patent loop, several loops, “pigtail”, etc.);
Knitting a scarf with stripes of yarn of different colors;
Various options for making increments: * yarns knitted with a simple loop (then we get a hole in the place of the increase), * yarns knitted with a crossed loop (there is no hole in the place of the increase), * increases from the broach, * lifting the loops of the bottom row.
As you can see, there is plenty to choose from, it all depends on what yarn you are knitting with, for what season and in what style. With medium-weight yarns (for example, wool, wool mixture, merino, merino blends), shawls look great without holes, with the addition of simple shadow patterns and garter stitch. From thinner yarn, you can knit a light scarf with lace, you can use thin merino wool with silk or summer yarn.
So, the principle of knitting a classic triangular scarf very simple.
For a beautiful design of the beginning of knitting, you need to complete a set of loops with a “ribbon”.
To do this, you need a waste thread (preferably cotton) and a hook. From the waste thread, you need to crochet a chain of 4-5 air loops and fasten the thread. In the tubercles of the resulting loops, dial 3 loops with a working thread and tie 7 rows of garter stitch (knit all loops in each row). Tubercles form on the edge, they need to be hooked with the left knitting needle and knitted with facial ones. Then loosen the waste thread, while removing the loops on the left knitting needle. They are also knit facial. You should end up with 9 stitches on the right needle. Three loops along the edges form a border, and the central loops are the body of the scarf.
Row 1: K3, yarn over, knit to marker, yarn over, slip marker, k1 (center st), slip marker, yarn over, knit to last 3 sts, yarn over, knit 3.
Row 2: K3, purl to last 3 sts, k3.
And that's it! The principle of knitting is these two rows. In the front rows we make increases (in the description these are yarns), in the wrong rows we knit everything according to the pattern (or according to the pattern, if you add it). Nakida can be knitted with a simple purl (then there will be a hole at the place of the increase) or a crossed loop (then there will be no hole).
Part 2. Semicircular scarf
Semicircular scarf.
Such a scarf is knitted similarly to a triangular one, but the increases are made in other places, due to which the scarf takes on a semicircular shape.
Increasing can be done in various ways, with yarn, from a broach, by raising the loop of the bottom row. If the yarns are knitted with a simple loop, there will be a hole in the place of the increase, if it is crossed, there will be no hole. The scarf in the photo is knitted from Naturafil Alpaca Nublado yarn
from three skeins.
Design options:
Front surface with the addition of shadow and / or openwork patterns;
- knitting in strips of plain and section-dyed yarn (2 rows of one yarn, 2 rows of colored yarn). This option looks very impressive, especially if the stripes are made of yarn in contrasting colors. When knitting in stripes 2 rows wide, you do not need to break the thread each time. If you change the thread at the beginning of each front row and do not tighten the threads, then their change will be almost imperceptible.
Original border along the body of the scarf. This model of scarf allows you to knit a border along the body. The simplest version of the border is a garter stitch, which repeats the border that goes along the edges of the scarf. More complex - various variations on the theme of leaves, rhombuses and even braids.
Description of knitting
Beginning - a set of loops with a "ribbon".
For a beautiful design of the beginning of knitting, you need to complete a set of loops with a “ribbon”. To do this, you need a waste thread (preferably cotton) and a hook. From the waste thread, you need to crochet a chain of 4-5 air loops and fasten the thread. In the tubercles of the resulting loops, dial 3 loops with a working thread and tie 7 rows of garter stitch (knit all loops in each row). Tubercles form on the edge, they need to be hooked with the left knitting needle and knitted with facial ones. Then loosen the waste thread, while removing the loops on the left knitting needle. They are also knit facial. You should end up with 9 stitches on the right needle.
Row 0: K3, p1, place marker, p1, place marker, p1, k3.
Row 1: K3, yarn over, knit to marker, slip marker, yarn over, knit to marker, yarn over, slip marker, knit over last 3 sts, yarn over, knit 3.
Row 2: K3, purl to last 3 sts, k3.
Repeat 1-2 rows until the scarf reaches the desired size. After that, you can perform 3-5 rows of garter stitch and close the loops.
Or tie a border along the body of the scarf, while closing the loops of the body.
After the body of the scarf of the desired size is knitted, a certain number of loops are typed on the knitting needles for knitting the border.
The border is knitted in turning rows, while the last loop of the border is knitted together with the loop of the body closest to it, thus joining the border to the body and closing the loops of the body of the scarf.
Part 3. Scarf with a wide central part
A scarf with a wide central part.
The principle of knitting such a scarf is 4 increases in each front row: one from each edge and 2 along the central part.
The easiest way to knit this type of scarf is garter stitch (in all rows, all loops are knitted).
In this case, the scarf turns out to be very plastic, especially if it is knitted from chain yarn.
You can wear it with the wide part forward, leading the ends behind the neck. The width of the flat part in this case should be approximately equal to ¼ of the girth of your chest.
You can diversify this model by knitting various patterns in the central part - openwork, shadow or relief patterns. In this case, the scarf will have a face and a wrong side.
Description of bactus garter stitch .
Knitting a scarf with a wide central part begins with a simple set of loops. The number of loops is equal to the number of loops of the central part + 6 loops. For example, the central part is 30 p. Then you need to dial 36 loops on the knitting needles and mark the central 30 loops when dialing with markers.
Abbreviations:
persons - facial loop;
PN - right (reverse) yarn - throw a working thread on the right knitting needle in a movement from left to right, under the thread;
LN - left (straight) yarn - throw the working thread on the right knitting needle from right to left.
1 row: 2 persons, PN, 1 persons, PN, reshoot the marker, 30 persons, reshoot the markers, LN, 1 persons, LN, 2 persons.
2nd row: knit all loops, while knitting yarns crossed, right - behind the back half-loop, left - behind the front.
3 row: 2 knit, PN, knit to the marker, PN, reshoot the marker, 30 knit, reshoot the marker, CL, knit to the last 2 loops, CL, 2 knit.
4th row: knit all, knit yarn over crossed.
Repeat 3-4 rows. Loops close freely, as facial.
Part 4. Scarf from the corner
Scarf knitted from the bottom corner.
This is the simplest scarf of all options. Such a scarf is best knitted from yarn with an unusual texture, fluffy, boucle.
In the photo, a dry rose scarf is knitted from Nako Paris yarn, and dark purple from Naturafil Superfine Alpaca delgado yarn. In both cases, the consumption of yarn is 200 grams. The lilac bactus alternates knit and garter stitch stripes.
Such a scarf is knitted from the bottom corner, 2 increases are made in each front row, due to which the bottom corner is sharp. But it also depends on how you block the handkerchief.
It is important to remove the edge loops at the beginning of each row as facial ones, and knit them with purl ones at the end so that an elastic pigtail forms along the edges.
Design options:
Garter knit;
- alternating stripes of front and back surface or garter stitch;
- adding openwork patterns.
Description of knitting.
Cast on 3 sts on the needles.
- 1 row: remove the hem, nakid, 1 person, nakid, knit the hem purl.
- 2nd row: remove the hem, faces to the last loop, hem - out. Knit crochets crossed
- 3rd row: remove the hem, yarn over, faces to the last loop, yarn over, hem - out.
- 4th row: remove the edge, faces to the last loop, edge - out.
Repeat 3-4 rows until the scarf reaches the desired size, close the loops freely, as if they were facial.
Part 5. Scandinavian scarf
This is the most difficult scarf to make. The triangular shape is formed by simultaneously making increases and decreases on both sides of the scarf.
There are two knitting options - from the wide side to the corner and from the corner to the wide side. In both cases, the shape of the scarf is the same.
In the photo with samples, one is connected from the corner, and the second from the wide part. As you can see, the difference is barely perceptible. But we will consider both knitting options.
Design options:
- knitting garter stitch,
- adding openwork and shadow patterns (some patterns require knitting from the bottom down, in this case it is more convenient to knit from the wide part to the corner),
- tassels at the ends of the scarf.
Classic variant- This is knitting from the wide part to the corner.
A certain number of loops are cast on the knitting needles, then in each front row 2 decreases are made from the right edge of the scarf, and in every second front row (that is, the 4th row in a row) - increases from the left edge of the scarf.
When knitting in this way, you need to know exactly how many loops you need to cast on to start knitting. To do this, you need to knit a sample, wash and dry it, calculate the knitting density and find out how many loops you need to dial in order to end up with 130-140 cm along the edge of the scarf.
Another important feature is that on the side of the reductions, the hem lines must be knitted at the beginning and at the end of the row (at the beginning - the front, at the end - the wrong side), and on the side of the increments at the beginning of the row, remove, and knit the wrong side at the end.
Second option- knitting a scarf from the corner towards the wide part. In this case, increases are performed in each front row (2 loops are added at a time), and decreases are made in every second front row. At the same time, there is a feature of knitting edging. From the side of the increments, knit the edging at the beginning and at the end of each row (at the beginning - the front, at the end - the wrong side), and from the side of the decreases - remove at the beginning of the row, and knit the wrong side at the end.
Description of knitting 1 option from the wide part (for Naturafil Merino medium yarn, 100% merino wool, 90 m in 50 g).
Cast on 180 sts on needles #6. Continue knitting with knitting needles No. 5.
Installation row (wrong side): all loops are facial.
1 row (face): 1 knit, 2 loops together with an inclination to the right, 2 loops together with an inclination to the right, persons to the last loop, out.
Row 2 (purl): remove chrome, purl to the end of the row.
3 row (face): 1 knit, 2 together, 2 together, knit to the last 2 loops, increase, 1 knit, 1 out.
Row 4 (wrong): remove chrome, purl to the end of the row.
Repeat from 1 to 4 rows until 3 loops remain on the needles, knit them together. In the course of knitting, add patterns (shadow and / or openwork) at your discretion. An excellent video on knitting a Scandinavian scarf from a wide edge is on the channel Svetlana Kolomiets. We recommend watching it if you need a more detailed analysis of knitting.
2 option Scandinavian scarf - from the corner.
I repeat that the shape of the scarf is identical to the first, you just need to close the loops of the last row more freely so as not to tighten the edge.
Description:
Increasing - knit 2 from one loop, knitting it first behind the back, then, without removing it from the left knitting needle, behind the front wall.
Cast on 3 loops.
Installation row: 1 persons, increase, 1 out.
1 row: 1 persons, 2 increases, 1 out.
Row 2: Slip 1, purl to end of row.
3 row: 1 persons, 2 increases, 2 together with the front with a slope to the right, 1 out.
Row 4: Slip 1, purl to end of row.
5 row: 1 persons, 2 increases, facial to the last loop, 1 out.
Row 6: Slip 1, purl to end of row.
7 row: 1 person, 2 increases, facial to the last 3 loops, 2 knit together with a slope to the right, 1 out.
Row 8: Slip 1, purl to end of row.
Repeat from 5 to 8 rows until the scarf reaches the required size. Cast off loosely using larger needles.
If in the purl rows the loops are knitted with facial loops (except for the hem ones), then you get a bactus with a garter stitch. In this case, patterns are not needed.
https://5motkov.ru/blog/view/2243/
Triangular scarf bactus - once an integral part national costume one of the northern peoples, and now a favorite item of clothing for women, men and children in the cold season around the world. With the help of bactus, you can not only protect your neck and chest from cool winds, but also diversify your usual outerwear. Several types of bactus in the wardrobe will give room for imagination and inspiration in an uncomfortable time.
The easiest way to get a special bactus is to knit it yourself. We are ready to help with this by offering several options for knitting patterns and descriptions at once. different models this beautiful and warm scarf.
How to knit bactus with knitting needles?
Not only professionals can knit a bactus, this original scarf is quite capable of knitting by a beginner. For this, the simplest knitting is suitable - garter. The length of the bactus triangle varies, from 40 cm to 140 cm, depending on the idea. The average width of a bactus can be from 25 to 45 cm. After all, it is easy to make a shawl or an openwork scarf from a simple scarf - you just have to want to.
Master class for beginners
Before you start this, remember: beginners are lucky. Especially in such a useful matter! Let's try to start by knitting a bactus with a garter stitch 180x50 cm. The knitting density will be 18 loops / 32 rows = 10/10 centimeters.
For our bactus for beginners you will need:
- 300 g of yarn - wool or wool / acrylic (100 m / 50 grams)
- Knitting needles regular (if you later want to sew) or circular - 4 cm
- Hook 4.5 mm - optional
Knitted bactus - diagrams and description for beginners:
Let's start knitting from the main edge (the top point of the pattern).
It is necessary to dial 6 loops on the knitting needles, knit 3 facial, 1 purl, 3 facial. We knit further according to the scheme, starting with 1 row.
From the 1st to the 6th rows we knit according to the scheme: that is, on both sides of knitting, in each front row we increase the number of loops by 6: in each front we make crochets and increases.
We knit in this way to the required length - 180 cm, after which it closes the loops.
To decorate the bactus with tassels in the corners of the scarf, you will need 80 pieces of yarn 30 cm long. They will make 3 tassels 15 cm long.
To make crocheting, you need to leave the loops when there are 373 loops on the knitting needles (123 row) and work with a crochet like this: 2 sts from the knitting needles we knit SS, then raise the st and make 1 picot (3ch, 1sc in 1ch) - so repeat 60 times. Finish the second half of the baktus in mirror image
Openwork scarf
Openwork bactus with knitting needles is worth the painstaking work on it. After all, this beautiful and stylish thing will decorate and protect you or your loved ones in the most uncomfortable time of the year. Such original model a scarf like an openwork will suit almost any outerwear and will be a great addition to your wardrobe.
Our openwork scarf will be 127 cm long, 56 cm high, legs - 84 cm.
Knitting density: 16 loops / 20 rows = 10 cm stockinette stitch
For an openwork triangular bactus you will need:
- 4 skeins of yarn 90 m/50 gr: 40% alpaca, 40% merino, 20% silk
- Circular needles - 5.5 mm
Openwork bactus with knitting needles - diagrams and description:
The above diagrams show only the right half of the shawl with knitting needles and the central loop. Schemes are read from right to left - to the central loop. We knit the second half in a mirror image from left to right. The pattern repeat is marked with a green frame. As rows 1-12 of the Bodi pattern are repeated, the number of repetitions of the pattern repeat in width will increase. The Bodi and Set Up diagrams do not show purl rows, they need to be knitted like this: 2 persons., out. - to the last 2 loops - 2 persons.
First we knit according to the Set Up scheme, then there is the Bodi scheme, and we finish with the Springtime scheme.
Using the auxiliary thread, crochet a chain of 4 loops. Knitting needles with the main gray thread, raise 1 person. loop into each of the two tubercles on the back of the chain.
- Rows 1-6 are knit.
- 7th row: K2, turn work, and pick up 1 st in each of the 3 edge loops, remove the auxiliary thread, place 2 open loops of the cast-on row on the left knitting needle, 2 persons. (There will be 7 sts in total.)
- According to the Set Up scheme, knit 1-24 rows (= 51 p.).
- According to the Bodi scheme, knit 1-12 rows 4 times (167 p.).
- According to the Edge pattern, knit 1-34 rows (1 time).
We close all the loops with facial ones. We remove the ends of the threads. The scarf is ready.
Knitting pattern with scalloped edge
Another version of a triangular scarf that can be knitted is bactus with scalloped knitting needles. Novice needlewomen will also be able to make such a beautiful warming thing for themselves or their loved ones with the help of a simple and detailed diagram knitting.
The length of the future bactus with serrated edges is 145 cm, width - 28 cm.
For a jagged bactus you will need:
- A skein of acrylic threads (both melange and plain yarn will do)
- Needles №4
Bactus with cloves - description
First cast on 4p, then knit in rows:
- No. 1: edge (hereinafter chrome), from 1 p. we knit 2 (that is, from 1 p. we perform the front for the front wall and for the back wall), faces.
- No. 2: chrome, persons. - 2 pieces, from 1 we make 2, chrome, air (hereinafter air)..
- No. 3: chrome, from one - two, to the end of the row of faces, and then 1 chrome ..
- No. 4, 6: 1 chrome, front, from 1 we perform 2, front.p. and air.p..
- No. 5, 7: knit in the same way as in 3 p ..
- No. 8: close 5 p., facial, from 1 p. 2, persons. and air..
We repeat the pattern from 1 to 8 p.
When there are 144 sts on the needles, the number of gear parts should be 21 pcs.
How to knit a scalloped edge:
- remove the loop and make 2 facial.
- we remove chrome., persons, chrome..
- edging, persons. - 4 things..
- remove the edge, persons. – 3 pcs., chrome..
- edge and 6 facial.
- repeat 4 p., but instead of 3 persons. do 5.
- according to the same scheme as 5 p., but at the end of 7 persons.
- as well as 6 p., but one facial more.
- close 7 p., persons. - 2 pcs..
Further, following the description, repeat all rows from 2 to 9.
Important:
the penultimate serrated detail from the edge must be knitted not by 7, but by 6 p.
The last jagged detail consists of 4 rows. It is connected by persons. P..
At the end of the loop must be closed.
Bactus with a jagged edge - interesting model, which was probably in every grandmother's chest, and now you can continue the tradition and knit this beautiful and everlasting accessory for yourself or your loved ones.


