Punching bag for home: how to choose it, fix it and train properly. Homemade boxing bag What are the benefits of exercising with a punching bag at home
From this article you will learn:
- What are punching bags for home
- How to fix a punching bag for home
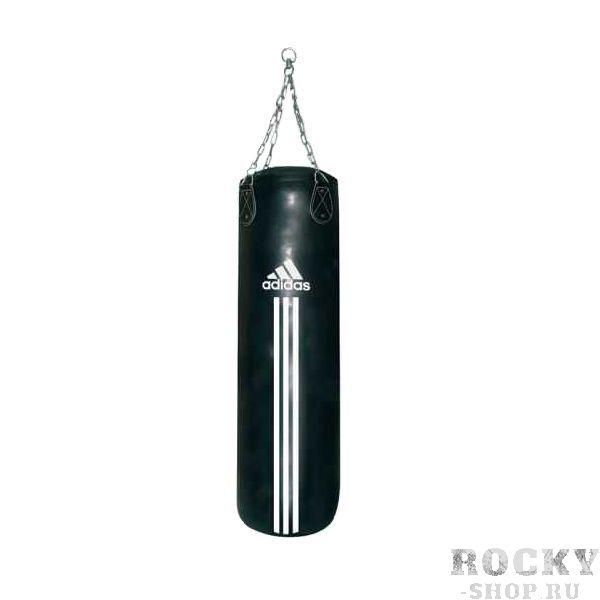
A punching bag is a universal projectile, which not only professional athletes can train with. To work with her at home, it is not necessary to have fighting skills. Such exercises will help to find a toned body, strong arms, hard abs, broad shoulders, develop endurance. A punching bag for the home has many characteristics, which complicates the choice and purchase of a projectile for beginners. Our article will help you understand all the nuances.
What are the benefits of exercising with a punching bag at home
Professionals use a punching bag to practice specific punches and techniques. But beginners and amateurs do not have to set themselves the goal of mastering the art of fighting. A punching bag for home is an excellent simulator that helps to keep fit, since almost all muscle groups are involved during work with it.

Using a projectile allows you to:
burn body fat during aerobic exercise;
strengthen the muscles of the arms, back, abs, hips;
improve blood circulation throughout the body;
increase the speed of reactions, coordination, attentiveness, concentration;
improve the functioning of the vegetative system;
increase the endurance of joints and tendons;
become more resilient to stress, stabilize work nervous system;
strengthen immunity;
increase the amount of energy, improve the overall tone of the body;
practice self-defence skills.
The main types of punching bags for the home
There are three types of punching bags for training at home.
Bulk(hydraulic pear) - presented in the form of a mannequin (human torso) or a boxing bag filled with water. The projectile allows you to work out different kinds shocks, and if necessary, you can drain the water and easily move it. Such a punching bag is the best option for home, because it does not take up much space and is suitable for complex training.

Inflatable- are an inflated pear-shaped chamber. This species is also called the pneumatic punching bag. The main advantage of the projectile is the presence of a rubber chamber inside, which allows it to quickly restore its shape after impact. Inflatable pears are attached to the ceiling and are intended only for practicing punches.

printed- the classic version, presented in the form of a cylinder. They differ from each other in the type of filler.

Before buying a punching bag for your home, decide on the purpose of the purchase and the intended place of employment. If you want to practice punches, take a small model. And if your goal is complex training, you should choose bulk or stuffed shells (focusing on the location in the house and the availability of free space for active work with trainer).
How to choose a punching bag for home
-
filler;
-
fastening.
Let's take a closer look at each point.

Depending on the weight, punching bags are divided into:
light - 5-40 kg;
medium - 40–80 kg;
heavy - 80-120 kg.
For non-professional training at home, it is better to choose shells from 40 to 80 kg. Consider also your own weight. For example, if you weigh 90 kg, then a 45 kg bag will be too light for you and vice versa. The best option when your weight is in the same category as the weight of the bag.

If you find it difficult to choose, give preference to a heavier projectile. Just remember that the greater the weight of the pear for the house, the stronger the mount should be.
Punching bags for the home are cylindrical and round shape. There are more complex varieties in this regard, but we will consider only the classic ones. The most popular shells are elongated cylindrical shells of medium size. They can be used for kicks and punches. Pear-shaped bags are more suitable for practicing punches only with hands.

Punching bags for the home are filled with the following materials:
-
sawdust;
-
rubber shavings.

Tyrsa is not the most practical filler, because it quickly falls to the bottom of the bag, making it stone, which negatively affects the possibility of training. Plus, tyrsa and sawdust can start to rot over time.
Sawdust - have characteristics similar to tyrsa, in this regard, they are also not a very good option, however, such punching bags for home have the lowest cost.
Sand - makes the projectile very hard, so not everyone can use it for training.
Rubber shavings are the most practical option that won't rot or fall off over time, but homemade punching bags with these fillings are more expensive than the rest.
Of course, a projectile with rubber shavings is most suitable for practicing at home from stuffed types of pears, but if this is too expensive for you, you can buy a bag filled with sawdust or tyrsa.
Attention! A punching bag for the home with such a filler will quickly lose its functionality, and you will again have to spend money on buying a new projectile.
For those who have been involved in sports for a long time or already have experience with a pear, you can safely choose a bag with sand filler.
The lining of a punching bag for the home can be made from:
leatherette;
PVC coatings;
tarpaulin.
Of course, the skin is the most best material, it is elastic, durable, environmentally friendly. But these models are not for everyone. Leatherette good quality will also serve for a long time, you just need to make sure the necessary density and elasticity of the material.
Reinforced kapron (PVC) is often used for lining punching bags. Such material has a different density (on average 600 to 900 g / m 2). The thicker it is, the higher the strength. However, it is not recommended to buy a projectile sheathed with such material, since it does not have high elasticity. Because of this, the pear will quickly become cracked and torn.

Tarpaulins are rarely used. Its properties do not allow sheathing boxing bags filled with sand or tyrsa. Although if there is rubber or polymer crumb inside, then the canvas-coated pear will turn out to be durable and wear-resistant.
Boxing bags are ceiling and floor. The former are attached to the ceiling with durable parts, the latter are equipped with a heavy base, and they can be moved from one place to another. The ceiling punching bag for the home is a cheaper and more popular model.

The installation method does not affect the functionality of the projectile in any way, here you need to take into account the free living space. If you have enough space at home to hang the bag and freely perform the necessary exercises on it, you can choose a simulator that is attached to the ceiling.
If there is not much free space at home, then it is better to buy a floor model that can be pushed to the center of the room during training, and then put back into place.
A ceiling bag often comes with a bracket and bolts, and if you don't have them, you can always buy fasteners from a sporting goods store.
For placement at home, the optimal height of a punching bag is 60–80 cm. This size is quite suitable for complex training. But it is worth noting that the longer the bag, the better. For example, a height of 100-120 cm makes the projectile convenient for practicing strikes at all levels. Focus on your height, free space in the house and, if possible, buy a large cylindrical bag.

A person's height is of great importance, since a teenager will be uncomfortable training with a very long projectile, but a tall professional athlete will be uncomfortable working with a short projectile.
Another important factor is the cost of the simulator. Prices for universal bags-cylinders start at 1500 rubles and reach up to 60 thousand. You can choose a children's punching bag for the home for 400-700 rubles.
Some manufacturers offer good pneumatic bags for the home at prices ranging from 1400 to 25 thousand for a medium weight punching bag.
Shells for performing an uppercut are rare and expensive - their cost is from 8 to 22 thousand rubles.
Pillows belong to approximately the same price category - their price varies from 6 to 30 thousand rubles.
The most inexpensive chaser will cost 400–800 rubles, but this is a budget model with thin stretch marks and sawdust inside. For the home, it is better to choose a solid pneumatic pear for 1600–3000 rubles.
A pear ball for a child will cost about 1200 rubles, and for adults in sports stores there are many options from 4-5 to 34 thousand rubles.
Water-filled punching bags for the home are even more expensive - from 14 to 82 thousand rubles, so not everyone can afford such a purchase.
How to make a punching bag for your home with your own hands
The easiest option is to prepare eight polypropylene construction bags, seven of which are set one into the other, stitch the bottom with a harsh thread using a gypsy needle, and then pull it off as follows:

Then you need to sew on loops of durable fabric (four or six pieces) on which the projectile will be hung. The remaining bag must be filled three-quarters with sand, tightly tied at the neck, and inserted into the resulting multi-layered case. The boxing bag should not be tightly sewn up, as the filler will settle down over time, and its volume will need to be increased. Consider this possibility ahead of time.
Making such a punching bag for the home does not require large expenses, it turns out to be quite durable, although it does not look very beautiful. How to make a punching bag with your own hands so that you are not ashamed to hang it at home or at work? You need to take a piece of tarpaulin 100x80 cm, and another small cut to cut out a circle with a diameter of about 40 cm from it for the bottom of the pear.
Fold a large canvas rectangle in half and stitch along the edge on sewing machine. Then sew on the bottom. Then bend the top edge and attach the loops. In the resulting case, you need to lower the polypropylene bag with sand, and the gap for better shape fill with sawdust.
Instead of tarpaulin, furniture leather can be used. It's a softer material, which makes a difference if you haven't worked with a punching bag before. Hitting a rough canvas surface will leave abrasions on your hands, even if you follow all the precautions.
Whichever option you choose to make a punching bag for your home, it is better to mount it not to the ceiling, but to an L-shaped structure made of a steel angle or channel, securely screwed to the wall. You can also purchase a ready-made bracket. The sports equipment turns out to be quite heavy and can come off after a while if you hang it from the ceiling with anchors.

How to make such a punching bag at home yourself?

This is the lightest and softest model, as it is made from a rolled tourist rug, which is also called a karemat. The main advantage of such a punching bag for the home is its high dynamism: upon impact, the projectile deviates, and then flies towards. Even without setting a specific goal, you will have to practice the skill of evasion, the possession of which can help in a street fight.
Everything is clear with the content of such a pear for the home, but you need to figure it out with a flexible leg. You will need: two pieces of pipe measuring 1 m and 0.5 m, a tight steel spring, a steel plate round (diameter about 30 cm) or square (side length 20–25 cm). A short pipe should be welded to one end of the spring, a long pipe to the other, and a plate to the free edge of the long pipe, which will later be screwed to the floor. After fixing the metal part, you need to attach a punching bag to it with adhesive tape, after which you can start dynamic training.
If there is not enough space for an outdoor punching bag for your home, you can make a wall-mounted punching bag - it is more compact, although this is not its only advantage. The design of such a simulator, most likely, is familiar to everyone who is interested in martial arts, and is more successful than the above-described simulator with sand filling or a pear on a flexible leg.
This projectile allows you to work out punches (fists, base and edge of the palm, knuckles, etc.) in the head, body and abdomen of the intended enemy. And the rice filler feels like a human body upon impact.

First we sew a canvas cover. We fold a cut of 120x120 cm in half, sew it on a typewriter on the sides - we get a bag. We fill it with 3-4 kg of cheap rice and make a manual line, designating the lower third with it. After that, pour another 3-4 kg, stitch again, separating the second third. And then again. It turned out three bags located one above the other. The top hole needs to be sewn up with a sewing machine and sew on two loops to hang a punching bag at home.
How to fix a punching bag at home
It is not necessary to engage in martial arts or attend Gym to exercise with a punching bag. The projectile is attached to the wall, ceiling or fixed on a special stand that you can install at home.
Decide on the location of the pear. Decide where it will be most convenient to practice with such a projectile. Do you have a basement or gym room? The placement of the pear directly depends on the availability of free space in the house.
Choose between ceiling and wall mounting. To ensure that nothing interferes with you while exercising with a punching bag at home, try to ensure that you can move 360 degrees around the bag. This positioning option allows you to perform active exercises and movements.
You can hang the bag from the ceiling off the center of the room, but then the punching bag can hit something, break or injure you by bouncing off the wall.
Many choose to mount the pear ceiling in the garage or basement.
Prepare a strong support beam. Support beams are narrow beams that are located along the ceiling not far from each other. The standard distance between them is 40 cm, but sometimes it reaches 60 cm. Most often, a home punching bag is hung from the ceiling for better mobility. Please note that this requires a strong beam with good support, as it will not only have to support the weight of the punching bag, but hold it while swinging.

You can find the support beam using the nail finder.
Or use the listening method. Try knocking along the ceiling - if you hear a dull sound, then there is no load-bearing beam in this place. If you find a support beam, the sound will be ringing, as you will be knocking on wood.
To locate the support beam, you can measure the distance from the wall. You need to pull the tape measure close to the edge of the wall and measure 40 cm. If the desired beam is not found, measure another 40 cm, and then by analogy. In the end, you will manage to find the right place on the ceiling. Tap the surface again to make sure the support beam is found.
Attention! A mistake when installing a punching bag is fraught with serious damage to the house. Therefore, it is very important to find the strongest beam. If you hang a punching bag for your home on rafters or ceiling joints, there is a risk of breaking drywall.
A beam for a punching bag must withstand a weight greater than the weight of the bag.
Make a recess in the support beam. Insert the eyebolt into the resulting hole. First you need to screw it into the hole, then tighten it with a wrench.

Hang a pear. Attach the chains to the corners. They should be complete with a punching bag. The kit should also include hooks that are attached to the chain. Then hang the bag on the eyebolt.

Check how secure the punching bag is for the house. Try pushing it a few times to see if it is securely installed. It is better to reinstall the machine if the bindings seem weak or not strong enough to you.
Some use an alternative method of attaching a punching bag at home.
The bag is suspended using a wall fixture. If in doubt about a ceiling mount, fix the bag to the wall. In almost all sports stores you can buy a wall bracket with all the necessary parts for mounting. But this method is relevant only for brick walls. Otherwise, the installation may damage your home.

Buy a mobile stand. If design features or lack of free space do not allow you to hang a punching bag at home from the ceiling or attach it to the wall, purchase a mobile rack. Some of them even have wheels for greater mobility. But this device must be heavy so as not to move while working with the projectile. A heavy punching bag usually requires a stance around 135kg. For lighter simulators, a weight of 45 kg is enough.
If you chose the stand version, simply attach the chain of the punching bag to the S-hook. As you can see, the installation process is quite simple.

Attaching a punching bag to the ceiling in your home can be very dangerous. The projectile may fall and injure you with its weight or chain.
When installing a punching bag, there is also a risk of damage to your home. Therefore, first you need to make sure the strength and reliability of the supporting elements of the structure and find out if they can withstand the load from dynamic work on the pear. If you have chosen a ceiling mounting method, it is better to use durable boards or diagonal braces. In the absence of such an opportunity, it is recommended to consider other ways of installing a boxing projectile.
How to exercise on a punching bag for home
You need to learn how to work with a punching bag correctly, and not mindlessly hit it. We propose to consider several recommendations for such exercises in order to develop technique and increase the force of impact.
Be careful.
During training on a punching bag at home, one very important problem often arises - the wrong "visual" habits are formed. When punching, athletes often look at the bag at one point or do not look at it at all.
Too focused.
It is good for the shooter who aims at a specific point on the target. During a fight, a closer look tells your opponent where you are going to hit. Don't look down if you're going to hit the torso. This gives an advantage to the opponent - he will be able to defend himself and strike back at you. Do not look at the point of impact, because when you hit the body, your head is left unprotected.
Don't look in one place.
When working with a punching bag at home, look ahead. Think that the bag is your opponent and you should always see him. In this case, special attention should be paid to his head and body movements. Strike correctly, but don't stare at the point of impact.

Lazy eyes.
This is the name of the situation when the athlete does not look at the bag at all. It's hard to believe, but some fighters find it difficult to answer the question of where they look when punching. It also happens that, inflicting powerful blows, they look at the floor or to the side. Often during the offensive, the wrestlers hit blindly from fatigue.
Your eyes should not wander. A lazy look makes you vulnerable! Concentrate and look at the projectile. So you increase the accuracy of strikes and definitely do not miss the oncoming attack. In order to get rid of a lazy look, you can attach pieces of adhesive tape to the surface of the bag (what you will look at) or work more with other projectiles that improve the concentration of vision, for example, with an air bag.
You are required to look at the punching bag, but not focus too much on it. You should be able to see the entire projectile, not part of it. Always control the distance between you and the bag.
Keep your balance.
Put power into the punch, rather than trying to lean with your whole body. Stand confidently on both feet and don't put your weight on the bag. Good balance allows you to hit harder and improve your footwork technique.
Don't lean on the bag. No need to push him with your shoulders, because in the ring a technical opponent will easily dodge you simply by shifting his body. And definitely don't hit your head! This - The best way receive UPPERCUT.
Don't push, but hit.
The punching bag after the blows should not sway, but vibrate. There is even a saying that says that a blind person can recognize whether a blow is correctly delivered or not. This can be determined by the sound from the contact of the hand with the surface of the projectile. It should be sonorous and loud, and not deaf in any way.

Pushing the bag instead of hitting it will tire your arms quickly. An accurate and targeted strike will practically not budge the projectile. Try to relax your hands and make quick whipping blows. Put the power into the punch, but make sure that the contact time of the fist with the bag is not very long. As soon as the touch has occurred, immediately return the hand back and deliver the next blow. If your hands get tired quickly, then you are not hitting, but pushing the simulator.
When hit, the feet must be on the floor.
During the strike, fix your feet on the floor. So you can catch the balance, put maximum accuracy and power into the blow, and quickly return to the starting position after it has been thrown. You can move as much as you like, but if you are ready to hit, put your feet on the floor! If you find it difficult to keep your feet off the floor during movements, reduce the width of your stride. For professionals, the blow is much harder also because they do not tear their feet off the floor even during movement.
Don't strike - move your feet.
Coaches say: "Use your arms or legs, or your head." If the movement is not related to the attack, then it belongs to the category of defensive ones. The punching bag doesn't respond to punches, so you don't have to worry about head movement, but you should definitely think about leg movement. If you're done hitting, move.
Be mindful of distance. Move with the bag and always leave enough distance to strike. Do not let the pear go too far or reduce it to a minimum. Don't stop kicking. You must move with the projectile, and not wait for it to return to you for the next hit. Back off when the bag approaches and follow him when he leaves. If it's difficult to work your legs to the rhythm of the machine, try lightening the blows, replacing the bag with a heavier one, or training your legs.
Don't stop moving.
This is what separates a man from a boy. Pay attention to professional fighters and you will see that during training with a punching bag, they constantly throw punches. Rest between blows does not exceed two seconds.
Beginners in this sport take longer breaks between series of punches. As a rule, it takes 10-15 seconds to restore breathing. In the ring, such a long period of inaction can be fatal.

You may not always put all your strength into a punch, but you need to strike without stopping. For example, throw light punches and jabs while recovering your breath or move around the punching bag. If you are ready to strike, take a step and proceed to action.
Less power, more breath.
Working with a punching bag, like running, requires proper breathing. Don't focus on punching power. Focus on explosive breathing. In order not to get tired, relax and watch your breath.
Gives strength to the blow good technique, and endurance is trained through proper breathing.
Don't let the projectile tire you. The punching bag works at your pace according to the rhythm of the punches. Try to save some of your energy for more grueling work (combat with an enemy or training with an air bag). If you get too tired while working with a pear, then you are not yet ready for the competition.
Apply 3-6 hits.
This is the most optimal number of hits for a series. Not one, two or eight. With three to six hits, you can inflict damage on an opponent in a short period of time and have time to get away before the enemy responds. Combine blows in combinations. They can be either traditional (1-2-1-2, etc.) or non-standard (1-3-2, etc.). The fight consists of combinations of blows, and not based on single ones.
Strike high (to the head) and low (to the body). Often during the fight, blows to the head do not reach the target. Sometimes this is due to the fatigue of the fighter.

Rest in motion.
If you're tired, don't just stand there. It is better to rest while moving and apply light blows. Do not hang yourself on a bag or dance like Mike Tyson. But you also don’t need to stand still like a bag.
Put your hands up.
Don't think solely about the power of the punch. You may think that you are holding your hands high, but you can only check this when you fight in a duel. You can spend hundreds of hours beating a bag without realizing how open you are to your opponent. When throwing a jab, try not to drop right hand. Also act when you hit the left hook. Tuck your elbows in to protect your torso, not just cover your head. It is better to train with a punching bag under the supervision of a trainer or at least a friend who would yell at you every time you put your hands down.
Everyone knows that a punching bag does not give back, but this is understandable, and sparring is an integral part of training. All right, but, nevertheless, nothing can replace a heavy boxing bag. Each training projectile has its own purpose, and since in our case it is a pear, we will consider its purpose.
There is a difference between a punching bag and a punching bag, but many people speak of a punching bag as a punching bag, and, accordingly, they speak of it as it should - a punching bag. You can’t say that about a pear, since it resembles the shape of a pear in shape. Calling a punching bag a pear is more of a matter of habit in general, and I don't think it's something terrible.
The blog has an article "", which may interest you. To make a punching bag does not need a lot of time and money. By and large, you only need sand and a polypropylene bag (a couple of pieces). You should choose a pear filler based on your preparation, but this is not about that now.
 Let's go directly to how to hit the punching bag correctly. Why would a person be interested in this at all? No, I'm not in terms of goals. A person who is interested in the question "How to hit a bag correctly" is most likely training in the gym without a coach, or at home, and he does not quite understand what he needs to do. Alternatively, you have a coach, but you think that he is doing something wrong, and you doubt his competence. Maybe you just don't like the way he teaches. Yes, coaches are different. A good coach can always be identified by the achievements of his students.
Which pear (bag) to choose. Weight
The weight of a punching bag that may suit you depends on your weight, but in general, the heavier the better, and weights of 70-100 kg are fine. Naturally, you will not be able to train fruitfully on a 40 kg boxing bag if your weight is 90 kg.
In principle, it is a pear that can be suitable for practicing punches, but nevertheless, it will not replace a good and heavy boxing bag, since on the bag you can work out punches to the head and body, and you can also work out kicks on the lower parts and body. On a bag that is often closer to head height, you won't be able to practice low kicks. Accordingly, kicks fall at the level of the head. The material of the punching bag is not important, but I want to say a few words about it. If you work with bare hands, then the pear should be exclusively leather. For example, working with bare hands on a tarpaulin pear, you will very quickly erase the skin, and your fists will be in wounds that will not allow you to conduct a fruitful workout.
The bag should not be very hard, because working on a very hard bag, you will unwittingly restrain the force of the blow, which can become a habit, but we do not need it. But, if there is only a hard pear, then it's okay. You can work on it, slowly hardening your fists, and gradually moving on to punches at full strength, but this must be monitored and controlled.
Equipment

Perhaps you have a question - “Why work on a pear with your bare hands?”. The fact is that the athlete must proceed from the goal, and in accordance with it, approach training. If you are training to be in shape and fight back against hooligans on the street, then in this case it is better to use a minimum of equipment, or work without it. By equipment I mean bandages, shells and other gloves.
It is difficult to say what is best for training, the purpose of which is protection on the street.
- On the one hand - boxing bandages. Wonderful and very desired item fighter equipment, but do not forget that on the street you will not have time to wrap bandages, and your fists get used to the corset that is created by bandages, and in case of a wrong blow, there can be serious consequences. Although, even when training in bandages alone, the hands become hardened, and the consequences will not be very serious, unlike an untrained fist. The same, do not forget that the boxing bandage fixes the hand very well in the wrist, and this gives a certain unloading during training.
- The second option is ordinary medical elastic bandages. A very good thing, and there are advantages to using these bandages. One of the pluses is that they bandage very quickly. They do not need to be bandaged like boxers. We simply wrap an elastic medical bandage around the palm and wrist, and it is advisable to hide the end under the bandages in the palm of your hand. The option is good and convenient. If the boxing bandage will be let down, if we do not tighten it tightly, then everything will be in order. We can wrap the striking surface as many times as needed, and wind the wrist several times purely symbolically. That is, in this case we simply protect the hand, and give freedom to the hands, which will not be fixed during an unexpected street fight.
- Rifle gloves are a good option. It is good because the brush is not fixed, and gloves serve as protection for you. Agree that you can’t work with your bare hands for a couple of hours. This is a great option, and if possible, I advise you to choose it. The hand remains as mobile as possible at the wrist, and the bones of the fist are not in the corset.
- Another good option that I want to advise you is ordinary household gloves. You can fruitfully work on the bag in ordinary household gloves. If they are tight, then put on one pair, and if they are thin, then two or three. This is an economical and angry option. Household gloves do not create a corset and protect hands.
- Working with bare hands is, in principle, a good option, but work should be done exclusively on a leather pear. But, despite the material, the skin of the hands will suffer, and such a choice can cause inconvenience. I think it's better to protect the fists, and "leave the bones" to the hooligans. The equipment will protect your fists from injury and allow you to increase your workout time.
If you are boxing, then to achieve your goal you need to work in. That is, training should be as close as possible to the conditions that are the target.

The weakest point
Now I want to say a few words about the weakest point, and I think that many have guessed that this is the wrist. If you haven't hit a bag for a long time, or haven't hit it at all, then you may be surprised to find that with a strong enough blow, your brush breaks. This may be seriously angry, but anger will not help here. There is nothing to worry about, since your wrists are not prepared, and accordingly, they must be prepared.
Strong, the wrists become after some time of training with a pear, as they get used to the load, but it would not hurt to further strengthen them and, in general, devote some time to them in training.
Ways to strengthen the wrist.
- . An excellent option for strengthening the wrists.
- Fist stand. Trains not only the wrists.
- . There is nothing to add here, since it is already clear that push-ups on the wrists strengthen the wrists.
- Bending the arms at the wrists with a barbell or dumbbells, various grips. This is a great exercise that will help build strength in both the wrist and forearm muscles. We put our hands on the bench, palms up, while we squat. We hold dumbbells or a barbell in our hand. The brushes should extend beyond the bench. Now just raise the brushes, and lower them to their original position. You can use another grip - palms down, but for the wrists this does not play a special role. You can also train with a rubber band.

Warm up
Now let's talk a little about the warm-up. Do I need to warm up before working with a pear? On the one hand, this part is not very important, since working with a pear is an aerobic exercise, which is a warm-up. Increasing the pace gradually will not hurt anything.
Legs are very important in combat. If the muscles are not warmed up, then they can be damaged, and they will not have the mobility that heated muscles have. As for the legs, it is not so easy to warm them up just by working on the bag, even by actively moving. The best option there will be a jump rope. This projectile will help warm up both the lower body and the upper. You should not tire your body very much with jumping rope, and after 5-10 minutes you can proceed to the next stage.
Then you can go directly to work with a pear, or conduct a round of shadow boxing. Shadow boxing should be done in front of a mirror, but if there is no mirror, then it's okay. You need a mirror so that you can see your mistakes in it. During shadowboxing, try to identify your mistakes, which may be in the movement of the legs, arms, defense. Move - you should always be on the move. A target that doesn't move is an easy target and you should always keep that in mind.
After a round with a shadow, you can move on to beating a pear.
A bit of physics
What is the strength? Based on Newton's second law, we can say that there are two factors that affect force. Perhaps the strength is in truth, but still the one who has more mass and speed is stronger.
Let's break down the formula - F=mV/t.
M - mass
V - speed
T - time

How to hit a pear correctly. Working with a pear for beginners
Punch and push
A beginner who has just started on a bag will most likely start pushing it rather than beating it, and this is normal for a beginner - in any case, there is nothing to worry about, and as you practice, this disappears. If you train yourself, then you should always watch yourself to hit the bag, and not push it. And always remember Newton's second law. The blow must be concentrated and fast. A good hit is an invisible hit, and this should always be remembered, no matter for what purpose you are training.
First, try to deliver single blows, and only then, when you understand that you have the right single blows, you can switch to “twos” and “threes”. Do not forget that the hands must always return. The main thing is not to get used to the fact that the pear does not give back, and, if possible, to spar.
Remember footwork
Don't forget your footwork. During the punch, both feet must be on the floor. Of course, the legs must work properly on impact, but that's not all. As you hit the bag, move forward, backward, and sideways, which will also prepare you for reflex movements on the street and in the ring. Make dives and dodges. Do not stand in one place - do not accustom yourself to immobility. The more mobile you are during a fight, the harder it is to hit you, and the more dangerous you become for your opponent. Do not put your feet together - remember the stance. A wide stance is better than a narrow stance. The movement is the topic of a separate article, but in short, we first take a step with the foot in the direction of which the movement, and then the second. You can make jumps, but they must be short and fast, and this is also a separate issue.

natural style
The natural style is the punching style where you just hit the bag using combinations. Just stand up and hit the bag. No matter how, the main thing is to hit, returning your hands, and not forgetting about breathing. Hit from different angles, from different distances, with different strengths and
Working in this style in the future may be useful to you, especially on the street, since it is in the conditions of the street that non-standard situations are often created.
No need to keep your fist on the pear. As soon as the blow has reached its peak, the hand must be quickly returned.
When working on the punching bag, always breathe through your nose and keep your teeth clenched. This will become a habit and you won't open your mouth during a fight. The jaw breaks just when the mouth is open.
That's all. Now you know how to hit a pear correctly.
You may also be interested in articles:
All martial arts fans practicing contact martial arts use pears (or bags) in the training process to practice punches. Initially, pears were used in a boxing environment, which is why they are commonly called boxing bags.
Currently, pears are used in almost all types of martial arts. They not only help to develop accuracy and speed of impact, but also contribute to the development of endurance, balance, the development of a sense of distance and the strengthening of striking surfaces.
There are several types of pears and bags.

This is a large cylinder made of tarpaulin, leatherette or leather filled with sawdust mixed with sand, plastic or rubber crumb. The weight of heavy pears is from 60 to 110 kg. The main purpose of a heavy pear is to develop powerful punches and develop lethal combinations. By virtue of its heavy weight, the pear is difficult to swing, therefore it is the most suitable for the work of athletes of a large weight category. In Muay Thai, powerful kicks are practiced on such a pear. The legs must be unprotected. Only beginners are allowed to use light rubbers.
Warning:
- When working with a heavy pear, you should bandage your hands and work only with special gloves.
- Be careful when moving the pear in your direction. When struck, injuries to the wrist joint are possible.
- Working with a heavy pear requires sufficient physical fitness.
2) Medium punching bag
The most common type of pear. It can be used for training both in the gym and at home. The average pear has, as a rule, a pear-shaped form. That's where its name came from. The average pear is made from tarpaulin, leatherette or leather. The filler is sawdust, rags, plastic or rubber crumb. The weight of an average pear ranges from 30 to 60 kg.
Warning:
- The pear is quite mobile, while the pear is moving in your direction, it is not recommended to strike.
- Although the pear can be used for practicing at home, due to its range of motion, it requires sufficient space.
3) Light punching bag
Designed to develop the speed and accuracy of your punches. Its weight is from 5 to 30 kg. Most often, such pears are made from leatherette and filled with rags.
4) Uppercut or horizontal bag
Designed for practicing uppercuts. It is suspended horizontally with respect to the floor level. The bag is made from leatherette or leather, its weight is from 25 to 50 kg.
5) Pneumatic bulb

Inside this pear there is a latex or rubber chamber, which is inflated with air. Such a pear is used for setting fast and sharp blows, as well as for practicing reaction and ligaments with slopes. When working with such a pear, you can beat it in oncoming traffic, fly in or dodge it. Pneumatic pears are available in standard or reduced sizes.
Warning:
- Since the bag is quite light and capable of developing great speed when returning to its original position, working with it requires a good reaction and increased attention.
6) Thai bag (in everyday life "banana")

Reminds a standard boxing bag, but has a length of 150-180 cm. The weight of the bag is 60-100 kg. The bag is mainly used for kicking. The bag is able to deform from impacts throughout the entire volume, therefore it is weakly amenable to buildup.
7) Water-filled mannequin

The most modern development. Acts like a punching bag, but is made of latest materials and is a mannequin on a plastic base.
How to work with a pear
With any kind of pear should be worked only after a warm-up. The warm-up depends on the sport and the training program.
Working with a big punching bag
Work with a big pear should be carried out exclusively in the presence of a coach and, as a rule, according to a plan specially created by him. When working, you should monitor the position of the hand and fist. The fist should be clenched in the most last moment, almost in full contact with the pear. After contact with the pear, the hand should not linger; it should be immediately returned to its original position.
The blow must be applied at a very high speed. When working with a big bag, punches are combined with movements forward, backward and sideways, which contributes to the development of footwork. The work is often carried out in a free style, which involves a wide variety of movements. Since working with a big pear is quite tiring, in the event of fatigue, classes should be stopped or more attention should be paid not to percussion, but to protective techniques. Otherwise, the movements will be performed and remembered incorrectly.
Video: Working with a pear
Working with a medium pear
Working with such a pear is almost the same as with a heavy pear. The only difference is that the medium bag is much more mobile than the heavy bag, and this allows you to strike from a variety of positions.
Video: How to hit a pear
Working with a pneumatic bulb can be done in two ways. In the first case, it is recommended to strike the pear at different angles, because of which the pear acquires a chaotic movement. After that, you should strike a clear blow on it. In the second case, clear direct blows are applied to the pear, setting the pear in motion of one axis (in a straight line back and forth). Thus, the accuracy of strikes and the correct placement of the fist are developed.
Video: Working with a pneumatic bulb
Cooking is the oldest of the arts, and enemas are the oldest of the healing methods. According to legend, Thoth, the God of the Moon with the bird's head of an ibis, came up with it when, after a too dense dinner, he collected water in his long thin beak and introduced it into his own rectum to get rid of heaviness in the stomach. It is believed that the enema pear is a prototype of a bird's head with a long beak.
A rubber syringe with a soft tip, with a capacity of 50 ml, with which the intestines are washed, is very popular, as it is convenient to use. Its advantages:
- Designed for washing the intestines, holds 50 ml of solution, also suitable for washing the ears.
- Made from non-toxic, soft and durable material.
- Sterilization is allowed.
The range includes different types and sizes of soft-tip pears:
- N. 1 (25 ml).
- N. 3 (50 ml).
- N. 4 (65 ml).
- N. 5 (85 ml).
The gut is a garbage dump. Its task is to receive and remove undigested and excess parts of food. Some of these poisons are deposited in the nooks and crannies of the intestines, rotting and hardening. Over time, there are more and more of them, and more and more they harm the human body. A "dirty" intestine works worse, poisons migrate through the blood throughout the body and weaken the body. Symptoms of poisoning are:
- heartburn;
- constipation;
- frequent headaches;
- puffiness.
That's when you need to take a rubber pear.
Advice for those who do not know how to make a pear enema at home: first you need to unload the stomach by drinking a glass of fresh sauerkraut juice, whey or buttermilk in the morning on an empty stomach.
People who are overweight or constipated can drink 30 g of bitter Glauber's salt dissolved in ½ cup of water with the addition of lemon juice. This unpleasant, bitter-sour mixture can be diluted with a decoction of mint for a better taste. You can't leave the house for several hours, because the emptying of the contents of the intestine can happen very abruptly!
Serious attention should be paid to the first bowel cleansing. It is useless if only part of the gastrointestinal tract is washed. For deep cleaning it is necessary to use an irrigator, which can be bought at any pharmacy.
Instructions on how to make an enema with a pear correctly:
- Prepare a solution. For this in a liter hot water brew a mixture of herbs, for example, chamomile (6 tablespoons of herbs pour a liter of boiling water, leave for an hour).
- The second option is an infusion of chamomile and. Boil two tablespoons of seed for 10 minutes in 2 liters of water, after removing from heat, add 4 tablespoons of chamomile, insist.
It is very easy to make it. In the cork of the bottle, drill a hole to fit the size of the body from a felt-tip pen, which we insert into the hole and seal with plasticine. We pierce a hole in the bottom of the bottle with a needle, which can be plugged with a match when water is poured. We put a plastic tube on the body of the felt-tip pen. All! Fill the bottle with water, insert the tube into the anus and pour the contents into the intestines.
The attitude of official medicine to enema is ambiguous. Some gastroenterologists prescribe it, others avoid it. The explanation for the dislike of the device is that the bowel becomes accustomed to this procedure and subsequently does not respond to modern laxatives in the case of constipation. Therefore, it is not recommended to use classic enemas for a long time.
In the 21st century, a special enema appeared in the form of a small tube. It's called a microclyster. It has gained immense popularity in pediatrics, but it is also an excellent choice for adults. The tube contains Microlax. It works quite uniquely. It liquefies the stool, changes its structure and contributes to the normal physiological recovery of the body. The effect is amazing - after 15 minutes the problem of constipation is solved.
To answer the question: How to douche at home?"- it should be clarified what douching is.
Douching is a process in which fluids are introduced into the vagina to flush out disease-causing bacteria.
But you should not get too carried away with douching at home, since along with pathogenic bacteria, you can wash the beneficial ones, which will negatively affect the vaginal microflora.
Douching is used only for medicinal purposes, but not for preventive purposes. You should only douche if you are worried about strange discomfort in the vagina, as well as itching or burning. But in this case it's still better. consult a gynecologist first. He will prescribe douching if he sees fit. It is impossible to self-medicate and douche on your own at home.
And now let's look at how to douche correctly with the help of certain drugs. For your convenience, we have collected them in a table, using which you can see, how to prepare douching solution and how to douche properly.
|
Means |
Douching method |
|
Chamomile douching at home is very good helps with thrush, and you can prepare a decoction for proper douching as follows: take two large spoons of dry chamomile per liter of boiled hot water, pour boiling water, pour into a small enameled container, and then put on medium heat. When the broth boils, you should cool it to room temperature, and then carefully inject it inside with a gynecological syringe. It is necessary to douche with chamomile only before going to bed, since after this procedure it is necessary to lie down for a while. |
|
|
Douching with soda is most recommended for thrush, as well as for conception. The solution for douching is prepared as follows: take half a liter of warm water, add a small spoonful of soda to it, then pour the solution into a gynecological syringe and insert it into the vagina with a neat trickle. It is best to carry out the douching procedure in the morning or in the evening, but not at the height of the working day. |
|
|
Chlorhexidine |
In order to properly douche with Chlorhexidine, no need to use a pear or gynecological syringe. The form of the drug package will allow douching without these elements, just insert the tip of the spray into the vagina and inject about ten milliliters of the product. After that, it is necessary to take a horizontal position for half an hour, so that the drug has time to act. |
|
To douche with a drug called "Citeal", it is necessary to dilute 50 milliliters of the drug in 500 milliliters of warm water, and then gently introduce the solution into the vagina, after which it will be necessary rinse with clean warm water. You can douche with this drug at home every day. |
|
|
Hydrogen peroxide |
To properly douche with hydrogen peroxide, without causing damage to the body, you should mix peroxide with warm water in a ratio of 1: 3. After that, the solution is poured into a gynecological syringe, one end is inserted into the vagina, and then the solution irrigates the walls of the vagina. The duration of the procedure should be at least 10 minutes in order for it to have at least some effect. |
|
Miramistin |
Douching with Miramistin takes place as follows: the tip of the bottle is treated with hot water, then it is inserted into the vagina at least 5 centimeters, then the bottle must be pressed 3-5 times, as a result of which the walls of the vagina will be irrigated. Reviews of women who douched with this drug are mostly positive. The preparation does not cause burning, has no smell and is practically colorless. But still, he has contraindications, therefore douching "Miramistin" without a doctor's prescription is not advised. |
|
tantum rose |
It is necessary to douche correctly with the preparation "Tantum Rose" in this way: if you have purchased a liquid for douching, then it does not need to be diluted with water beforehand. The tip of the vial is inserted into the vagina and, by pressing on the vial, the liquid irrigates the walls of the vagina. If you bought rose powder for douching at home, then its contents should be dissolved in 500 milliliters of warm water, then pour the solution into a douching pear, and then use it for its intended purpose. This drug can even douche into the rectum. |
|
Celandine |
Douching with celandine is very simple. To do this, you need to take 10 grams of dry celandine, pour it with one liter of hot water and put on fire to bring the infusion to a boil. When the liquid boils, it should be removed from the heat and let it brew for at least three hours. Then the infusion is poured into a douching pear and used to irrigate the vagina. Douching with celandine should take place no more than twice a day. |
|
Potassium permanganate |
For proper douching with a solution of potassium permanganate, a 0.02% solution should be prepared. Its color should be pale pink, as higher manganese content in the solution can cause burns when douching. It should be clarified that douching with potassium permanganate has a very short-term effect, and besides this, the finished solution can be stored for no more than 12 hours. After this time, it loses its properties. |
|
In order to properly douche with Dekasan, you should warm up 50 milliliters of the solution to a temperature of thirty-eight degrees, and then use a pear to douche. You can use the drug three times a day. An overdose of this drug is not possible, but this does not mean that you can douche with Dekasan every half hour. |
|
|
blue vitriol |
|
|
Furacilin |
You can correctly douche "Furacilin" at home as follows: one tablet of the drug is diluted in one hundred milliliters of hot water, let the solution brew a little so that the tablet dissolves, then pour the resulting product into a gynecological syringe and use as directed. You can douching with Furacelin no more than four consecutive days. |
|
It is necessary to douche with the ASD preparation as follows: exactly 30 drops of ASD must be dissolved in 500 milliliters of warm water, after which the resulting solution should be douched. Douching ASD is also recommended when woman wants to get pregnant. |

How to douche with a pear?
Right douche with a pear or gynecological syringe need as follows:
First, prepare a suitable solution, which must be warm.
After that, you should go into the bathroom, the bath itself should be dry and warm, so that you can sit on its edge.
The legs must be spread apart, the vestibule of the vagina should be lubricated with baby cream.
The tip of the pear should be inserted into the vagina carefully, trying not to injure the walls of the vagina.
To properly douche, the tip of the pear must be inserted to a depth of about seven centimeters. If you feel discomfort at the same time, then the tip of the gynecological syringe should be inserted to a depth of five centimeters.
The jet entering the vagina should not be too strong, so as not to wash out the beneficial bacteria.
After douching, you should lie down in a horizontal position so that the solution has time to be absorbed.
It should be clarified that it is impossible to douche during pregnancy, as this can harm not only the body of a pregnant woman, who is already weakened, but also the child.


