How to make interesting New Year's cards with your own hands. Postcards Happy New Year of the pig for children Do-it-yourself New Year's cards in stages
The most common type of congratulations on the holiday is a postcard. No exception for its solemn presentation to relatives, friends and colleagues - New Year's Eve. Despite the rich assortment of annually replicated postcards, in last years original, original New Year's greetings, created independently, are becoming increasingly popular. In mastering such a simple science, the following master class on making postcards with your own hands will help.
Quilling technique for making postcards
A greeting card for the New Year 2017 must necessarily depict the main attribute of this holiday - Christmas tree. A noteworthy version of a postcard with a forest beauty will be a product in the quilling technique that has gained immense popularity today among representatives of the hand-made technique.
To create a postcard of this kind, some materials and tools are needed:
- milky cardboard sheet,
- paper strips for quilling in three shades of green,
- corrugated paper white color or alternatively a napkin,
- scissors,
- bamboo fruit skewers
- PVA glue.

Armed with sharp scissors, each strip of quilling paper along its entire length is cut across two-thirds of the width of the strip.

At the next stage of work, a Christmas tree element is formed. To this end, each already prepared strip for quilling is tightly wound onto a bamboo skewer, after which its paper edge is attached to the rudder formed in this way using PVA glue.

Using the described method, the required number of paper elements is formed, which will subsequently create several tiers of the Christmas tree, made in three shades.

The upper edge of each of the resulting elements is fluffed with fingers, thereby forming a kind of paper pom-pom.

Lush paper elements in three tiers are glued with PVA onto the front of the cardboard chosen for the postcard.

To make such an original image of a New Year tree will be within the power of both an adult and a child who wants to please his parents with his gift.
Sewing method in making a New Year's card
New Year cards You can create 2017 with your own hands using bright threads and decorative elements such as sequins and beads.

To work on the manufacture of the presented postcard, you will need:
- colored cardboard,
- awl,
- stationery knife,
- ruler,
- simple pencil,
- needle,
- bright silk threads of predominantly green shades,
- sequins or beads in gold or silver.
Given such an important nuance that the symbol of 2017 will be the Rooster, which is distinguished by its colorful plumage, it is preferable to choose cardboard for a future postcard in red, scarlet, orange or bright yellow.
A rectangular sheet of the selected cardboard must be folded in half and held a couple of times at the fold. Using a ruler and a pencil on the front of the future postcards easy strokes outline the contour of a heifer with a triangular shape.
In the upper corner of the formed geometric figure, carefully cut out with a clerical knife five-pointed star. On the inside of the postcard, exactly opposite this hole, you need to glue a star-sequin of the same size, which will subsequently be visible through a slit in the paper.
Using an awl, holes are pierced on each side of the triangle at a distance of one centimeter from each other.

Having tucked a double-folded silk thread into the needle, a knot should be formed on its edge in order to fix it on the base of the postcard. A needle with a thread is inserted from the back of the cardboard into the upper hole under the cut out star.

Following from top to bottom, stitches are made on the front side of the postcard different lengths, each time stringing one sequin or bead on the needle, imitating Christmas tree tinsel.

Embroidered like this in an unusual way christmas tree will be to the taste of the owner created by the original technology greeting card.

A wealth of types of voluminous New Year's cards
A do-it-yourself postcard for the New Year 2017 can be voluminous. For some models, it is best to use scrapbooking paper.

To make such an attractive New Year's greetings, you will need to stock up:
- sheet of white cardboard
- scrapbooking paper in different colors
- simple pencil,
- scissors,
- pva glue,
- a few vintage buttons, beads or rhinestones.
At the first stage of work on a postcard of this kind, the paper of the selected shades should be cut into rectangular fragments so that their height is the same, and the width of each is about one centimeter less than the previous one.

Taking a pencil as a basis, rectangular fragments should be wound around it, forming a tube. At the end of work on each of them, the paper edge is fixed with PVA glue.

Finished tubes are glued together, starting from the longest, ending with the shortest.


A multi-colored Christmas tree made from tubes is glued to the front of the cardboard taken as the basis for the future postcard.
Several pre-prepared vintage buttons or beads are attached over paper tubes, imitating the top christmas tree And Christmas decorations. For these purposes, industrial stickers or rhinestones are successfully used.


Paper voluminous New Year's cards can be created by studying other equally common technologies. For their manufacture, you can use not special, but standard colored paper.

To create one of the variations you will need:
- a sheet of plain cardboard measuring 20x30 centimeters,
- three square sheets of plain colored paper in one of the shades of green,
- rectangular sheet of paper Brown,
- scissors,
- PVA glue.
Each of the green paper squares should be 1 centimeter larger than the previous one.
The square of paper must be folded in half twice - first horizontally, then vertically. Having outlined the middle lines, the paper sheets are folded diagonally again.

At the next stage of work, pyramids of different sizes are formed from paper squares.


Having applied a little PVA glue along certain contours, the paper Christmas trees placed on top of each other are connected, beginning with a larger one and crowning a smaller one.


Having completed the formation of the crown of the New Year's beauty, you can proceed to the manufacture of its trunk. For this purpose, a brown paper rectangle is used. It must be folded in such a way that the result is an accordion.

Lubricating the reverse side of the paper with glue, a tetrahedral paper barrel is formed.

Glue must be applied to one of the sections of the trunk. Each face of the trunk should be aligned with central part lower edges of the paper crown.

The paper Christmas tree obtained in the process of work can be attached to the cardboard base of the postcard. Received such an original New Year's greetings will surely be very pleased with them.
An elegant voluminous New Year's card can be made in snow-blue tones using winter motifs as decoration.

To bring this idea to life, you will need:
- white, blue and multi-colored cardboard,
- scissors,
- simple pencil,
- ruler,
- PVA glue,
- small decorative elements imitating Christmas decorations.
The conceived postcard will consist of blue cardboard folded in half and triangles cut out of white or multi-colored cardboard. different sizes- future Christmas trees.
Using a pencil and a ruler, it is necessary to outline the strips of the planned bases for attaching cardboard Christmas trees at the same distance from the fold of the postcard. Using scissors, cuts are made along the longitudinal lines of the intended strips.

In a product open at a right angle, paper strips become a kind of steps, on which Christmas trees cut from cardboard are subsequently glued.

If desired, the tops of each of the Christmas trees can be decorated with openwork paper snowflakes, and the crown - imitating Christmas balls shiny sequins or beads forming a multi-colored garland.

You can create amazing one-of-a-kind New Year cards not only on your own, but also with the involvement of a child who will benefit from practicing this type of work to develop his creative potential and fine motor skills hands
For joint activities on a postcard, they will come in handy:
- sheets of thin cardboard in various shades of green,
- White paper,
- thick cardboard intended for the base of the postcard,
- scissors,
- PVA glue,
- sequins, sequins, tinsel.
First of all, a sheet of cardboard, when choosing which it is advisable to give preference to a blue tint, is folded in half.
A sheet of white paper cut to the depth of the future postcard is folded several times, forming an accordion. Its ends must be covered with a layer of PVA glue and firmly attached to both lower edges of the cardboard postcard.

Having folded the product in half again, the protruding parts of the paper accordion inside the cardboard halves should be carefully cut off.

Christmas trees are cut out of cardboard in green tones according to a given pattern. They can be decorated with sequins or beads that have an adhesive base with stars or circles.
The trunks of decorated Christmas trees are covered with a layer of glue and fastened in the folds of a paper accordion.

DIY Christmas gifts, including a variety of postcards, in the best way will express the feelings of their donors, who have invested a piece of their soul in self-made congratulations.
A good addition to the New Year's gift will be original postcard made by hand. It can be made at home with the child, in kindergarten and school.
Volumetric postcard "Herringbone"
You will need:
Green cardboard.
Scissors, stationery knife.
Postcard template.
Decorations.
1. Transfer the postcard template to cardboard.
2. Cut out the outline of the Christmas tree and corners with a clerical knife.
3. Fold the cardboard along the fold line, and straighten the tree so that it is in a vertical position.
4. Decorate the card with snowflakes, sparkles. On the back of the Christmas tree, write a wish.
"Mittens"
It is very easy to make such a card, and you can make it with your child.
For a postcard you will need:
Cardboard of any color or with a pattern.
Decorations.
Postcard making sequence:
1. Transfer the template to a sheet of cardboard.
2. Cut and fold along the fold.
3. Decorate a postcard and write a wish.
4. In the corner of the postcard, you can make a small hole (hole punch) for the ribbon. If the postcard is not plain, but with patterns or a pattern, then print the desired pattern on the printer in advance and then transfer the template to it and cut out the card.

"Christmas Trees"
For manufacturing you will need:
Cardboard of any color.
Lighter weight cardboard or a sheet of A4 paper.
Decorations.
A compass or something round, such as a mug.
Manufacturing sequence:
1. Bend a sheet of cardboard in half.
2. Draw a circle on thin cardboard, divide it into two equal parts with a ruler and cut out these two parts.
3. Fold the resulting semicircle with an accordion into six bends. Then fold the second semicircle in the same way. You will get two Christmas trees.
4. Stick double-sided tape on each layer.
5. Glue Christmas trees on the base of the postcard and decorate them.


"Snowflakes"
You will need:
Thick cardboard of any color.
Lighter weight cardboard in white or light blue.
Styrofoam.
Hole punch or awl.
Manufacturing sequence:
1. Fold the cardboard in half.
2. Make the right amount of snowflakes out of thin cardboard, if you have a snowflake-shaped hole punch, this will make the job easier. If not, then cut out the snowflakes in any shape.
3. Crush the foam into small balls and stick them on the base of the postcard in the places where the snowflakes will be.
4. Attach snowflakes to the already glued foam grains.

Template postcards. They are made very quickly and easily.
"Christmas Tree"
For manufacturing you will need:
Cardboard in the color you want.
Decorations.
Manufacturing sequence:
1. Print the template and transfer it to cardboard.
2. Cut out the Christmas tree according to the template.
3. Bend along the fold line.
4. Decorate the card with ribbons, rhinestones, snowflakes.

"Ball"
You will need:
Cardboard or paper with a pattern or pattern.
Decorations.
Manufacturing sequence:
1. Print the template and transfer to cardboard.
2. Cut along the contour.
3. Bend along the fold.
4. Decorate and tie a ribbon. This postcard can be hung on a Christmas tree.


Postcard template with "Gift" binding
Such a postcard is made in the same way as the previous template postcards.

Volumetric postcard "Spruce"
To make a postcard you will need:
Cardboard in different colors.
Decorations.
Ribbons.
Manufacturing sequence:
1. Print the template and transfer to cardboard. Cut out.
2. In addition, cut out 2 extreme templates.
3. Make folds along the dotted lines.
4. Glue ribbons on the outer edges so that the card does not open arbitrarily. Or make patterned edges and thread a ribbon into the holes.
5. Glue an additional 2 Christmas trees.
6. Decorate with rhinestones and write a wish.


Postcard with a pocket for a gift.
You will need:
Decorations.
Patterned hole punch or lace ribbon.
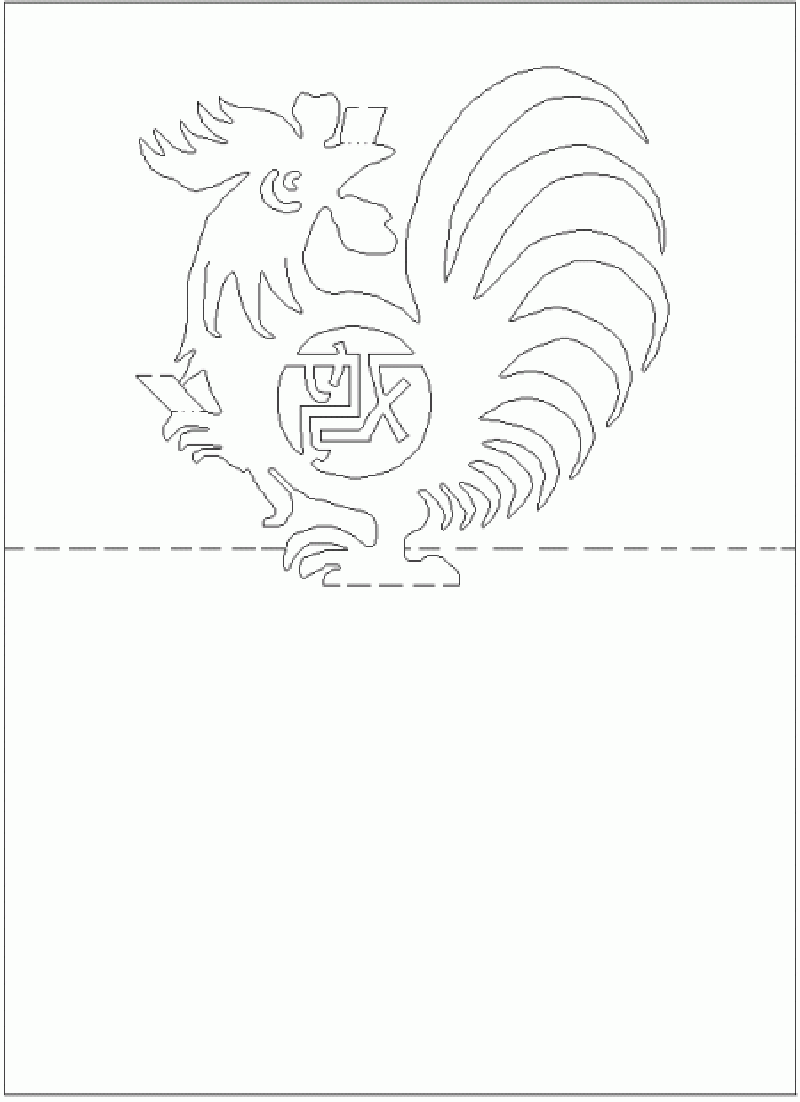
Ribbon. Drawing with a rooster.
Sequencing:
1. Transfer the template to cardboard or paper with a pattern.
2. Cut and fold along the lines.
3. If there is a patterned hole punch, then make the edges patterned, or glue a lace ribbon.
4. Glue the pocket to the base of the postcard and ribbons around the edges.
5. Decorate the postcard.
6. Cut out the rooster and stick it to the front.


Postcard from felt "Snowman"
For manufacturing you will need:
The cardboard is thick.
Decorations.
Manufacturing sequence:
1. Make snowman patterns and transfer to felt. Cut out.
2. Bend the cardboard in half.
3. Stick a snowman on the front side of the card and decorate with snowflakes and sparkles.

Postcard template from felt "Bunny"

Postcard "Surprise"
The original card in the form of a Christmas tree is suitable for congratulations and just as a gift.
For manufacturing you will need:
Postcard template.
Ribbon.
Decorations.
Execution sequence:
1. Transfer the postcard template to cardboard.
2. Cut out.
3. Bend all parts of the postcard along the dotted lines.
4. Make holes at the top of the Christmas tree with an awl.
5. Glue the three sides around the edges.
6. Decorate the Christmas tree with beads, snowflakes.
7. Put a souvenir inside, and write a wish on the fourth part of the Christmas tree.
8. Insert a ribbon into the holes and tie.

Background patterns for postcards

By the approaching New Year 2017, we all begin the search New Year's gifts, and with them New Year's greeting cards. If buying a New Year's card is not an option for you, if you still prefer handmade items, then this article will be useful for you.
The news port "site" in this article has prepared for you some ideas for making New Year's cards with the symbol of 2017 of the red fiery Rooster.
Do-it-yourself postcard with a Rooster

Here is such a charming Cockerel in the shape of a lush heart that will be able to convey all the warmest and most tender congratulatory speeches your family and friends, loved ones and friends, work colleagues and just acquaintances.
To make a decoration for a postcard, the Rooster itself, you will need a dense colored paper or cardboard, scissors and glue.

It is necessary to cut out the necessary details from colored paper, which, without exception, all have the shape of hearts. Symbolic, isn't it? From a thin strip of colored paper yellow color twist the spiral, which will become the legs of the cockerel.

Now form a cockerel on the front side of the greeting card and glue everything together. Don't forget to sign the postcard!
Do-it-yourself volumetric card with a Rooster
Very unusual option decorating a greeting card.
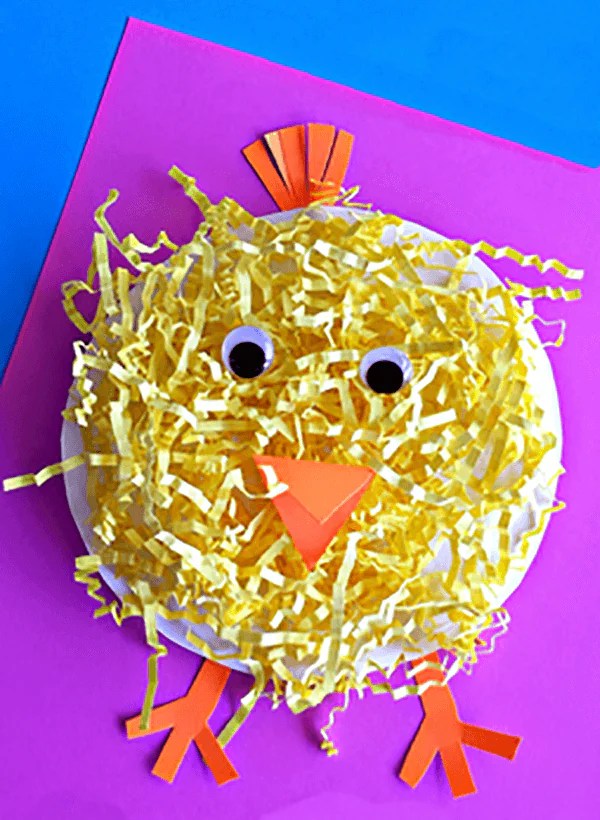
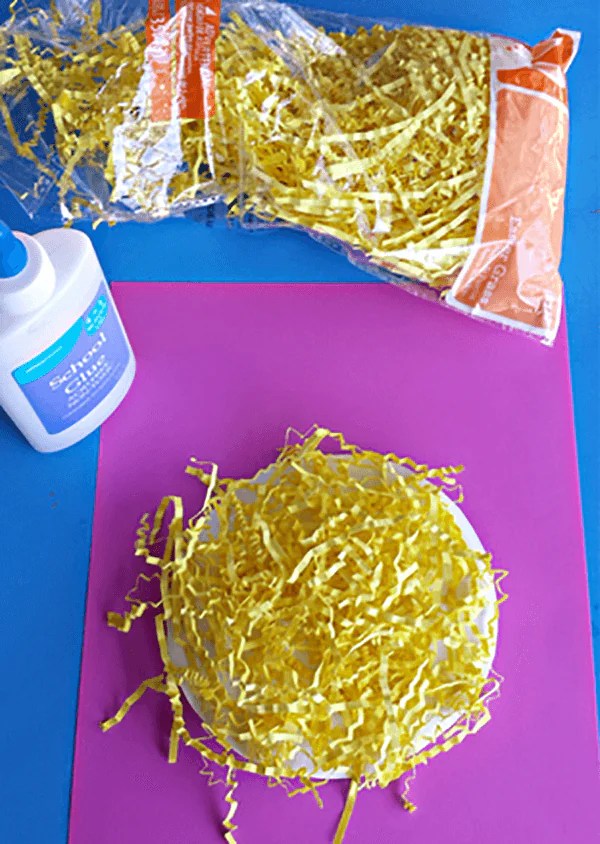
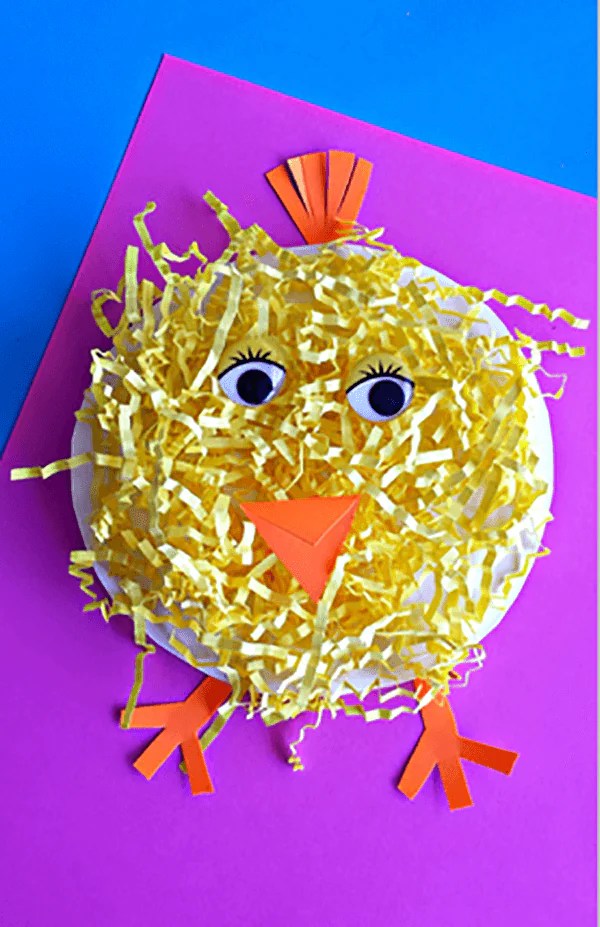
From thick cardboard or plastic disposable plate Cut out an even circle to fit on the front of your greeting card.
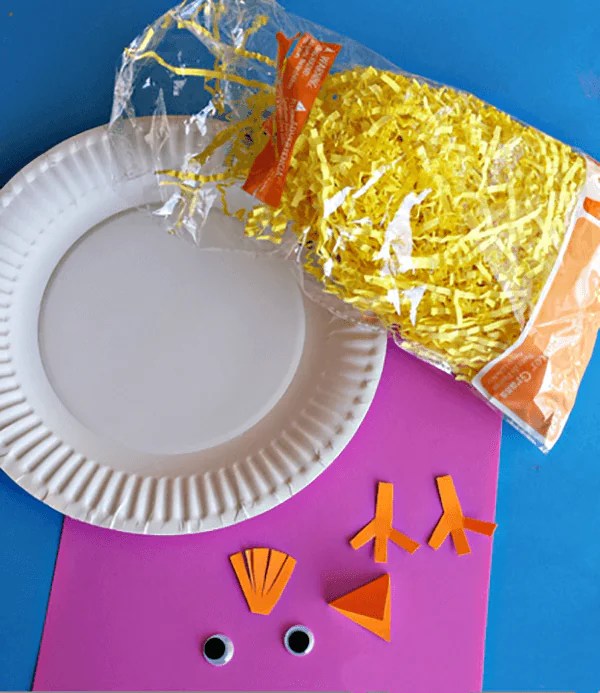
Now cut thin strips of colored paper and glue it to the prepared circle.

Now it remains only to cut out the red paws, beak and scallop.
And don't forget the live eyes!
New Year's card with a Rooster do-it-yourself

At first glance, such a postcard looks all normal. But one has only to deploy it and before you stand outlandish beauty plots.
New Year- a holiday of childhood. Each time, traditionally, it comes under the symbol of some animal according to the Chinese calendar. Upcoming 2017 - . Of course, I want to please each other with gifts. Shops offer an extensive selection of ready-made souvenirs, but Lately Handmade items are back in fashion. In the needlework departments, a lot of kits for making interesting things on your own appeared. And if you make New Year's crafts as a gift to relatives and friends with your child, then making New Year's cards is what you need!
There are many ways to work. Postcards can be made in several versions. Here are some of them, simple and very interesting.
- Postcard from colored paper and cardboard.
- Fabric applique.
- Straw applique.
- Postcard in quilling style.
- Postcard in the style of engraving.
- Grain drawings.
Application-based postcard options
Postcard from colored paper and cardboard. The simplest materials will be required.
- colored paper and colored cardboard;
- glue;
- scissors;
- drawing of a cockerel.
You can find a drawing of a cockerel on the Internet or draw it yourself. Disassemble the image into parts, cut each part out of colored paper, stick it on colored cardboard. Such a cockerel can be additionally decorated with several real feathers in the tail, make rope legs for it, glue a toy eye. And now the cockerel has become more elegant and interesting. You can complete the design of the postcard by beautifully signing it or by cutting out a Christmas tree and the numbers of the year from the same paper.

Another option is to make a postcard from corrugated colored paper. Cut out a Christmas tree and decorate it with pieces of real rain, sparkles and beads, place a cockerel on the top of the Christmas tree. There are many fantasies on this topic!
Fabric appliqué. It is made in the likeness of applications from colored paper, but the details are cut out from multi-colored, bright fabrics. You need to arrange them on a sheet of colored cardboard. Such a cockerel can be decorated in the previously proposed ways.
Straw work. This is very exciting, you can get an unusual postcard and a lot of fun from the process of creating a gift. It will take only one thing that you need to prepare or find on the street yourself, this is a straw. So:
- straws from any cereals;
- tracing paper;
- glue;
- scissors;
- figurine of a cockerel disassembled in detail.
Pour boiling water over the straw, and when it softens, cut the tube on one side with small scissors, straighten it. There may be an extra thick layer inside, it can be easily removed with a knife. Next, the workpiece must be smoothed with a hot iron.
Attention! The longer you hold the iron on the straw, the darker the color of the straw will be.
The details of the cockerel need to be cut out of tracing paper, glue straw on them. Smooth out with an iron and cut along the contour.
Advice! Do not forget to mark the direction of the straw on the details and follow this during the gluing process. Directions must match.
On a sheet of cardboard of your choice of color, you need to draw a picture. Glue the straw parts onto this sheet. The result is an original handmade postcard. Or maybe this technique will become your hobby!
quilling- a fashionable direction in the manufacture of applications. There are a lot of kits for it on sale. It is also possible to buy separately the stripes of the color you need. There is no point in dwelling on the quilling technique in detail, it can be studied in specialized articles.
Draw on the card the composition that you have in mind. Glue the little striped baboons different colors by filling in the drawing. An unusual composition is ready! It is not a shame to present it as a gift.
Unexpected ideas for a New Year's card
Engraving. A rather difficult task to complete, but if your child is already a schoolboy, he will definitely like this activity. Such a postcard will not sparkle with all the colors, but the result is no less interesting. You will need:

- a piece of linoleum;
- cutter;
- roller;
- Oil paint.
Engraving takes practice and time. If you decide to make a postcard in this style, you need to familiarize yourself with the technique in more detail in specialized sources.
Groats drawings suitable for little kids.
Advice! Do not leave your child unattended at work, in order to avoid unpleasant incidents.
Draw a cockerel, take the cereals and smearing the sheet with glue, lay out the grains by color. The work will dry and become a great postcard!
There are a lot of ideas for making postcards, the best of them are presented in this article. Further depends on your imagination. No one forbids combining several techniques into one, and new ideas are only welcome.
How to make a postcard for the New Year: video
Making a New Year's card, moreover, with your own hands for 2017, the Year of the Rooster is a wonderful way to show fiction and surprise loved ones and relatives with a creative surprise. After all, a thing made by yourself carries a huge positive charge, the warmth of your heart and hands. All that is needed for this is to stock up on a small amount of materials and connect your imagination.
Such a card will be a great addition to the main gift for the New Year of the Fire Rooster, who will definitely like such amateur performance. Below are some DIY options that you can use as a basis for creating your own masterpieces. With us, it’s not difficult to make postcards for the New Year 2017 with your own hands, just focus on the photos, read the explanations, and you will succeed.
Idea number 1 - Colorful Christmas tree
New Year's cards for 2017 of the Rooster, with their main decoration, can have a purely winter symbol, steadily associated with this home holiday. It is, of course, a Christmas tree. What is a holiday without prickly beauty?
Only in our case, the main attribute of the New Year's fun will not be with needles, but made from any paper you like and suitable in color. It is better if a different pattern is applied to the paper on both sides - this will become the main highlight of our Christmas tree.
Making it with your own hands is extremely simple. We cut out a semicircle from paper, fold it, as shown in the figure, as if forming a fan. In another way, you can cut out the "twigs" and then glue the paper together so that it does not open. The top can be decorated with an asterisk-sticker, a snowflake, a bead - as you like. 
Idea number 2 - Mountain of gifts
Realize this very original idea for a postcard as simple as shelling pears, and there will be a sea of emotions from receiving such a surprise. So, we choose paper, preferably a bright saturated color, it can be textured (with some kind of decorative pattern). 
We fold the selected sheet in half and, using a ruler, outline 3 squares (from larger to smaller or vice versa), which in the future will become gift boxes. Then, using scissors or a clerical knife, we make cuts at the top and bottom, thus giving volume to our boxes.
Glue them on top and decorate as you like. All, - unusual postcard ready for the New Year of the Rooster 2017!
Idea #3 - Creative Christmas trees and a cute snowman
DIY 2017 Year of the Rooster New Year Cards using the following ideas prove that being original without putting in a lot of effort is very easy. What is needed for this? Different textured paper of different colors (in our case it is white, red, green, black), cardboard, pieces of ribbons, buttons, glue, felt-tip pens.
snow beauty
To make a simple but very elegant Christmas tree out of white paper with an ornament, just cut out a triangle with a long top and decorate with two bows of transparent white ribbon. The top can be decorated with a silver snowflake.
Shine Christmas tree!
A Christmas tree made of circles looks even more interesting. different sizes, cut out of paper, differing in texture and color. Then the mugs are simply glued in the form of a Christmas tree on the base, and this splendor is crowned with an asterisk.
Fancy snowman
And let's make a snowman from buttons with our own hands? It will turn out interesting and unusual. We take 3 buttons of different sizes, choosing the smallest one with two holes that will be eyes. We glue the buttons on top of each other, finally “tying” a scarf from a thread and putting a funny hat on the snowman’s head. Or… a bucket cut out of paper is also an option.
We depict snowflakes around the snowman with a felt-tip pen, and we tie a bow from a contrasting ribbon on top. Everything - you can give a surprise for the New Year! 
Idea number 4 - Button mood
Buttons provide a wide scope for creativity. You can make a Christmas tree out of them with your own hands, laying out the gaps with rhinestones, beads or circles of paper. Buttons can be used in the same color and successfully combined with shiny rhinestones in the same tone.
To do this, you can take a ready-made postcard and decorate it with buttons to your liking and desire. And you can not be limited to ready-made templates and create your own, unparalleled options.
Buttons can not only be glued, but even sewn to the base, cut out in the shape of a Christmas tree - it will be even more interesting. As a decor, we use snowflakes, beads, bows tied from ribbons.
And how good is a Christmas wreath of red buttons of different sizes and even shapes! We lay them out in a circle, having previously lubricated the lower part with glue and forming a wreath, “hanging” it on a ribbon attached to paper with glue. It turns out extraordinary and very European. You can use combinations of buttons of different colors within the same wreath or even lay out interesting ornaments. 
Idea number 5 - For creative and ... economical
If you wish, when creating postcards for the New Year 2017, you can even use scraps of ribbons, trimmings of fabric, lace, twine, thread, in a word, everything that lies dead weight in sewing boxes, patiently waiting in the wings. 
Rustic postcard
So, simply by tying pieces of different fabrics, lace ribbons in the middle and gluing them under each other, you can get a pretty rustic-style Christmas tree. Buttons and mother-of-pearl beads are suitable for decoration.
Minimalists take note
For lovers of minimalistic design, the following option would be ideal: we select narrow tapes in green, slightly different in width and attach them one below the other, fixing them with a bead in the middle. It turns out simple, but very unusual!
"Live" Christmas tree
Ribbons of different lengths, tied to a stick fixed to paper, will perfectly depict fluffy twigs. Complement the picture with a shiny star on top. Even a child can cope with such a simple task, and the result looks extremely stylish.
As you can see, postcards for the year are not difficult to make. In addition, the process itself is addictive and gives a lot of pleasure. Even one single idea can become an inexhaustible source for the implementation of your own creative finds.
Based on the methods outlined in this post, feel free to create your own, which can and will become much more interesting and original. Most importantly, remember that the beauty of such crafts is in your own vision of the end result. Let him be a little naive and funny, your surprise will only benefit from this, believe me!


