What are vegetable crafts. DIY fruit bouquet for beginners - step by step photos
Date: 2018-10-13
fruit bouquets in Lately are becoming more and more relevant. Such an alternative to ordinary flower bouquets, which will delight and surprise with its unusual presentation, brightness and originality, is gaining more and more popularity. Creating a bouquet of fruits with your own hands is not as difficult as it might seem at first glance, and not much time will be spent. With a set of bouquet components, you can fantasize to your taste, the main thing is to use fruits that are not overripe, without mechanical damage. Such a cute edible bouquet will be relevant for any occasion. Well, if you need to congratulate a very small hero of the day in an original way, I propose to make a three-tier
In my fruit bouquet:
- Grapefruit - 1 pc.
- Coconut - 1 pc.
- Kiwi - 1 pc.
- Lime - 1 pc.
- Lemon - 2 pcs.
- Tangerines - 2 pcs.
- Apples - 2 pcs.
- Miniature persimmon "Long nose" - 4 pcs.
- Pear - 1 pc.
- Champagne mini - 1 bottle
- Decor with greens and berries
To assemble a bouquet of fruits, we need:
- cling film
- Skewers 30 cm long
- Scotch
- glue gun
- Kraft paper
- Decoration tape - 2m
- stapler
How to make a fruit bouquet:
To begin with, we will prepare all the fruits that we will use in the bouquet: wash them and dry them. 
We will cut some of the fruits, namely grapefruit, lime, lemon, kiwi. I also cut one persimmon. 

Cut fruits will be wrapped in cling film. To do this, put each fruit on the film cut down, pull the film up. We insert a skewer into each fruit with a sharp end: for large fruits, 3-4 skewers are required, for small ones - 1-2 skewers. Insert the skewers slightly at an angle to each other. We pull the cling film to the skewers, fix it with adhesive tape. We also fasten the skewers closer to the end with tape. 

To fix the skewers on the coconut, I used a glue gun and tape. First, glue the skewers with hot glue, then wrap them with tape. 
To prepare mini champagne for a bouquet, you need 8 skewers and scotch tape. First, we apply 1 skewer, fix it with tape, wrap the bottle 1 time, apply the second skewer from the opposite side, wrap the champagne again, etc. 
When all the components of the bouquet are prepared, we begin to assemble the composition. 
In the center we make an accent of champagne, grapefruit and coconut. We fasten the skewers with tape. 
Then add the rest of the fruit, also fix it with tape. 
The composition is ready, now you need to pack it in kraft paper. 
I used 2 sheets of kraft paper 50x50 cm. Fold each sheet obliquely, make 3 cuts in the center to make it easier to pack a fruit bouquet. We fasten the edges of the paper with a stapler. 


We pack the bottom of the bouquet with the remains of kraft paper, fixing them glue gun. You can also tie with twine for better fixation. 
We cut the bow into 2 equal parts, put them together, tie around the base of the bouquet, form a bow. 
We decorate a bouquet of fruits with greenery decor with berries.
Handmade fruit bouquet is ready! 
Original, beautiful and unusual!
For viewing, I offer a video master class on making a fruit bouquet from the Kateryna Bay channel
Best regards, Oksana.
I would like to continue showing children's crafts for readers. In the previous article, you and your children learned what you can do. In today's article, we will continue this topic and get acquainted additionally with fruit crafts, general interesting topic will be designated as: crafts from vegetables and fruits.
Study the article yourself and start creating with your children. Introduce your children to the world around you using the creative process.
The created compositions can be taken to kindergarten or school.
Crafts from vegetables and fruits - DIY "Ships"
See how simple and clear the sailboat is made.

We will need:
- Pumpkin
- A pineapple
- Watermelon
Master class on making crafts from vegetables and fruits - "Ships":
We choose a medium-sized round pumpkin for crafts. In the process of creativity, parents necessarily conduct a dialogue with the child. The child takes part with the help of thinking and children's prompts, since the knife cannot be put in the hands of a child.

Cut the pumpkin in half with a knife.

We explain to the child that we will do crafts in the form of two boats, which means we need to cut two identical pieces from a pumpkin.

We clean the hull of the boat from seeds.

This is the basis we have ready for the boat, like a boat.

Now we will cut the pineapple sail. Cut off a round plate from a whole pineapple.

Then we divide the round plate into two parts with a knife.

Now cut off the skin from both halves of the pineapple with another smaller knife.

Sail on boats happens white color so that when he swims, he can be seen from afar. That's why we make it from pineapple. All this must be explained to the child.

We stick a wooden stick into the sail - this will be our mast.

We stick the sail into the ship's hull.

On any ship, there should always be a flag on the mast. We will make a flag from a watermelon. Cut off the platinum with a knife.

We cut the plates into smaller pieces.

We will have two boats, which means two flags. We cut two identical squares.

Cut off the corners of each square.

With a knife we show that we need to cut a triangle.

The result is a triangle with three sharp corners - this is one flag.

We stick the flag into the stick. Crafts from vegetables and fruits "Ships" - ready.
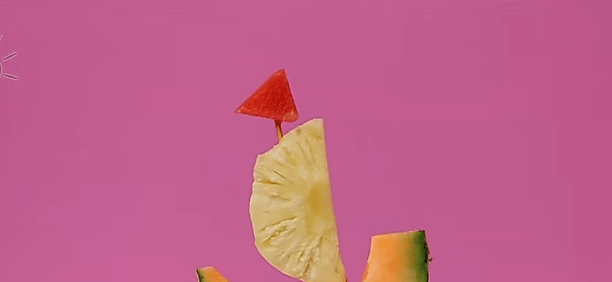
The red sail will be visible far away in the sea, because red is a bright color, like the sun.
Crafts from vegetables and fruits for the exhibition - "Hedgehogs"

We will need:
- Pear
- Grapes green
- grapes purple
Master class on making crafts from vegetables and fruits - "Hedgehogs":
We take a pear that is even and slightly oblong, as in the photo.

Knife not big size slightly cut through the outlines of the muzzle of a hedgehog.

We begin with a vegetable cutter to peel off the skin from the pear - the future muzzle.

That's how we peeled part of the pear.

Cut with a knife bigger size side of the pear.

We put the cut part of the pear on the table - it has become stable.

We take a grape brush and separate the fruits from the brush.

We pierce each grape with a toothpick.

We stick a grape into a pear.

We try to stick sticks in even rows. We start from the top row.

The row should be even to the tail.

Then we stick the second row of sticks with grapes.
 A bouquet of fruits and vegetables is a fashionable and useful trend in the world of gifts, which you can always congratulate in an original way, surprise and feed the hero of the occasion. The advantage of fruit bouquets over flower bouquets is obvious: fruit won't wither so fastlike flowers, besides, they can be eaten and shared with guests.
 The fruit composition looks just as bright, elegant and beautiful as the floral one, while it can bring as much joy and positive emotions. And even more: if you like juicy fruits, bright colors and fragrant smells, you will get incredible pleasure from such a gift. Flower bouquets are also pleasing to the eye and smell good, but sooner or later you will have to part with any fresh flowers, sending their withered buds to the trash can. And you can simply eat fruits, having previously captured them in bright and unforgettable photos.
Today, designers, florists and craftsmen have come up with many ways to replace flowers with tasty, healthy and no less beautiful gifts. We have already told you how to craft. And in this article we will teach you how to make a fruit bouquet from affordable, beautiful, bright and, most importantly, edible ingredients.
Traditionally - the best way for demonstration step by step instructions is detailed wizard class, after watching which you will definitely want to make a bright fruit bouquet with your own hands. We will talk about the technique of making a bouquet a little later. Now I want to talk about the ingredients and the principles of their combination.
What is used in the manufacture of bouquets?
For the manufacture of edible bouquets, not only seasonal or Exotic fruits and berries, as well as others tasty, bright, fragrant ingredients.
- Vegetables: broccoli, carrots, cauliflower, beets, cucumbers, turnips, zucchini, garlic.
- Greenery: lettuce, parsley, dill, mint, arugula, basil.
- Spices and aromatic herbs: vanilla, cinnamon, Bay leaf.
- Mushrooms: mushrooms, oyster mushrooms.
- nuts: almonds, walnuts, peanuts, hazelnuts, cedar.
- Candies and sweets: marshmallow, macarons, rafaello, marshmallow, chocolate, meringue.
- Flowers: live, paper, dried flowers.
 The principle of making bouquets can be completely different: you can select fruits and vegetables according to the color or “to the taste” of the person for whom you are preparing a gift. The main thing is that the ingredients are combined in size and look harmonious in one composition.
To fasten all the details of the bouquet, various auxiliary tools and materials.
- Skewers or bamboo sticks- for fruits.
- Vases, baskets, cardboard boxes- for installing skewers.
- Hard dough, styrofoam, floral sponge- for the base.
- cling film, craft paper, foil, sisal fiber- for package.
- Wire, twine, colored ribbons, scotch- for fastening.
Fruit bouquets are a fairly new fad and should be decorated with some simple rules .
- Fruits and vegetables for a bouquet can be precut or used as a whole. Be sure all the ingredients must be ripe, fresh, without stains and damage.
- Before you start making a gift composition, the ingredients must be rinse thoroughly and dry.
- Some masters in creating fruit bouquets use figured cutting, cookie cutters, shredding knives.
- Do not take too juicy fruits and berries, because soft pieces will fall off the skewer. To attach soft fruits and berries, such as strawberries, to the skewer, first put a small slice of apple on a skewer or other hard fruit.
- And sometimes half of the grapes are strung on top of the main fruits - to mask the punctures.
- Sliced fruit wrapped in cling film so that the product does not weather and does not darken. Also, the finished fruit composition can be sprinkled lemon juice.
- For greater effect, the berries are covered with chocolate or glaze with water, gelatin and lemon juice.
- When composing a bouquet for adults, you can inject a few drops of alcohol into the middle of the fruit using a syringe.
How to make a bouquet of fruits: step by step for beginners
After you have learned a few secrets of composing fruit arrangements, it's time to move on to practice and try to make a bouquet of fruits with your own hands: a step-by-step photo for beginners will just help you in this lesson. 
For composition you will need:
- fruits;
- bamboo sticks or skewers;
- scotch;
- gift wrap;
- greens, flowers, sweets for decoration.
 Citrus fruits for a bouquet can be cut- in this form, they will look more effective.
  We string fruit: large ones on bamboo sticks, smaller ones on skewers. Also you can use several skewers at once so that the composition does not break under the weight of fruit.
  We begin to collect a fruit bouquet - the largest fruits in the middle, smaller ones on the sides. While your hand is still “not stuffed”, use fruits and vegetables that are more or less suitable in shape.
Place pomegranate, orange and grapefruit in the middle and secure them with tape. 
Next, we set fruits around, smaller in size, berry branches, small flowers and greens.  Pack the finished bouquet in paper, fasten with tape and decorate with a ribbon.
  Your colorful and chic gift is ready.
We want to note in advance that in most crafts it is required to fasten together some parts of the product carved from vegetables or fruits. It is best to use ordinary toothpicks for this. Well, in extreme cases - matches.
1. Beautiful children's crafts from apples with their own hands - little men
In order to prepare crafts in the form of such unpretentious guys, the following components will be needed below:
- Big apples.
- Some apple seeds.
- Simple toothpicks.
- Knife.
The process of making this children's apple craft:
- you need to take two apples, one of which will be larger than the other, and put on top of each other. Accordingly, a small apple will be on a large one. Fasten them quite easily with an ordinary toothpick. These two apples will serve as the body of our future man.
- after that, four pieces must be cut off from the apple. Two pieces will serve as legs and need to be fixed at the bottom of the body. And accordingly, the other two pieces will be the hands of a person and they need to be fixed on the sides.
- you need to take a small apple and cut it into two equal parts. Each of the parts will serve as a little man's hat.
- pumpkin seeds will be needed in order to make the eyes and, accordingly, the nose of a person. The mouth can be cut with a knife right on the apple. However, there is another way: you can cut off a separate piece and fix it with the same toothpicks.
2. Crafts from vegetables and fruits - a giraffe from carrots or potatoes

In order to make a giraffe from vegetables with your own hands, you need two potatoes different size. Accordingly, the one that will be larger will act as the body of a giraffe, and the one that will be smaller in size will act as the head. In order to make a neck, carrots are perfect, from which you will need to cut off the tip. The torso with the neck will need to be fastened with toothpicks. Of course, any giraffe has ears and they can be made using small leaves or even seeds. In order to make legs, you can take small twigs from any trees, and the tail itself can be made from grass, which you can also look for dried for beauty. The easiest way to make eyes for a giraffe is with grits. Most often, buckwheat is used. You can also make a giraffe from a carrot, such as shown in the photo above.
3. Simple children's crafts of animals from fruits - a mouse from a pear
What to make such an unusual mouse? From very simple ingredients like the pear itself, a couple of pumpkin seeds, a small piece of wire that has a plug and, of course, with a knife.

The process of making fruit crafts with your own hands:
First of all, we will make the ears of the mouse: First, using a knife, you need to make cuts in the pear in those places where the ears themselves will be. After that, you should slightly bend your ears, which you will get back.The next step: we make the eyes of a mouse from a pear. Let's take pumpkin seeds, which we wrote about earlier, and you need to draw black pupils on them with a felt-tip pen or a marker, respectively (whichever you prefer). After that, you need to make incisions where the eyes will end up and insert pumpkin seeds. There is nothing complicated about this fruit craft.
The last step in this fruit craft is the tail of the mouse. In order for the mouse to have a tail, you will need the wire that was mentioned at the very beginning. We stick it on the other side of the eyes with the plug outward.
4. How to make children's crafts from pears - funny little men
If you suddenly feel sad in the fall, you can make such unpretentious little men. To prepare the second of them, you don’t even need any additional ingredients. It will be enough just to take a knife and cut out their eyes and a smile. If you want your little man to have legs and arms, then you can simply take ordinary toothpicks and insert them in place of the arms and legs, respectively.

For cooking the first little man, in addition, you may need another pear, a lettuce leaf and grapes and a banana. In order to make the eyes, you will need two circles, which we will cut off from a banana. On the circles themselves, we make pupils with a marker or a black felt-tip pen and, accordingly, attach them with toothpicks. The role of the nose of the little man's nose is performed by grapes, and the role of the hat is a circle cut from the second pear. A leaf of lettuce is just for beauty, and a smile can simply be cut out with a knife. By the way, if you want, you can also fix raspberries or blackberries with a toothpick at the tip of the pear.
5. Crafts from vegetables with their own hands - rat Larisa from radish
An interesting enough rat will turn out for anyone who has a radish in the garden. You can’t distinguish it at all from the one that the well-known old woman Shapoklyak had. How to make yourself such a girlfriend? And it's very simple.

To make such a children's craft, You will need :
- one large white radish
- a few lettuce leaves or, if none, cabbage
- one radish
- some olives to be stuffed with paprika
- knife from the kitchen
- five toothpicks.
Process:
- the first step is to properly wash and dry your large radish accordingly. After that, you need to remove all the leaves from it. You can leave only those that are in place of the tail of the future Lariska rat. You also need to remove all the roots, leaving them exclusively in place of the future antennae.
- after that, the front part of the radish should be cut off, and at the end, with the help of one of the toothpicks, the very large radish should be fixed. Immediately it is worth sticking a couple more toothpicks so that they later act like hair on a rat's beard.
- in order to make the ears, you will need to make two rather large notches on the left and right, respectively. They will need to stick the same lettuce or cabbage leaves. There really is no difference. Maybe just the lettuce leaves are a little brighter.
- at the very end we will make eyes for the rat Lariska. We cut the olives into small circles and stick each one into the radish with a toothpick (as you can see, we would not have been able to do almost anything without toothpicks). But what is a rat without eyebrows? They can be made using the leftover piece of radish.
6. How to make an apple and orange teapot and cup

With the help of apples and an orange, you can make a real tea pair or, if you want, a whole tea set. Here it will already be a matter of dexterity and accuracy, since the only tool that you will use is a knife. With it, it will be possible to make the base of the cups by removing the pulp from apples or, as in this example, use an orange for a cup.
7. Children's crafts from vegetables - eggplant penguin
Making such a penguin is quite simple and you only need an eggplant and, accordingly, a knife. In order to make the eyes of a penguin, it will be possible to take beads and pins, with which they can then simply be fixed.

First, you just need to cut the eggplant into two even parts. Each of their parts will become a separate penguin. After that, you need to take the beads and fix them in place of the eyes. However, what is a penguin without wings? They can be easily made with a knife. It is enough just to cut them in shape with a knife.
You can also try to make a slightly different penguin, for which, in addition to eggplant, other vegetables will be required. You will need to take a couple more carrots and one pepper. The carrot will be used for the penguin's legs and nose, and the pepper for the wings. That's all, then we will consider children's DIY fruit crafts, but for now, about eggplants.
8. How to make duck from cabbage and eggplant?

If you take a curved eggplant and one head of cabbage, which is called Beijing, then you can easily make a duck. There is already a beak and, accordingly, her chest will be made of green sweet pepper.
9. Children's crafts from vegetables and flowers - a beautiful vase

You can also use eggplant beautiful vase for flowers. Using a knife, you will need to remove all the eggplant pulp, and beautiful pattern can be cut with a knife. By the way, the pattern can be absolutely anything and as varied as your imagination allows.
10. Shark from zucchini - vegetable crafts for kindergarten
A shark can be made from a simple zucchini and sleight of hand.

It will be enough just to take a knife to cut out the fins and, accordingly, the tail. By the way, if you don’t have a zucchini, then a large cucumber can easily replace it.
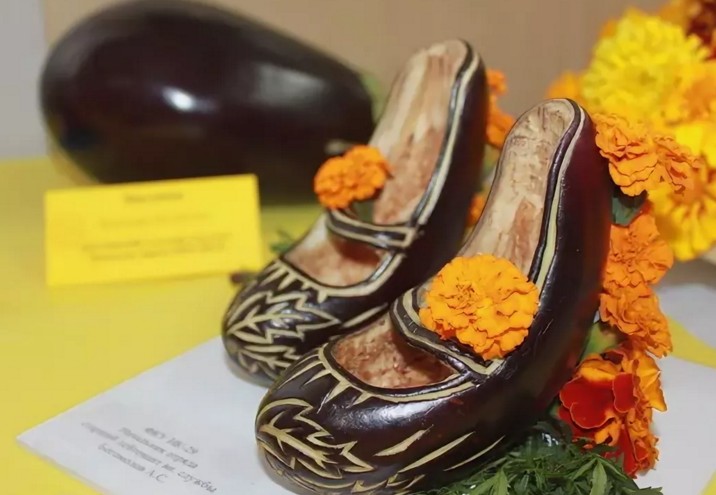
11. Zucchini shoes - vegetable crafts for children
Beautiful shoes can be made from all the same zucchini.

This craft is most to the taste of girls. It is not surprising, because they are maddeningly similar to the beautiful shoes that Cinderella dropped at the ball. Of course, shoes can also be made from cucumbers, but here you have to look for the right cucumber, since it must be really large.
12. Crafts from zucchini - pig
In order to make such an interesting piglet, you will need the zucchini itself, a small cucumber, and a couple of rowan berries.

The process of preparing crafts from vegetables:
- You need to clean the skin from the zucchini.
- Cut cucumber into slices and take five of them
- One circle, cut into two equal parts, can be used as ears.
- The other two mugs will serve as the nose of the piglet.
- Rowan berries should be fixed in place of the eyes.
13. Cucumber Train

With the help of cucumbers, you can also make a train. For this you will need four cucumbers. Two of them will serve as wagons. One will need to be fixed on the car of the first for beauty. And the remaining two cucumbers need to be cut into circles. They will act as train wheels in this craft, which will need to be fastened with toothpicks and pieces of cheese.
14. Crafts racing cars from natural material - cucumbers
With the help of all the same cucumbers, you can make cars for racing.

Additionally, you will need radishes, carrots and the most ordinary toothpicks. The radish in this craft will act as a helmet for the racer, and the carrots, cut into circles, will replace the wheels of the car. To attach the wheels, you will need a toothpick that is already familiar to everyone, which will connect the wheels, both to each other and to the body of the racing car.
15. Craft flowers from vegetables with your own hands - you need corn and carrots
Without exception, all girls will like flowers that can be made for the holiday for mom with toothpicks and carrots.

With a knife, you need to cut out the desired shape of the flower and then string it on the toothpick itself. Carrots can also be safely replaced with corn. Then the core can be made brighter from beets or corn kernels. If you make about ten flowers, you will get a rather beautiful bouquet.
16. Cabbage and carrot ice cream for kindergarten and school

To prepare such a craft, you will need:
- Cauliflower
- Carrot
17. Craft sheep, from natural material - cabbage

You can also make a pretty cute sheep from cauliflower, for the preparation of which you will also need currants and, accordingly, ordinary matches or toothpicks, with which you will actually need to fix your eyes. The figure of the lamb and its legs will need to be cut out with a knife.
18. Man and vegetable cheburashka for kindergarten and school
It is quite simple to make a hand-made craft of a person from vegetables with your own hands. For the body, a medium-sized carrot is perfect. Ideally, of course, it will be if during the harvest you can notice carrots that have a forked end. In this case, even the legs do not have to be additionally attached, since they will already be ready. For a human head, you can take a small potato or even an onion.

In order for a person to be like a real person, of course, he will need eyes. From it can be made either from black peas or from any grains at all. For the mouth, no additional vegetables are needed, since a smile can be cut out with a simple knife. It is only advisable for an adult to do this, since not all children will be able to cut it out neatly, and in the end I want to get the ideal figure, of course. What is a man without hair on his head? They can be made using threads that can be woven into absolutely any hairstyle, or even using straw or even grass. If you didn’t get a carrot with a forked end, then the legs can be made from carrots. Just in order to secure them, we will need toothpicks or matches, depending on your preference. For such a person, a child can come up with a name, and girls can even prepare clothes.
19. DIY fruit crafts - pear hedgehog
Craft Ingredients:- Large pear
- Almond spikes or the simplest toothpicks
- Cherry in sugar
- Some raisins.

- at your choice, the pear can be peeled or directly with the skin. However, you must understand that if you decide to leave the pear without the skin, you will need to sprinkle it with a little lemon juice, otherwise the “naked” pear will darken quite quickly.
- then you need to cut the pear into two parts exactly in half and reflect the very end of it.
- after that, you need to stick almond spikes into the pear (if they are not there, then the most ordinary toothpicks). It is they who will serve as needles on the body of the hedgehog.
- Of course, the hedgehog will need to make both the eyes and the nose. For the nose, we just took a cherry in sugar, and the eyes can be made very simply by fixing a raisin in their place.
20. Cucumber crocodile - beautiful children's crafts from vegetables and fruits with their own hands

In order to make a crocodile, it is best to take a sufficiently curved cucumber, which will act as a torso. On the cucumber you need to make small cuts. After that, another cucumber must be cut into two equal parts, one of which will act just like a head. In order for the crocodile to turn out with beautiful teeth that will be as similar as possible to real ones, you need to arrange it quite carefully, complete it by cutting them on both sides of the notch of the figure in the form of triangles. Crocodile legs are best made from the other half of the cucumber. They are also best attached with matches or toothpicks. For the eye, as well as for all other figures, you can use any berries that you like. You can even make pupils with peas or even a piece of carrot. Only at first it will be necessary to get rid of sulfur.
21. Vegetable Dog - Banana Dachshund
Banana fakes have also become very popular recently.

This banana craft is quite simple to make and even a small child can do it. For the body of the dog you will need a large banana. By the way, for a fake it is better to take a couple of bananas, since at least one more will be needed to make a muzzle for future dog. Using a knife, you can cut the dog's ears out of the banana peel, the main thing is to remove all the pulp first. The head with the body is simply fastened with simple matches, but the main thing: do not forget to attach eyes. For this, you can use, for example, raisins.
Beautiful children's crafts made from fruits and vegetables from natural materials, in fact, make it possible to cook a huge number of a wide variety of items and animals, and most importantly - this is your imagination. It is she who will allow you to decorate the dinner table with such beauty that you can then eat!
Hello! Glad to see everyone again.
Here it is golden and wonderful time. The nights are getting colder, the day is getting shorter. Harvesting is in full swing, or maybe it has already come to an end. And so now we all together began to make crafts from vegetables and, of course, fruits.
This is such a small tradition, which is always timed to autumn theme. Such exhibitions or events are held in every school and kindergarten, and each of you can take part in them.
Well, today I will surprise you again, and I will try to make this selection exciting so that you take first place at the holiday. And they were, as they say, the best.
To be honest, I am amazed at that and even more extremely admired by the works that I found exclusively on the Internet. How cute and beautiful they all are. It's great, I can't find the words! All the same, the kids like this activity, to create something so interesting and fun. You definitely can't get past.
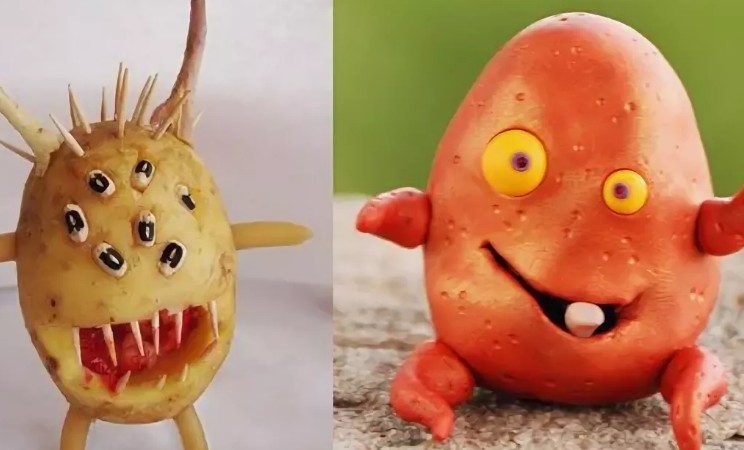
Well, let's start in order. What do you think, what can be done from ordinary potatoes? Let's look together and figure out what and whom they propose to do. Yes, that's right, for example, funny pigs or pigs.

Clumsy hippos who scream, oh, their tummies hurt).

Or maybe you prefer lamb?

Or this shy puppy who is so cute and looks like a poodle.

But the potato caterpillar and as it should be on cabbage leaves.

And also an ant and a spider in autumn foliage and flowers.


And even Masha and Misha can also settle in such an exhibition with you. A whole fabulous picture turned out, and even with a goldfish. Make a wish.

Or one teddy bear with a pot of honey, which is also made from potatoes.

A team of eight friends…. Remember this children's song, so Thomas is the main commander ...

For adventure lovers and dreamers, I suggest making monsters.
Children preschool age can build a duck with adults.

Or like a bun. And you can draw eyes and decorate somehow unusually. Among other things, if you find a suitable specimen of a potato, then a piglet will come out.


The same idea arose with this character, you guessed it? It's a cat.

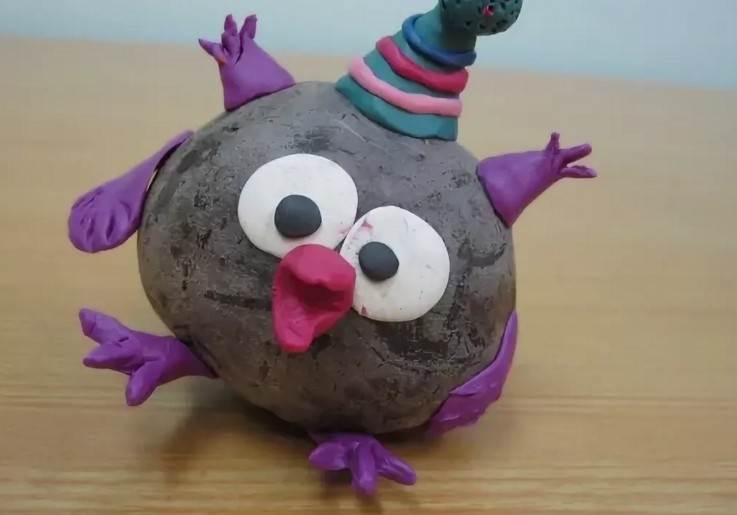
Everyone's favorite cartoons, namely the heroes that the children loved so much, will also fit perfectly at this event. Watch this and Malyshariki with Kroshik and even Chipollino.


The most simple work, this is a hedgehog or a monkey made of potatoes and toothpicks.

Make such figures and it will be fun and interesting.

Now let's move on to the next vegetable. Everyone knows the beauty - carrots. From her, too, I found a lot of interesting things, especially if she herself was born with different curvatures. For example, you can see in this picture, such a couple in love in the form of octopuses.


The simplest craft is a nest. Chop the carrots and lay the birds down. By the way, chicken and cockerel are made from onions.

You can also learn how to easily decorate the interior with flowers, see these works. And it's all made from carrots. Can you imagine?

And they even made a bouquet. The main thing is to find a curly knife.

The house looks great, so log and powerful.

But even a horse was made on a board. The tail was laid out from onion feathers.

But, the most popular carrot toy is the giraffe and other animals. Making them even without a master class is not difficult. See.

Well, if you still find it difficult, then this video will help you.

Here are a couple more ideas.


You can even make a palm tree or an island.

And now we take and make crafts from beets. I fell in love with the owl at first sight. In reality, if you bring such charm to the competition, you can definitely win.
Like carrots and cucumbers, beets are also served for carving. Usually make roses or bouquets.


And if you don’t know how, you can cut the vegetables into pieces and lay out a cow or a bull.
Or make an elephant.

Now go to the radish and select the following pictures. They mainly make mice, bees or mushrooms.


But what kind of musical heroes are a boy and a girl, as if they are performing on stage. And they light up in the dance.

And of course, everyone's favorite flowers from radishes or radishes come out nicely too.

Or you can cut it altogether.

Well, now I propose to consider souvenirs that will be made mainly of cabbage.
By the way, you can take absolutely any, iceberg, white cabbage and even broccoli or color. And create together with other vegetables.
Here's what I had to get. This, as you probably guessed in the first place, is a white poodle.

And here, look at the whole composition of lambs and lambs.

Everyone's favorite bunnies or rabbits, and a perky puppy.

And this miracle took a prize at the competition last year.

Together with the frog princess, and no wonder. Who wouldn't like that.

And here, as you can see, a Russian family, a grandmother with a grandfather and a granddaughter.
You can also make a sailboat from cabbage leaves together with zucchini or eggplant.

I liked the idea of a child sitting in a cabbage, but unfortunately I did not find such a composition. But I found a chicken. I think you can do it without instructions.

Now let's make eggplant figurines. You can probably guess right away that the first option would be a penguin.

See here for a hint:

And the penguin Pororo turned out.

The same method can be used to make a dolphin (whale) or a zebra.


Among other things, any transport, for example, a helicopter, a tank, and many others. See everything for yourself.


And girls will appreciate the shoes.
But from zucchini or squash you can make a terrible beast, this is a shark.

Well, other marine life or fish.


As well as snakes and even a crocodile.


In general, there are a dozen animals, choose. And even the swan queen got here.


By the way, if you love acrylic paints then draw minions or other cartoon characters.


Hmm, the old woodman would also fit in here perfectly.

Well, of all kinds, they are probably the most popular, since you can put all the gifts of nature, autumn in them. I will not dwell on them in detail, if you wish, you can go and read my separate note. Here I will show only a couple of photos.


Toys and souvenirs made of bell pepper are very little popular. But in vain, because such a vegetable is also good for creations. Look what cute frog creatures came out.

Or this bright dragon.

And here is the sea of flowers with tomatoes.

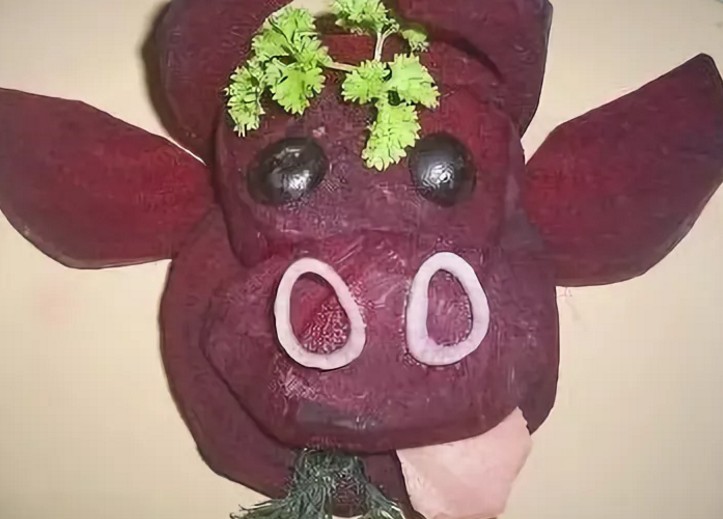
Well, in conclusion, consider crafts from cucumbers and tomatoes. I propose to make a muzzle or head of a cow, a bull. And garnish with parsley or dill.

From cucumbers you can make such a charm, a shark.

In general, there are a great many such ideas, I will show you only a few.


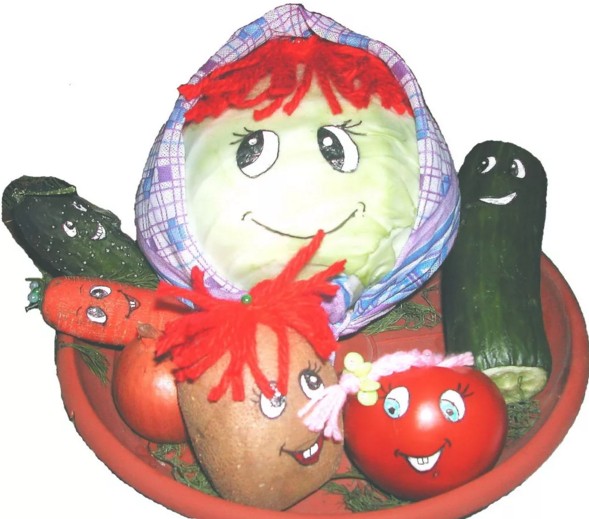
You can make different faces of people and use different vegetables and fruits.

Now let's move on to fruits, you can first make a caterpillar from apples.

Take tangerines or oranges and post your masterpieces. The stand is made of pineapple.

Or take pears, grapes, whatever you have, everything will go for such work.


All sorts of funny "products" from bananas.


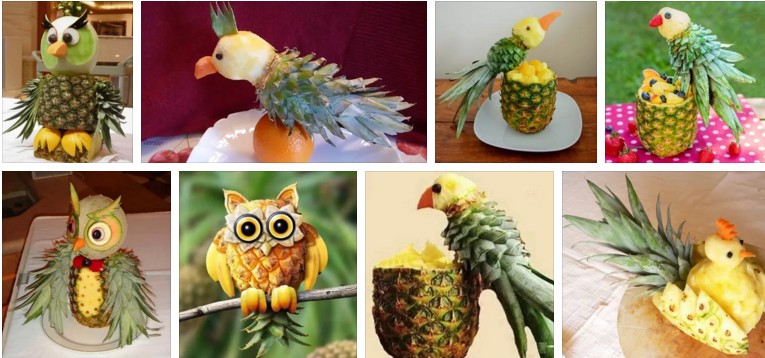
Of the pineapples, they mostly came across works in the form of birds.
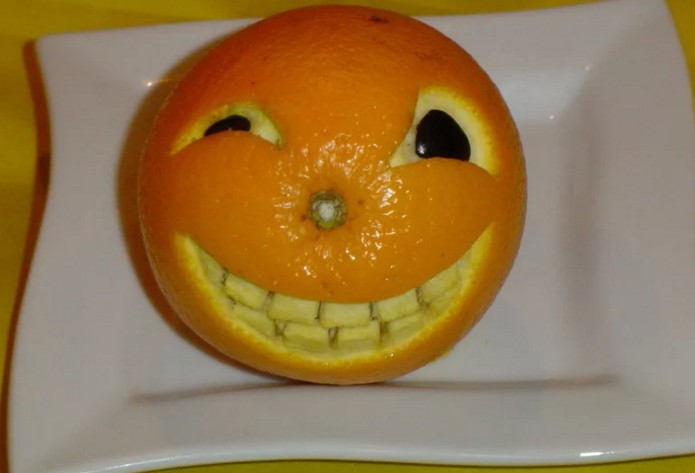
Little men made of tangerines, well, they look like cookies from a cartoon.

You can do this from citrus skins, wow, take a look.

Maybe a lemon is closer to your soul, I suggest making fish from it.

But from pears, the well-known hedgehog, here is its sequence of all manufacturing steps.

38 original and interesting ideas on how to make crafts from vegetables and fruits for kindergarten and school
In addition to all this, I decided to put together a diverse collection of pictures that you might need. When you create your new creations. As you can see, the authors even made vehicles in the form of a stroller and a carriage (car), and they managed to make a horse out of a carrot. The rest of the characters are also great, especially Cheburashka and this little mouse. Well, a beautiful caterpillar.


Boys can, of course, build a locomotive or a train with wagons. And girls, for example, a crocodile Gena from a cucumber or an eggplant penguin.

Even from watermelon peels, a crazy beauty in the form of a turtle will come out.

And here, in general, funny guys, Smeshariki probably visited us. And here is a wheelbarrow from a zucchini meets them.

How surprising, but even from cabbage you can create puppies or already adult dogs.
Good-looking, but this first one in the picture does not even look like a unicorn.
But to him, by the way, all the ingredients and sticks, skewers, so that everything stays in place.

If your imagination is tight, then here are the finished sketches. Cool, the ant is riding in a wheelbarrow. Quite simply, and such a machine is waiting for you, you only need an eggplant and a couple of other vegetables.
As you can see, a spider was built from a radish, also quite easily and quickly.
A cool dog came out of a banana. Who is looking at you now and does not want to be eaten.

Beautiful children's crafts Gifts of autumn to school
Well, friends, how many works with you have already been viewed, do not count. And now I want to invite you to watch these videos. After all, you can still do it turns out from improvised means or natural materials, of course together with fruits and vegetables topiary. Or as they are also called ornamental trees.
And one more video, it attracted me because the tree is made of paper. In general, also a great idea, maybe it will come in handy for you.
Souvenirs and toys in the style of carving for the holiday Autumn has come (for beginners)
In fact, you can master this technique in a couple of hours, the main thing is to find the right tools and have patience. Unfortunately, you can't do without special knives.
I propose to first master the simplest option, and make a chrysanthemum from Beijing cabbage.
To do this, take the cabbage and cut off all the bad leaves.

Then you need a grooved knife with any section, oval or triangular.

And where you see the veins, make cuts to the base.
Do not cut to the very stump, leave 1.5 cm.
In the end, you will get a flower that you made yourself.

Or there is another option, carrot cones. Of course, these works are only for beginners, whoever has a lot of experience in this matter can make figures even more complicated.
To get started, take a carrot and cut out a square stand at the base.

Then slightly round the diameter using a knife, cut off the edge.
Now make cuts in the form of leaves.


Here's what should happen.

Well, in the end, a slide of such cones.
There is one video on YouTube on how to create a rose from vegetables, if you are interested in this technique, you can watch it right now by clicking on the view button.
That's all for me, I hope that's all autumn crafts from vegetables and fruits you liked and you already know what you will do. I wish everyone patience and perseverance. And of course wins!


