We sew women's bags. DIY fabric transforming bags
A bag is one of the necessary and stylish accessories. modern woman. An original unique bag can be made with your own hands - sewn from improvised materials according to detailed master classes in our article. Interesting models can be created from old unnecessary things.
Catalog of fabrics produced light industry, varied. Any of them, rustling or fleecy, rough or smooth, denim, leather can become the basis for a bag. The principle of eclecticism (combination of styles), used by modern designers, allows any combinations and fantasies.
The following fabric options can be the most suitable for a bag:
- Canvas- canvas is an extremely durable material used for sewing sails. If earlier this variety was produced from hemp, today it is made from synthetic fibers.
- Cordur- the material used by American tailors for sewing military ammunition. Durable and durable material, the wear resistance of which is 5 times higher than that of nylon.
- Denim- denim, a durable fabric that does not allow dust to pass through, which lasts a very long time. It is combined with any kind of decoration, guipure lace, embroidery, decorative details.
- Lake – original fabric skin-like, shiny and smooth. The industry produces a plain varnish or covered with a patterned print. The fabric is durable, does not pass moisture, has a low cost.
- plain gabardine, with which decorative elements are perfectly combined. A bag made of such fabric can be washed frequently, appearance products will not lose their attractiveness.
- Oxford- backpack fabric with increased strength.
- You can also use light tacks - linen, silk, cotton, the coloring of which is extremely rich. With this option, you will need to select the fabric for the lining.
Features of drawing up patterns from leather
For leather bag can be used old thing or purchase scraps of thin leather, but the manufacturing process will not be easy, so it is important use the following tips:
For any model, you need to build a pattern. Beginning fashion designers should remember that sharp corners on leather products are difficult to make. so all lines should be smooth. You can draw such a line using a pattern. According to the pattern, hard paper templates are prepared, according to which all leather details are cut out, it is easier to work.
Patterns from jeans
All sorts of ideas for sewing bags from old jeans open up scope for the designer's imagination.
There are many options for the implementation of the plan:

Here are some tips for making denim bags:
- Such bags are sewn according to ready-made patterns.
- No need to look for fabric large sizes. The patchwork style, which combines jeans and light fabric, is very fashionable today.
- The product will become more expressive if you add it with decorative elements.
- In order for a denim bag to keep its shape, a lining is sewn into it, which can be made of bright fabric. If you make it longer, then the protruding part of the fabric can be used for additional finishing.
- The scheme of the simplest bag: four pieces of square-shaped fabric, two - rectangular, four long narrow strips for handles.
Fabric patterns
Sewing a bag with your own hands (master class), different models fabric can be developed independently or found ready-made patterns in the Internet.
After the model is selected, it is necessary:
- Having made a pattern, transfer it to the wrong side of the selected fabric, and cut out two parts. An option is possible - handles are cut out along with the side parts.
- In order for the product to come out neat, the parts must first be swept, ironed well and only then stitched.
- The two central walls of the product are stitched together in width, narrow side parts, then the bottom is sewn on.
- The lining is made in the same way and put on the sewn part.
- The model is turned inside out and the edges are processed.
- Handles are sewn on if they were cut out separately.
- It remains to sew a zipper or arrange a cover.
In order for the fabric bag to keep its shape, the fabric needs to be strengthened, that is, glued with doubler, which is done after the material is selected.
Felt pattern
Felt bags are becoming more and more popular because they are beautiful, bright, soft and cozy.

Working with felt is easy:
- The material does not stretch, so there is no need to draw a pattern. Having decided on the dimensions of the product, you can simply cut out two squares or the same number of rectangles, and get to work.
- The edges of the fabric do not crumble, so the need for additional processing of seams disappears.
- Having swept and sewed the bag, you need to think about the handles for it. The options may be different: from the same felt, a thin chain, a belt.
- To make the product look neat, it is better to sew on a lining of a contrasting color that will hide the internal seams.
- It remains to complement the sample with decor. It can be made from felt fabric of a different color. The cut out funny figure is simply glued or sewn on with an overcast seam.
The cost of such a product is very small.
Burlap patterns
Burlap is a natural inexpensive material. Products from it look spectacular, remind of the harmony of man with nature. The material is soft and pliable.
Working with him is easy and at the same time not easy:
- Before starting work, the fabric must be carefully ironed so that even shapes can be cut out.
- The edges of the burlap crumble, so the entire base must be smeared with glue.
- The inside seams need to be overcast.
- In order for the product to retain its shape, a more rigid lining is needed.
Fur and suede for a bag pattern
Sewing a bag with your own hands (master class), different models are easy from fur, suede of the simplest design, which always look rich. You want to take them in your hands and try them on with your outfit. For the execution of such an exclusive, the rest of the fur, natural or artificial, will be required, which will not be easy to work with. 
Most likely, it will be painstaking manual work. When sewing a fur product on a typewriter, work progresses slowly: the villi fall under the needle. In addition, you need a machine that sews thick fabrics.
If the desire to have a fur bag has not disappeared, then you will have to do the following:
- You will need a pattern.
- After it is done, the existing fur is laid out in the direction of the pile, pattern.
- Elements of the future product are placed on it parallel to the center of the cut. Circle the details with an automatic pen so that the line is noticeable.
- You need to be careful that the defects of the fur do not fall under the pattern.
- Fur, like suede, cannot be cut with scissors. A furrier's knife should be at hand.
- You need to grind the details according to “how the pile looks”. All villi should be hidden under the seams.
- The process can only be performed with a sharp, rather thick needle using nylon threads. You need to pierce fur or suede once.
How to turn an old umbrella into a fashionable bag
You can sew an interesting bag with your own hands from an old umbrella. The reviewed master class will tell you different models of light bags that do not need much space in the hostess' handbag.
But this is not the only advantage of such a product:
- the fabric from which umbrellas are sewn has extraordinary strength, so the new accessory will not be demolished;
- products folded in such a bag will not get wet in the pouring rain;
- stylish design (the colors of umbrellas are usually original) a little imagination will make this thing unique.
 How to sew a bag with your own hands from an old umbrella. Master class with photo


The procedure for creating a bag will be as follows:
- The old umbrella is torn into triangular sections, but the fasteners from the umbrella should not be cut off.
- Details need to be washed and ironed.
- Next, the parts are folded so that a continuous fabric is obtained, the parts are swept and sewn on a typewriter along the front side with a blind seam. The edges of the resulting piece of fabric are also connected.
- The product is folded so that a rectangle with absolutely right angles is obtained. The bottom of the product, screwed inside out, is ground and overcast.
- Handles are made from the remaining fabric. They can be made triangular or the usual rectangular.
- It remains to process the top edge of the bag.
- Having folded a new accessory, securing it with an umbrella clasp, you can go to the store.
Master class on sewing a beach bag
Not required to buy summer holidays beach bag. You can create it with your own hands, and it will be just as stylish and fashionable. If you are going to do creativity, you need to collect any shreds that are in the house.
It is important that they have a bright large ornament.
It can be:
- printed tapestry, raincoat fabric;
- bright print fabrics, printed cotton, linen;
- coarse burlap.
Thick fabrics, felt, felt, denim should be left for other purposes. Immediately you need to pick up the lining fabric, some kind of “sliding fabric” one-color satin, satin, silk.
It is better for beginner craftswomen to take on a simple rectangular model, although if you round off the bottom, the product will look more original. Today big bags are fashionable. 


Having decided on the size, finding thick paper, you can start creating a pattern:
- A square with a side of 50 cm is drawn - these are the side walls of the bag. If desired, the bottom of the bag can be rounded. To get an even semicircle, a compass or a pattern is used.
- From the selected flaps, two such parts and two of the lining fabric are assembled.
- A rectangle is marked, the length of which is 50 cm, the width is 10 or 20 cm. This is the side and the bottom. You will have to cut 6 such details from the fabric (the bag and lining are taken into account).
- A handle is drawn - a rectangle, 60 cm long. The width can be different. For the bag you will need four parts.
It remains to sweep, iron and sew everything, decorating the product with decorative elements.
How to sew a travel bag
Sewing a bag with your own hands (master class), different models can be made from denim, leather, thick drape.
You can also create it from old jeans, spending one evening on the whole process, while saving your own money:

After the top is sewn, the accessory is considered complete.
Making a sports bag with your own hands
Sewing a bag with your own hands (master class), different models can be made from tarpaulin, raincoat fabric in sports style. You can choose a style with a belt or with a handle. For the lining, a quilted synthetic winterizer is taken, for the rigidity of the bottom - fleece. You will need a zipper, rings for pens.
Step-by-step instruction to create a bag:
- Taking an old newspaper, you need to fold it so that the edges match.
- Bend the corners, but not to the center. Run through the folded corners horizontal line.
- Cut off the top along this line. Cut the resulting figure along the center line of the newspaper. Mark the top, bottom, fold of the product.
- Having laid out the pattern on the selected fabric, cut it out, not forgetting to leave two centimeters of allowance for the seams.
- Sweep the top of the bag and the bottom, the sides, stitch them, sew on the zipper.
- In the same way, cut out the lining on which to make several pockets.
- Sew on the bottom, lining on the sides.
- After cutting out the handles, attach them to the bag.
- Insert the lining into the base of the product, chop at the seams and sew.
The work on the creation of the bag is completed.
Sewing a bag in patchwork style
Patchwork style bags are summery, so you need to choose cotton or linen fabrics for them, but such a product will often have to be ironed. Can take non-shrinking, durable synthetic fabrics.
Having prepared the necessary (shreds, lining material, glue stick, pen belt, scissors), you can start sewing:
- find fabric for the base: length - 29 cm, width - 25;
- lay out patches on it so that their edges overlap each other by 1.5 cm, chop them with pins so that they do not move;
- the corners of the patches should be glued and only after that proceed with stitching manually or on a typewriter along the length, and then along the width;
- cut the workpiece and insert the bottom, pre-glued (14/25 cm), reinforced with interlining;
- grind the side parts, sew on the rings for the handles;
- sew corners, turn out;
- make a lining, sew it inside;
- process the top edge of the product and attach handles.
Knot bag
It is easy to sew a knot bag with your own hands, but it is better to view the master class. Different models will tell your own imagination. For such a product, cotton fabrics with a cheerful ornament are suitable, although evening fabrics can also be used. Products are double-sided.


The inside is usually plain. The bottom can be round, semicircular, with grooves. The accessory can be miniature (wear it on the arm) or large, like a backpack.
To make a knot bag, you need to spend about an hour:
- it is necessary to draw a sketch of the future product (the bag resembles a T-shirt with wide shoulders, one of which is 5 cm longer than the other) and cut it out;
- the pattern is transferred to the fabric (seam allowances are required);
- the lining is marked (it is better to take interlining on an adhesive basis);
- the product is swept from the handles, then the side parts, the bottom, the seams are sewn on the machine;
- it remains to sew the lining and sew it.
Waist bag
A belt bag is the perfect gift for a loved one. To make it, you need suede or thin skin, felt or fleece. The basis will be patterns taken from the Internet, because it is quite difficult to develop the shape of a bag on your own.
- The manufacturing process begins with sizing and stitching the back wall to which the zipper is sewn. The second side of the zipper is sewn to the top of the cover.
- A second zipper is marked on the convex side of the lid.
- The front wall is attached to the free edge of the zipper.
- If necessary, pockets are made (they will be fixed with Velcro).
- Slings with fastex are attached to the front and back walls.
Simple shoe bag
A student needs a bag for change of shoes and a sports uniform. To create such a bag, you can use a raincoat fabric of two shades. 


It is necessary to prepare:
- rectangular piece of fabric bright color, 40 cm wide, 64 cm long;
- 2 pieces of fabric in a contrasting color (length - 40 cm, width - 24 cm);
- for the pocket, a rectangle of fabric (16 cm by 21 cm);
- lace.
The sewing sequence is as follows:
- the pocket is decorated with the initials of the child and attached along the line drawn on the side;
- top cut fabric different color are sewn from the front side;
- parts are folded with the front sides, stitched;
- the part is bent and ironed under the drawstring, stitched, not reaching the center;
- it remains to put the drawstring - you can put things in a bag.
Interesting ideas for sewing a bag
There are many ideas for sewing bags, here are some of them:
- The original will be a braided bag from old jeans. Cut old trousers into strips, weave the fabric. Sew or glue it on the fabric base. Having folded the workpiece, stitch the sides. It remains to sew the handles.
- A semicircular clutch is convenient to take to the cinema. From a piece of wrinkle-resistant fabric, cut out two round parts and the same circle from synthetic winterizer. Putting the parts on top of each other, they should be stitched and sheathed with a narrow braid. A zipper should be sewn into the workpiece and decorate the product.
- The bag looks original evening dress or a piece of cheese.
- The next model can be considered exclusive - a bag-transformer from a vest into a bag. You can leave the house in a quilted vest, and return with a bag in your hands.
- You can make a bag in the form of a clock, the hands of which indicate the way out of the house.
A bag is not a difficult thing to make on your own. Thanks to a large selection of models, a novice craftswoman can choose one of the most simple options. Create original and stylish accessory help detailed wizard classes with photos of patterns and finished products.
Article formatting: Vladimir the Great
Video: How to sew a bag with your own hands
Master Class. How to sew a bag from jeans with your own hands:
How to sew a shoulder bag with your own hands:
Hello Master!
On this page, I'll tell you about my inspiration, which came, oddly enough, from a shopping bag I saw on the Weird Moms website.
I make this butterfly using the “reverse appliqué” technique in different bags, my clients and my mother fell in love with it. I also wanted a bag made of faux leather.
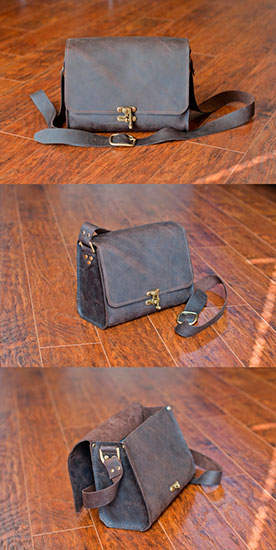
I share the sizes, the pattern of the bag and the stages of its creation:
The size of the finished bag is height 31.5 cm, width at the top 36 cm, width at the bottom 25 cm, bottom depth 12 cm.
We need artificial leather, lining fabric, back pocket zip, bag zip.
Croy:
1. Upper parts 2 pieces, size 38*35 cm (we mark the corners of the bottom 6*6 cm).
2. Top bar 2 pieces, size 38*4 cm.
3. Lining 2 parts, size 38 * 32 cm (we mark the corners of the bottom 6 * 6 cm).
4. Handle detail 115*6 cm.
5. Plank for the handle - 2 parts, size 26 * 7cm.
6. Lining for the back pocket, 2 parts, size 24*18cm and 24*20cm
7. Lining pocket, custom size.
Detailed pattern of my bag, as I did it.
On the main part, we mark all the necessary marks and lines:
- Corners of the future bottom
- Middle line for future application
- The line of the future pocket (from the top edge 5-6 cm, 20 cm long)
- On the upper edge, mark the marks for the bar into which the handle will be pulled. In finished form, 22 cm, which means that from the side edge we retreat the width for the allowance of the side seam + 11 cm (1/2 planks).
On the lining we sew pockets as desired. I have a double, open pocket + mobile pocket.
Sew the zipper to the lining of the back pocket.


On the outer part of the leather bag, we make an application. I have a butterfly made using the reverse appliqué technique.


We sew the upper trims of leatherette to the upper edges of the lining, inserting a zipper.


We connect the sides and bottom, leaving an opening for eversion. We build up the corners to form the bottom.


Preparing the hole for the back pocket. Insert pocket lining with zipper.


We connect the sides of the upper part of the bag, stitch up the corners, forming the bottom.


In my version, the handle did not turn out to be one-piece and I will join 2 parts, the seams will hide in the upper slats. We form the handle


We wrap the edges of the strap for the handle by 2 cm, towards the wrong side, we lay the fixing. Line. We fold across and attach to the upper strip of the lining, observing the middle of the part of the strip with the side seam of the lining.


We turn the outer part of the bag inside out and put it inside the lining face to face, combining the sides and middle of the parts. We sew by connecting them.
We turn the bag inside out through the hole left when stitching the lining.
We lay the finishing line and thread the handle into special strips. We connect the handle into a ring and hide the seam inside the bar.
Sew up the hole in the lining.
Not everyone knows that sewing a bag with your own hands from a piece of some fabric found at home or not too thick leather is not as difficult as it seems at first glance. Difficulties can arise if the material is too thick, such as leather or jeans, or the pattern is not easy. I myself tried to sew my first bag back at school, there was no pattern, I just sewed a rectangular one.
How to sew a bag? What? Small women's or large roomy household, fashionable stylish for yourself or children's ...
Homemade summer bag can be sewn from almost any material you like. A model and a pattern of a pattern with dimensions can also be made based on your own ideas about the shape and capacity. It is advisable to start with simple patterns. Otherwise (professional language) the pattern is called a template. Keep this in mind as you search.
From felt, you can build a very cute flat bag in the form of an owl or a wolf with huge eyes (photo below towards the end of the article) for an electronic device.
I was surprised that for some reason a lot of visitors come to this page for the query " do-it-yourself fabric bags patterns for very stupid". You can't talk like that about yourself. If you are going to sew such a thing, then I think that you can easily figure it out. As a last resort, if something is not clear, then you can ask!
DIY bags - patterns
For example, if I carry an umbrella in my purse, then it should fit there - horizontally, vertically, or diagonally.
Think in advance of the situation - if your umbrella breaks, you will buy a new one, which may be slightly longer than its predecessor.
It is better to make sure that a standard size umbrella fits inside.
Three patterns of GUCCI leather handbags
To begin with, I will give patterns for several GUCCI bags, they were originally given for making paper models, but they can also be used for sewing normal ones from fabric or other material with your own hands. The next three photos, if you are interested in patterns, can be slightly enlarged, they are clickable.
In the photo, basically, only patterns of bags without sizes. A little advice for those who have found a model suitable for themselves wants to sew a similar one. Take a picture with a pattern, open it on a large screen in any graphics editor, enlarge the pattern to the desired size. It’s even easier for me - my screen is a large TV. :)
Attach loose paper or tracing paper to the screen, fix and circle with a soft pencil. If you are planning to make a small bag, then a regular screen may be enough for you. Otherwise, enlarge the image to " natural size» bags (even if it doesn’t even fit in full screen) and circle the pattern in parts, shifting the photo on the monitor.
When opening the bag, do not forget the seam allowances!
By the way, the leather pattern of the hanging brush for decorating the bag looks like a paint brush, it is done exactly as shown. It is not cut completely into strips, then the skin area is moistened with glue and folded into a tube.

Details such as size and shape, the presence of external and internal pockets must be thought out in advance, based on your needs and preferences.

Focus on the size of your wallet when thinking through pockets. They say that it is safest to store your wallet vertically in the middle of the bag in a specially made compartment, so it is much less likely that a pickpocket will get to it. They usually cut the outside of the side or end with a sharpened coin and steal what they find inside. The second time to cut - inside - is already inconvenient.

Some sew a special pocket for an umbrella with a zipper at the bottom of the bag or under it. This is also very convenient, you can get an umbrella separately from your compartment without opening anything from above.

If it is difficult for someone to understand the patterns presented above, in any case, he will understand how to sew a bag according to an elementary scheme (for example, from an old jacket), a “t-shirt”, a bag using noble materials - suede, leather. However, jeans, leatherette will also go, it all depends on what choice you have.

DIY backpack bag with a pattern
You better know what shape of the bag you like best, what you wear (or are going to wear) inside, which handles you prefer - short, long, wide, narrow, or maybe it’s more convenient for you to carry a backpack - so your hands will be free. I personally love backpacks, but not too small - they don’t fit much, and ladies’ backpacks for sale are mostly very modest in size, so sometimes you have to sew it yourself if you want to do small sewing.


A cute bright little owlet will great gift for girl or girls. The main thing in this backpack is the external decor, but you can take almost any pattern, anyway it will not be visible. Looks great in casual youth clothing - t-shirts and jeans. By clicking on the link, you can see a few slightly different color options, as well as what a “carcass” bag-backpack looks like.
Bag from an old leather jacket
You can sew a new leather bag from the skin of an old jacket (or leather trousers) - it probably left good unworn pieces of land. It can turn out such a convenient little thing, as in the photo below.

It's a good idea to make handles that you can always make shorter or longer, or fasten one long strap.
Think over the fastener in advance, if it is a zipper, then find it at home suitable color, if it is slightly larger than the hole, then this is not scary - one end can be hidden inside the product. Think about what kind of buckles, magnetic fasteners the future bag will have.

The choice of accessories for bags
Usually, when I throw away a thing (clothing or a backpack, it doesn’t matter), I rip out accessories from it, which can still be useful, and therefore I have a lot of such little things at home. This is very convenient - you don’t have to immediately run to the store, if the idea of \u200b\u200busing accessories comes up, then you can immediately attach and figure out if something from “home stocks” is suitable. It is necessary to take into account the color of the fittings, the finished product will not look very good if silver and silver fittings are used. golden color simultaneously. Better keep the style.

The clasp can be made on a magnet - there are such on sale, they are quite inexpensive. Or even on a lace that tightens the top. It looks good on beautiful evening bags made of silk or other fine fabric with a slight sheen, with embroidery or beading.
Usually I draw the pattern of the bag myself - the shapes are very simple. From the Internet, I sometimes collected ideas for models and patterns, I never used them directly, but you can take them as a basis, and little things (and proportions, or separately height-width) can always be changed or added as you wish.

A product sewn on a lining looks neater, so prepare a lining fabric that matches in color - in tone or vice versa in a contrasting color. The main details of the bag pattern will need to be duplicated on the fabric for the inside. On the lining, one or more pockets, with a zipper or open, for small things, cosmetics, a phone, may not be superfluous. Pockets are always very convenient when you know what should be in which pocket.
Knitted and felt bags with felt
If you don't know how or don't want to knit, you can still make your own. knitted accessory on one's own. Do you know from what? From unnecessary knitwear- pullovers, sweaters of large or small knitting. Or use old bag for alteration into a new one using knitwear.
The handbag can be sewn from felt in the form of a wolf, an owl or another animal. No pattern is required here, the main thing is beautiful decoration outside.

There are a lot of all sorts of large pictures with examples of felt bags. Animals and birds are different - a fox, an eagle, a pig, an elephant, a dog, a rhinoceros and even bat. The basis of the pattern is a rectangle the size of a phone or other device, and the rest - decorations - is already a matter of your imagination and possibilities in terms of choosing the color of felt, thread or fabric.
The idea of reworking an old leather bag with knitting
Very interesting idea- remake an already existing old bag made of thick leather - cut off the bottom and knit it from dense threads or yarn, for example, in a contrasting color. Pre-make holes on the bottom, to them and tie knitted details. I have been going to implement this idea for a long time, there is even a bag for experiments, but so far I have not found a suitable yarn.

In my opinion, this is a “Spanish” idea for original bags made of thick leather with a knitted addition, it seemed interesting to me, of course, to repeat with my own hands. So I took it on board.
The bottom can be knitted very quickly with a thick cord. I would still knit the lower part of the darker shape, otherwise there will be a washing problem very soon.
The shape of the pattern will largely depend on the rest of the piece. Worry about sewing sewing machine the leather part is not necessary - we will make small holes with a special punch tool and everything can be fixed. I think that the lining for such a handbag is still worth doing, especially if the knitting is large.
Decorating a fabric bag with beads and sequins
I would like to briefly dwell on one more point. If you don't like to bother with complex tailoring of a bag according to a special pattern, or you already have a fabric bag (small!) that you would like to change, then there is a way out too. If there is no ready-made applicant for alteration, then sew a small fabric bag with your own hands. Or a clutch. It's simple - the pattern is as follows - two rectangles, a zipper or a button, or something else quite unpretentious. Let the fabric be plain. For our purposes, this is even better.
The trick here is that you can additionally decorate the bag with your own hands - you get a unique thing. In the end, buy the simplest ready-made one and try it. To do this, you will need beads, sequins, glass beads, rhinestones, threads, a needle.

Decoration of handbags and clutches with sequins and beads
Now I'll show you what can happen. Don't be scared - these are three clutches, standing friend after another. They are all interesting and all different.
Women's tweed bag - necessary thing on a journey. It is very roomy and practical to wear. Therefore, it is also good for everyday use in the cool windy season. A very interesting old pattern with a sewing scheme, let's try to sew it with our own hands, leather trim will look good.

Here are such interesting multi-colored woolen knapsacks with embroidery, made by a craftswoman with her own hands, I spied at the exhibition of masters self made. There were also cases for mobile phones, and even simply capacious, but very light baskets and baskets made of felt for shopping trips to the store. Oddly enough, the hostess advised wearing them even potatoes! :) Personally, I would not do this - it's a pity the thing! And how easy they are! Just unbelieveble.

It is even easier to sew a capacious bag for the beach with your own hands, the patterns are very simple, the sewing process is simple. Materials can be anything - from mesh to canvas, the shape and pattern can vary, but in any case, the volume should be large. And you can decorate it however you like, even though sea shells, at least paint acrylic paints. Here you will find a bag-package pattern, according to which you can sew a product from fabric or even leather!

Another simple pattern for sewing a large comfortable bag for the beach from a material (plain or with a pattern), which will fit all the necessary things. I don’t advise sewing such a bag from leather, bow folds along the top will not look very good. The bag consists of an outer part and a lining, which can be the same or different, for example, a thinner fabric.

Examples of ready-made shopping bags, as well as handicrafts with applications of my good friend, a needlewoman, a jack of all trades, who lives in the city of Regensburg. So you can decorate an existing thing with your own hands, as well as sew a new one, in the process coming up with an ornament.
For shopping
Four rectangles: two for the front and back of the bag, two for the handles (see the diagram below for the package bag). So the simplest shopping bag is cut out, with which they usually go shopping. Most prefer to replace it plastic bags, however, if you are not indifferent to the ecological state of the environment or want to look more elegant, then it is better to sew a nice shopping bag from a more noble material using this simple pattern: leather and fabric, for example, as in. Or from a fabric with an individual decor, for example, with weaving from ribbons - as described in, so in addition you can creatively use the remains of different ribbons and ribbons. You can also come up with own version: from embroidery to patchwork applications, as did the users of our portal Katerina-777 and Leukocyte.
Super easy for every day
According to the same simple pattern, you can sew a lot of different bags not only for shopping, but also for walking and even for the office, attaching a zipper to the upper edges and, if desired, sewing instead of two - one long handle with loops to the side seams. An example of such an easy-to-sew bag of the most elementary cut is a magnificent ethno-style model from. A representative look of the bag will give the choice of material and fantasy finish in a certain style.
And to make the bag more spacious and look like a bag, stitch the bottom corners obliquely, as described in. Then your bag will have a rectangular bottom, and things will not pile up.
Package bag
Instead of stitching the edges, you can sew a real bag bag by stitching 3 more details between the sides of the bag: side inserts and bottom.
The size of the side inserts is calculated by the height of the side cuts of the bag part, plus the required width is added, usually 6-8 cm. Folds can be sewn along the top of the side inserts for convenient flat folding. For the bottom, two parts are cut out, their width should be equal to the width of the side inserts, and at least one part of the bottom is duplicated by a gasket, preferably rigid (gasket materials are possible). If you don’t have a rigid pad on hand, reinforce both parts with a regular adhesive pad, and insert a piece of cardboard cut to the exact size of the bottom between the two parts. The top of the bag can be closed with a zipper. To do this, cut out 2 more strips for turning along the upper side of the bag and, on the one hand, sew them to the upper edge of the bag after hem along the upper edge, and on the other hand, sew the zipper braids to them from the bottom.
By the way, there are more simple pattern bag-package - it is provided in . Or by .

Flap bag
Approximately according to the same scheme: front and back sides plus a handle, a standard bag with a one-piece flap is sewn. For the valve, simply increase the size of the back of the bag and, accordingly, if desired, round the edges of the valve or draw them in the shape of a triangle. You will find a super simple pattern for a handbag with a valve in.
Note that the details of the bag, if desired, can also be rounded, drawn in the shape of a trapezoid, or given any fantasy shape, for example, the shape of a butterfly, flower or fruit. You will find a pattern for the curly side part, for example, in.
Bucket bag
A very convenient and popular pattern of a soft and comfortable bag-bag with a long wide one-piece handle is cut out from just two parts. For her, you can combine different fabrics, as in the master class on sewing a bag with turquoise decor, sew on pockets, side linings, insert zippers, decorate with tassels, pendants, decorative stitches, etc. - see also the options below.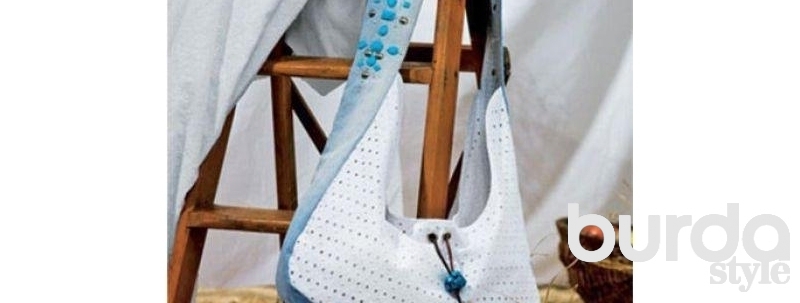
Lined bags
A bag with a valve (like many other models) must be duplicated with a lining. Details from the lining fabric are cut out according to the existing upper parts, with the exception of the handles, with the same allowances for the seams. When the bag itself is connected to its lining, a hole is left in one of the seams of the lining (the usual side seam) for eversion, which is then sewn up by hand with blind stitches.Detailed description sewing bags for lining you can look at.


Sewing a bag for cycling on your own is also not a problem, description in. For outdoor activities and sports, a bag-pocket on the belt is also useful - a small and roomy model, like a backpack, leaves your hands free, it is better to familiarize yourself with the pattern and tailoring in detail, and choose the right model for yourself there.
To relax on the beach
A beach bag-mat is sewn according to one of the above very simple circuits. Its pattern consists of one large rectangle, folding 4 times, and a strip for two handles. A large rectangle will need to be cut out 3 times: 2 parts from fabric and 1 part from a thick pad or foam rubber sheet. In ours, it is proposed as an option to sew a beach bag from a terry towel. Another option for a beach holiday -: original solution for two problems at once: you just sew on a pillow for beach accessories and a carrying handle.
And for those who like to relax on the beach with their favorite needlework, you just need to sew on a model in which you can put everything you need: from scraps of fabric and patterns to scissors, needles, threads and a thimble.

Urban backpacks
IN Lately women's urban backpacks are very relevant, small, but roomy and comfortable. Details for fashionable backpacks or transforming bags (those that can be worn both in the hand and behind the shoulders - see) can also be drawn independently. According to a similar pattern, you can sew a variety of models: to sew a glamorous accessory, to where you can combine a tapestry with leather - a stylish addition to an ethnic-style look.
Clutches and evening bags
And finally, evening bags - primarily clutches, as well as bags with a clasp clasp (see pattern and sewing description in) - all their variety is based, as a rule, on the original finish. Handbags on a chain or long handle, which are hung around the neck and in which no more than a powder box and lipstick- a hit of this season, sew it super simply according to the description in
To sew a couple of dozens of different clutches, you can use just a few patterns: from the simplest to the clutch or the original soft clutches presented in the master class on sewing three models at once. When sewing such clutches, it is very important to carefully sew on a zipper or make another fastener.
Decor
So, we have already understood that sewing a bag is not so difficult. However, to make your model different from others - after all, it is not without reason that it is handmade, focus on the choice of memorable fabrics and materials and decor.
Embroidered fabric appliqués, cut-out leather motifs (including logos), contrasting or matching piping, tassels, patchwork, 3D patchwork (trapunto technique), oversized rhinestones underneath gems and exquisite floral motifs lined with rhinestones, pom-pom braid combined with mirror sequins, fringe, patch pocket in contrasting leather with a beautiful clasp, contrasting color handle, decorative belts with eyelets or a row of eyelets in the form of beads.
In youth fashion, a variety of inscriptions, funny bright applications are relevant, and clutches in the form of boxes for sweets, books and other items have not gone out of fashion.
You can find on our website.
Accessories, made with fantasy and taste, will make your look unique!
Greetings to all gathered now on the blog! Today I will tell you about how to decorate your life and the lives of others with the help of such a simple item as a bag with your own hands.
A lot of shops sell bags, handbags, clutches, etc., etc. But it's so cool to make something like that yourself, to feel the process of creating a product, right? Many will agree with me, I think. Therefore, today we will make a bunch of handbags, cute and funny)
How to sew a bag with your own hands
First of all, I suggest you sew a cute fluffy handbag that you can give to a little girl or girl.
List of materials:
- artificial fur (for the outer part of the bag);
- fleece (for lining and for covering buttons);
- threads in the color of the fabric;
- two round buttons;
- two small white rhinestones or half beads;
- synthetic winterizer;
- pattern paper;
- needle;
- glue second;
- pencil;
- pins (for pinning patterns);
- scissors.
Patterns of the future bag you can download here: ear And the basis. Let's deal with them.
What kind of patterns are here:
- one-piece bag pattern (lid + back) - the entire area of \u200b\u200bthe pattern;
- the front of the bag is everything that is below the side insert;
- side insert width - we will sew the side part into the bag, this is its width. The length is the length of the contour of the front (without a straight top).
As for the side insert: it should consist of two equal parts, the direction of the pile of which will be directed against each other. But that's just for fur! From fleece, simply cut one strip of the required width, you can ignore the direction of the pile.
How to sew a bag: a detailed master class
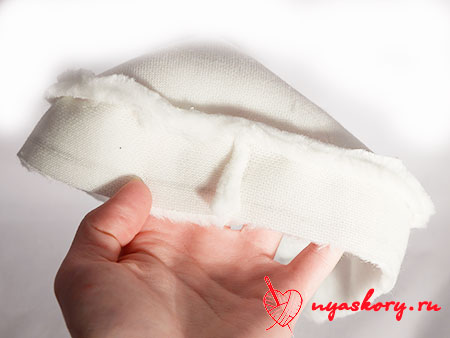
First of all, we will work with the side of our product.
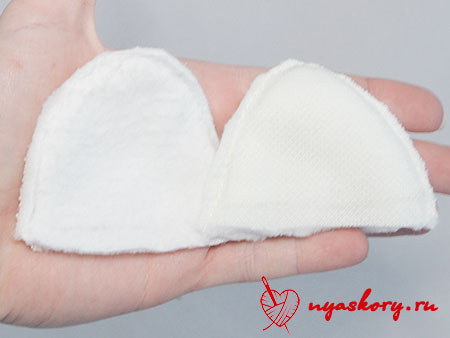
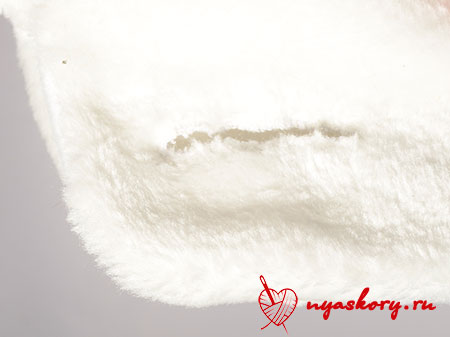
Take two pieces of fur side piece and sew them along the edge. Sew them so that the pile of pieces is directed towards each other.
Why do I suggest doing this? I answer: the fur has a long pile, which should go in one direction. And this can be achieved just by stitching two pieces

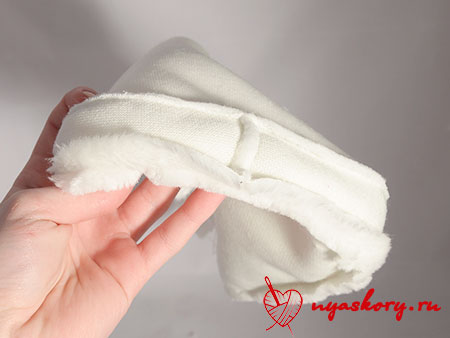
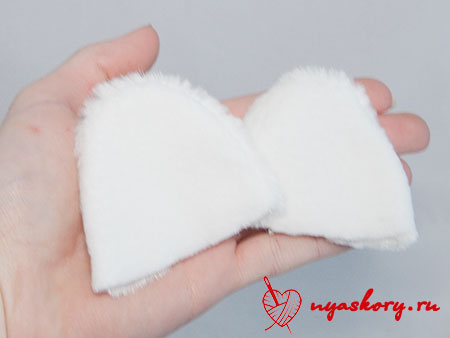
Trim off any excess. And sew the side part to the front of our future bag.
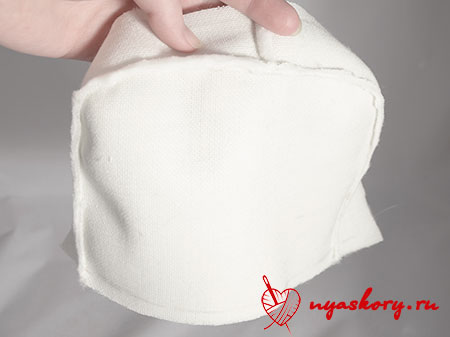
And now we sew the back of the bag! Already the lid is planned
Trim the edges of the seam allowances. See why:
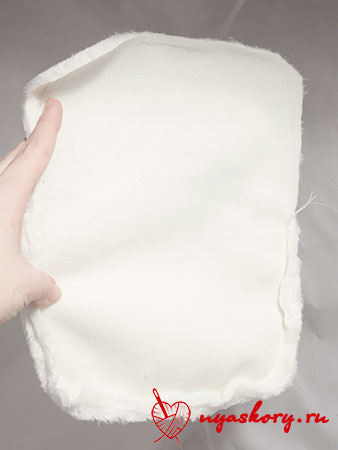
By the way, here is the back view of the bag:
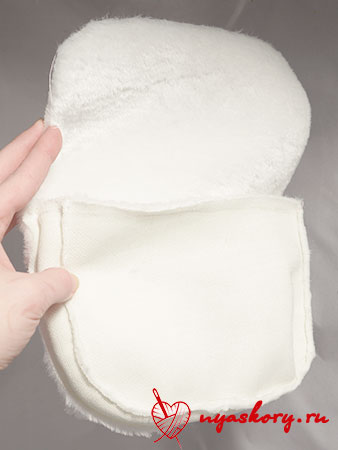
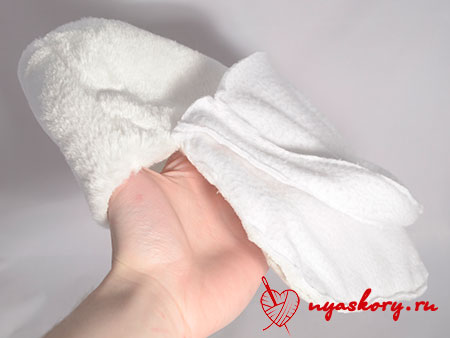
Sew a fleece "handbag" in the same way. This will be the lining - the inside of the bag.

How to sew a lining to a bag? First, attach the fleece and fur parts with the right side inward.

In this photo, it seems to be clearer

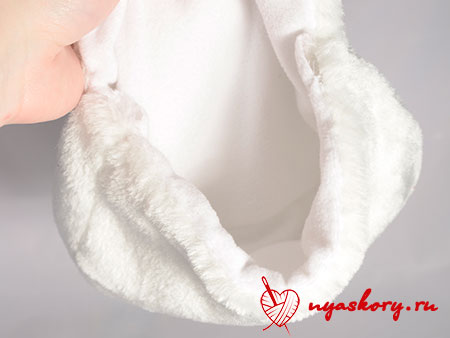
And just sew the covers of both parts.

Screw the inside into the bag.

Sew the remaining edges with a blind stitch.
To decorate our bag, I suggest you cut out these ears:
This is how you should get them:
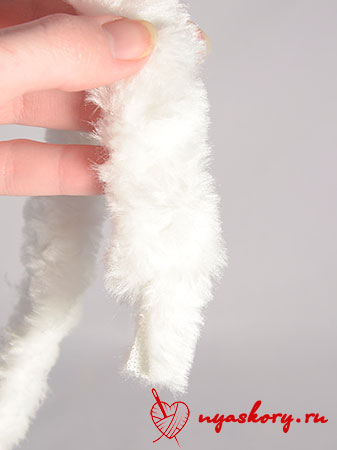
Now let's make a strap for the bag. To do this, cut three strips of fur of such a length that it would be convenient for you to then put on a strap of them on your shoulder. Weave a pigtail out of them (fix at the end and at the beginning so that it does not come apart).

Remember we left holes for fasteners? Now you need to insert them into them and carefully sew the resulting pigtail with a hidden seam.

But our bag doesn't have bindings yet! There are several options here: you can sew in a zipper (which is better to do earlier), you can use Velcro and buttons.
I decided to stick with the last option.
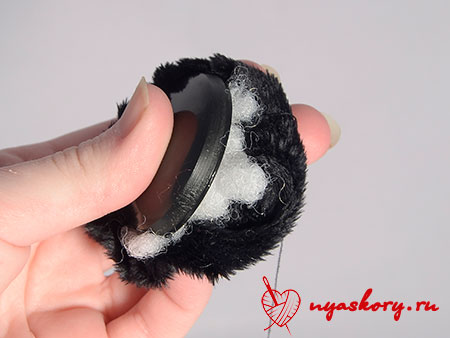
Cut two black circles larger than the button from the black fleece and take the button.

Put a little padding polyester on the button.
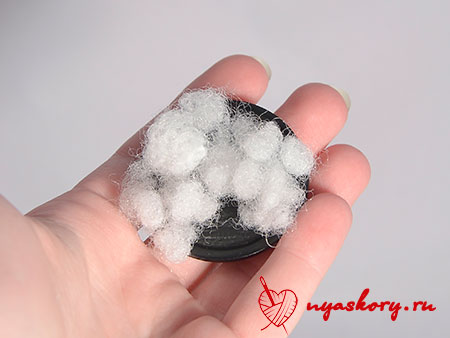
And in a fleece circle, along the edge of which walk with a running stitch without fastening:

Put them together.
And pull the thread.

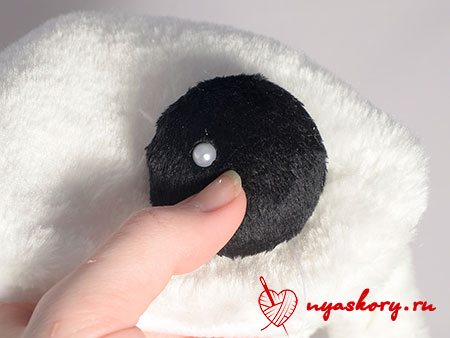
The button for attaching the bag to the back should look something like this:

Glue a small rhinestone highlight on the front.

Now attach the clasp to the lid of the bag to see where you will need to make a notch for the eyelet.
Draw a line down the center of where the button should be. Make a cut along the drawn line.
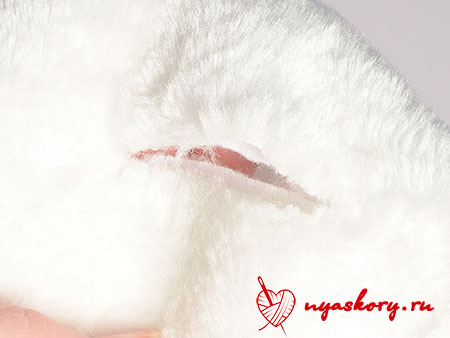
To make the cut beautiful and neat, sheathe it buttonhole stitch so that each stitch is as close as possible to the previous one.
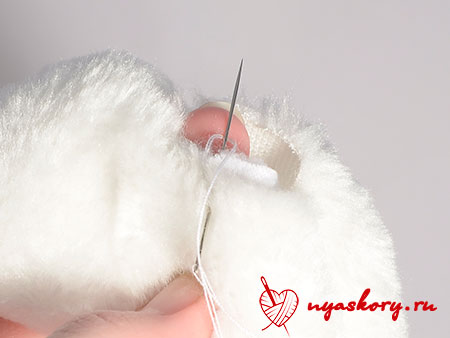
This is what the bag will look like after the lining:
Sew on the button eyes to the bag:

Well, now back to the ears! Fold and hem their edges.
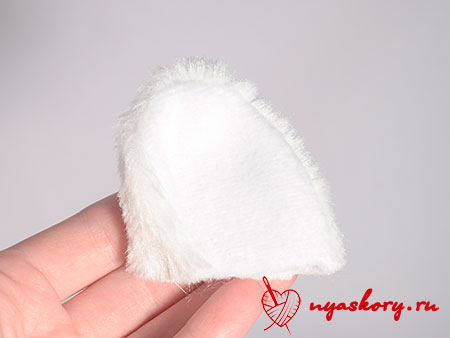
And sew them where you would like them to be.

Ta-dam! The bag is ready. It turned out to be a cute kitty)

DIY leather bags
Leather is one of the most interesting and durable materials for sewing bags. Therefore, I present to your attention several master classes from this material.
Bag - cat
For this simple but very cute model (somewhat reminiscent of the previous one), you will need leatherette, scissors, an awl, thread and a thick needle.
This can be worn by both a young girl and a small child.

The simplest leather bag
No, you definitely need to get one. You will need leather, scissors, a strap, tape, a marker and (optionally) a special tool for cutting several holes in a row (you can do without an awl). All you really need to do is cut out the circle, poke holes, thread the ribbon through, and attach the strap. All)

Envelope
Reminds me of a cat bag.

Chanterelle
Pretty model)) Prepare leather or thick leatherette, braid and rivets for her. Chanterelle can not be sewn, it is enough to glue along the edges and hide these places under the braid.

DIY jeans bags
However, the following models can be made from both jeans and old jeans.
Network
For her, cut the jeans into strips and weave the fabric, as in the photo. Sew it already with a bag (folding a piece of canvas in half) and sew on the handles.

Simple denim bag
There is a denim leg - go ahead to the production of the bag! Need more buckle leather belt, scissors and thread with a needle.

Delicate denim bag
Here you will need two trousers, scissors, thread with a needle and a zipper.

DIY bags made of fabric
Rectangular
For her, take a few pieces of cotton fabric, a zipper and accessories.

clutch
An interesting idea is to use thick pieces of processed cardboard for lining. I would recommend taking Fix Price plastic boards or juice packaging as a dense base.
Present such a handbag to your mother - she will definitely be delighted))

Clutch in a semicircle
Cut out two round pieces of cotton fabric and a circle of synthetic winterizer from the fabric. Fold them with a "sandwich" and sew several times at right angles. Sew around the edge with bias tape. Fold the workpiece in half and sew a zipper into the bag. Decorate.

Handbag
Useful here cotton fabric, lining, clasps and floral embellishments. A young lady, say, 17 years old, will definitely appreciate such a gift.

Sportswear bag
For it, prepare a dense fabric, braid, scissors, pins, fasteners, zippers and threads. In addition to sportswear, you can also put hiking things in this bag.

Mini handbag
According to the scheme described below, you can make both a completely miniature accessory and a larger item.

Alteration of old things
For the first of two photo workshops, you will need a long rag bag of soft tissue, and for the second - an old T-shirt.


Photo of handmade bags
I want to show you how you can get a lot of bright and unusual products using the same patterns.
Sandwich bag
Cute bag made of fleece. She is quite simple! And such a design can be introduced into a cat bag.

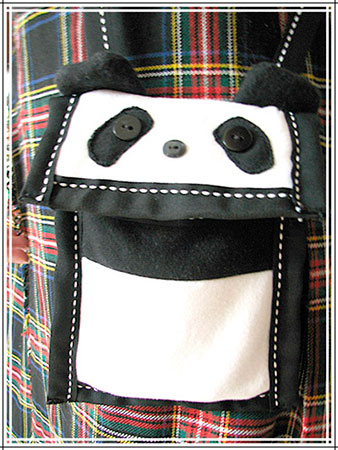
panda bag
Cute panda design
Simple and elegant bag
The handbag is quite simple and is made according to similar patterns from the very first pattern.

Knitted bag
Although this bag is knitted, its design can be implemented and sewn from fabric.

Leather bag
Octopussy bag
The bag, again, is knitted. But it is very similar to the first one (at the beginning of the article). Only you need to add tentacles to it and remove the ears.

By the way, I bought fleece for the eyes of the "cat" bag Here. You won't find one like this in a store.
This article comes to an end. I hope you enjoyed looking at all the handbags and took note of something interesting for yourself. See you soon!
P.S. Subscribe to updates!
Sincerely, Anastasia Skoreva


